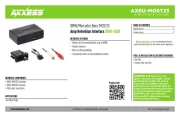
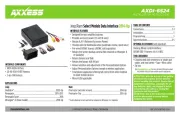
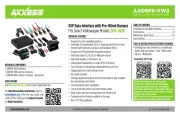
AXDIS-TY3
INSTALLATION INSTRUCTIONS
AxxessInterfaces.com © COPYRIGHT 2024 METRA ELECTRONICS CORPORATION REV. 11/22/24 INSTAXDIS-TY3
INTERFACE FEATURES
TOOLS REQUIRED
Fits Toyota Interface with SWC 2018-2023
• Designed for both amplified and non-amplified models
• Provides accessory power (12-volt 10-amp)
• Provides NAV outputs (parking brake, reverse, speed sense)
• Retains the factory AUX-IN jack
• Retains the factory backup camera
• Includes an AXCSD-6V 12-to-6V step-down for the factory camera
• Retains audio controls on the steering wheel
• Retains balance on amplified models
(non-amplifed models retain balance and fade)
• Micro-B USB updatable
INTERFACE COMPONENTS
• AXDIS-TY3 interface • AXDIS-TY3 harness (LD-TYAMP3-SWC)
• Female 3.5mm connector with stripped leads
• AXCSD-6V
TABLE OF CONTENTS
Applications ...........................................................2
Connections:
LD-TYAMP3-SWC ....................................................3
3.5mm Jack Steering Wheel Control Retention
...4
Installing the AXDIS-TY3........................................4
Programming the AXDIS-TY3 ...............................5
Audio Level Adjustment .......................................5
Steering Wheel Control Settings ...................... 6-9
LED Feedback .......................................................6
Changing Radio Type ..........................................7
Remapping the SWC Buttons .............................8
Dual Assignment Instructions
.............................9
Troubleshooting................................................... 10
Visit AxxessInterfaces.com for more detailed information
about the product and up-to-date vehicle specific applications.
•
Crimping tool and connectors, or solder gun, solder, and heat shrink
• Small flat-blade screwdriver • Tape
• Wire cutter • Zip ties
ATTENTION: With the key out of the ignition,
disconnect
the negative battery terminal before installing
this product. Ensure that all installation connections,
especially the air bag indicator lights, are plugged in
before reconnecting the
battery or cycling the ignition to
test this product.
NOTE: Refer also to the instructions included with the
aftermarket accessory before installing this device.
APPLICATIONS (See Page 2)
MetraOnline.com may be used
to assist with dash assembly
instructions. Simply enter your
Year, Make, Model vehicle into
the vehicle fit guide and look
for the Dash Kit Installation
Instructions.
Product Info
www.MetraOnline.com