Draper 78774 Manual
Draper
Loddemaskine
78774
Læs nedenfor 📖 manual på dansk for Draper 78774 (4 sider) i kategorien Loddemaskine. Denne guide var nyttig for 3 personer og blev bedømt med 4.5 stjerner i gennemsnit af 2 brugere
Side 1/4

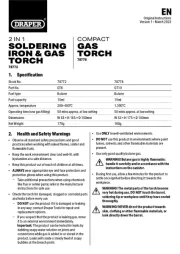
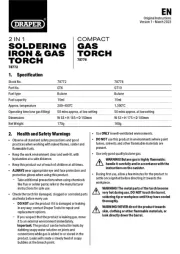
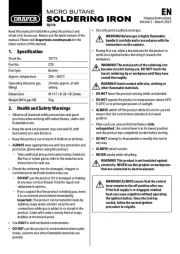
SOLDERING IRON
78774
MICRO BUTANE
EN
Original Instructions
Version 2 – March 2023
1. Specication
2. HealthandSafetyWarnings
• Observe all standard safety precautions and good
practices when working with naked ames, solder and
ammable fuels.
• Keep the work environment clear and well-lit, with
bystanders at a safe distance.
• Keep this product out of reach of children at all times.
• ALWAYS wear appropriate eye and face protection and
protective gloves when using this product.
− Take additional precautions when using chemicals
like ux or solder paste; refer to the manufacturer
instructions for safe use.
• Check the soldering iron for damaged, clogged or
corroded parts and leaks before every use.
− use the product if it is damaged or leaking DO NOT
in any way; contact Draper Tools for repair and
replacement options.
− If you suspect that the product is leaking gas, move
it to an external environment immediately.
The product can be tested for leaks by Important:
dabbing soapy water solution on joints and
connections while gas is added to or stored in the
product. Leaks will create a steady feed of soapy
bubbles at the breach point.
• Use ONLY in well-ventilated environments.
• use this product in environments where paint DO NOT
fumes, solvents and other ammable materials are
present.
• Use only good quality butane gas.
WARNING!Butanegasishighlyammable;
handle it carefully and in accordance with the
instructions on the canister.
• During rst use, allow a few minutes for the product to
settle once ignited before directing it towards the
workpiece.
WARNING! The metal parts of the soldering iron
becomeveryhotduringuse.DONOTtouchthe
barrel,solderingtiporworkpieceuntiltheyhave
cooled thoroughly.
WARNING!Avoidcontactwithskin,clothingor
otherammablematerials.
• leave the product running while unattended.DO NOT
• expose the product to temperatures above 49°C DO NOT
(120°F) or to prolonged periods of sunlight.
• switch o the product while it is not in use and ALWAYS
ensure that the control lever remains in its lowest
position.
• After each use, ensure that the ame is fully
extinguished, the control lever is in its lowest position
and the product has completely cooled before storing.
• attempt to disassemble or modify this tool in DO NOT
any way.
• refuel outside.ALWAYS
• smoke while refuelling.NEVER
WARNING! This product is not insulated against
electricity.NEVERusethisproductonworkpieces
that are connected to electrical power.
WARNING! ALWAYS ensure that the control
leverremainsintheopositionafteruse.
Ifthefuelsupplyisre-engaged,residual
heat can cause reignition without operating
theignitionbutton.Oncethetoolhas
cooled,followthenormalignition
procedure to reignite.
Stock No. 78774
Part No. GT8
Fuel type Butane
Approx. temperature 200 – 400°C
Operating time (one gas
lling)
20 mins approx. at mid
setting
Dimensions W 147 × H 35 × Ø 20mm
Weight (80% gas ll) 54g
Read this manual in full before using this product and
retain it for future use. Always use the latest version of the
manual. Please visit drapertools.com/manuals for the
latest version of this manual.

3. Refuelling
WARNING!Beforellingtheproduct,ALWAYS
ensurethatthecontrolleverisinitslowest
position.ONLYusebutanegastofueltheproduct.
Important: This product is not shipped with butane gas
and MUST be fuelled before use.
1 Fig.
(A)
1. Turn the soldering iron upside-down and push the
butane can nozzle rmly into the lling valve (A).
2. Filling begins automatically and takes only a few
seconds.
The fuel level can be viewed through the window (B)
beneath the control lever (C).
3. Allow a few minutes after lling for the gas in the
product to stabilise.
WARNING!Allowescapedgastodispersebefore
lighting the soldering iron. NEVER light the
product while a gas canister is inserted into the
llingvalve.
4. IgnitionandUse
WARNING! Keep your hands and face away from
thebarrelwhenignitingandoperatingthe
product.Gripthesolderingironbythehandleonly.
1. Fuel the product and allow the gas to settle.
2. Move the control lever (C) to the ON position to start
the fuel supply.
2 Fig.
(C)
(B)
3. Depress the ignition button (D) repeatedly until the
ame is lit.
3 Fig.
(D)
4. Adjust the size and temperature of the ame using
the control lever.
5. Allow approximately 30 seconds for the ame to
reach temperature, then direct the soldering tip
safely towards the workpiece.
6. Place the soldering tip against the appropriate area
of the workpiece and apply solder to the point of
contact as required.
Important: DO NOT apply excessive solder; use only
as much as is required for the connection.
7. To switch o the product, move the control lever
fully to the OFF position. Allow the soldering iron to
cool thoroughly.
– The clear lid (E) can be used as a stand while
cooling.
4 Fig.
(E)
Important: Avoid using the product in sideways or inverted
orientations as this may interrupt the ow of fuel to the
ame.
WARNING!ALWAYSensurethatthecontrollever
remainsintheopositionafteruse.Ifthefuel
supplyisre-engaged,residualheatcancause
reignitionwithoutoperatingtheignitionbutton.
Oncethetoolhascooled,followthenormal
ignition procedure to reignite.
Produkt Specifikationer
Mærke: | Draper |
Kategori: | Loddemaskine |
Model: | 78774 |
Har du brug for hjælp?
Hvis du har brug for hjælp til Draper 78774 stil et spørgsmål nedenfor, og andre brugere vil svare dig
Loddemaskine Draper Manualer
1 Juni 2025

31 Maj 2025

31 Maj 2025
31 Maj 2025

31 Maj 2025
Loddemaskine Manualer
- Loddemaskine Mag-Torch
- Loddemaskine Powerfix
- Loddemaskine Truper
- Loddemaskine Monacor
- Loddemaskine Maestro
- Loddemaskine Sievert
- Loddemaskine Güde
- Loddemaskine Basetech
- Loddemaskine JBC
- Loddemaskine Hakko
- Loddemaskine UNIMIG
- Loddemaskine Cigweld
- Loddemaskine FERM
- Loddemaskine Milwaukee
- Loddemaskine Uten
Nyeste Loddemaskine Manualer

21 Januar 2025

12 Januar 2025

4 Januar 2025

4 Januar 2025

3 Januar 2025

3 Januar 2025

1 Januar 2025

1 Januar 2025

1 Januar 2025

1 Januar 2025