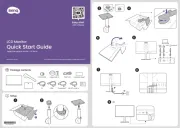
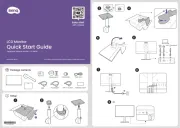
Eizo DuraVision FDF2382WT Manual

Eizo overvåge DuraVision FDF2382WT

Læs gratis den danske manual til Eizo DuraVision FDF2382WT (46 sider) i kategorien overvåge. Denne vejledning er vurderet som hjælpsom af 17 personer og har en gennemsnitlig bedømmelse på 4.1 stjerner ud af 9 anmeldelser. Har du et spørgsmål om Eizo DuraVision FDF2382WT, eller vil du spørge andre brugere om produktet?

Side 1/46
Important
Please read the Precautions and this User’s Manual carefully to
familiarize yourself with safe and e󰀨ective usage.
The software described in this document is provided based on the
Software License Agreement, and can be used only when you agree
with the contents of the agreement.
This document exclusively describes the projected capacitive touch
panel monitor.
For information about how to connect the monitor, refer to the Setup
Manual of your monitor.
The latest software and User’s Manual are available for download
from our web site:
www.eizoglobal.com
Users Manual
Touch Panel Setting Tool
2
About This Document
1. EIZO Corporation shall retain the copyright to this document. Reprinting this document in part or
in whole without prior permission from EIZO Corporation is strictly prohibited.
2. The contents of this document are subject to change without notice.
3. While we take great care in producing this document, if you nd any errors or omissions, please
contact EIZO.
4. Notwithstanding the above, EIZO shall not assume any responsibility for damages, loss of prots,
and the like, resulting from the use of this document.
Windows, .NET Framework are registered trademarks of Microsoft Corporation in the United States and
other countries.
DMT-DD is a registered trademark of DMC Co, Ltd.
EIZO and the EIZO logo are registered trademarks of EIZO Corporation in Japan and other countries.
Other company and product names are trademarks or registered trademarks of their respective companies.
About This Document
This document describes the procedures required to operate the EIZO projected capacitive touch panel
monitor in Windows 11 / Windows 10.
About DMT-DD
DMT-DD is the software used to operate EIZO touch panel monitors in
Windows 11 /
Windows 10.
The available operating system varies depending on the model you are using. For details, refer to the User’s
Manual of the model you are using.
3
Contents
3-10. Monitor Setting............................................ 36
3-11. Touch Setting ...............................................37
3-12. Mouse Setting ............................................. 38
3-13. Tool Setting .................................................. 39
Resident Function ......................................... 39
Chapter 4 Troubleshooting .............................. 40
Chapter 5 Reference Information ................... 42
5-1. Uninstalling the Touch Panel Driver ......... 42
USB Connection.............................................42
COM Port Connection ....................................42
5-2. Uninstalling DMT-DD .................................. 44
Contents
About This Document ........................................... 2
About DMT-DD ....................................................... 2
Contents ................................................................. 3
Chapter 1 Introduction ....................................... 4
1-1. Outline ............................................................ 4
Operating Conditions ...................................... 4
1-2. Precautions ................................................... 4
Chapter 2 Setup .................................................. 5
2-1. Setup Flow ..................................................... 5
2-2. Installing DMT-DD ......................................... 6
2-3. Installing the Touch Panel Driver ................ 9
Installing the Touch Panel Driver
(USB Connection) ..........................................10
Installing the Touch Panel Driver
(COM Port Connection) ..................................10
2-4. Conguring a Touch Panel .........................13
2-5. Registering a Conguration File ................15
2-6. Calibrating the Touch Panel Monitor .........18
2-7. Calibrating the Sensitivity of the Touch
Panel Monitor ...............................................19
Chapter 3 Touch Screen Properties ............... 20
3-1. Touch Panel Device List ..............................21
3-2. Software Settings ....................................... 22
Software Settings .......................................... 23
Calibration ......................................................24
3-3. Touch Input Setting .................................... 26
Touch Input .................................................... 26
Touch Form ................................................... 27
Lift-o󰀨 Delay .................................................. 27
Touch Enabled .............................................. 27
Inversion ........................................................ 28
SwapX/Y ....................................................... 28
3-4. Edge Setting ................................................ 29
Edge Support ................................................ 29
3-5. Touch Sound................................................ 30
Play Type ....................................................... 30
Sound Timing .................................................31
Beep Setting ...................................................31
Name of the le to play ..................................31
3-6. Right-click .................................................... 32
3-7. Hardware Setting ........................................ 33
3-8. Hardware Information ................................ 34
3-9. Conguration File ....................................... 35
Conguration File .......................................... 35
Addition and Deletion of Conguration File
... 35
Default Setting ............................................... 35
4
Chapter 1 Introduction
1-1. Outline
DMT-DD provides the functions necessary to operate a touch panel. The functions are as follows:
Install and Uninstall of the touch panel driver
Conguration of the touch panel driver
Operating Conditions
The following shows the conditions that need to be satised to operate DMT-DD on the EIZO
projected capacitive touch panel monitor.
OS
*1
Windows 11 (64 bit)
Windows 10 (32 bit / 64 bit)
Software .Net Framework 4.6
Hard disk Approximately 10MB of free space / data le capacity on the system drive
Interface USB
RS-232C (COM port connection)
*1 EIZO support will end when OS vendor support ends.
Attention
The available operating system varies depending on the model you are using. For details, refer to the User’s
Manual of the model you are using.
System-builder version of Windows 11 / Windows 10 is not supported.
Note
“(Limited) Touch Support” may be indicated in the system properties, however, this does not a󰀨ect the
operation of the touch panel.
1-2. Precautions
If this software is used under the following conditions, the software may not operate properly.
- Usage methods that are di󰀨erent from the instructions contained in this document
- Usage in operating conditions other than those specied
- Usage in an environment where mouse emulation software or any similarly functioning software is
installed
- Using after installing the software by overwriting a previous version
EIZO shall not be liable in any way for any issues that may arise from using this software. Be sure to
back up your system before installing this software.
5
Chapter 2 Setup
Chapter 2 Setup
2-1. Setup Flow
1. Connecting the product
Refer to the Setup Manual of your model.
2. Starting the computer
3. Installing DMT-DD (page 6)
4. Installing the touch panel driver (page 9)
5. Conguring the touch panel (page 13)
6. Registering the conguration le (page 15)
7. Calibrating the touch positions (page 18)
Completion
6
Chapter 2 Setup
2-2. Installing DMT-DD
Attention
If you need to re-install DMT-DD, e.g. when upgrading, uninstall DMT-DD rst. Then restart your PC and install
DMT-DD.
1.
Log in to the computer using an account that has administrator privileges.
For information on user account privilege settings, contact your system administrator.
2.
Insert the "EIZO LCD Utility Disk" into the optical disk drive.
3.
Open the "Touch Panel" tab, and under "Touch Panel Driver", click "Install".
The “Welcome to the DMT-DD Setup Wizard” window will appear.
Note
To perform installation by downloading DMT-DD from our website, carry out the following procedure.
1. Extract the downloaded le.
2. Double-click “DMT-DDSetup_ms.msi”.
Attention
If an installer other than the installer dedicated to the OS used is executed, a message appears and
installation fails. Be sure to execute the dedicated installer.
4.
Click “Next”.
The “License Agreement” window will appear.
7
Chapter 2 Setup
5.
Read the contents. Select “Agree” and click “Next.
Installation will start.
When the installation procedure is completed, the message “Installation Complete” will appear.
Note
During the installation procedure, the following screen may appear several times. If so, click on “Install.
8
Chapter 2 Setup
6.
Click “Close.
If DMT-DD was installed successfully, a shortcut is created on the desktop.
9
Chapter 2 Setup
2-3. Installing the Touch Panel Driver
Merely installing DMT-DD does not enable the touch panel to function. You must install the driver in each
touch panel monitor. The installation procedure di󰀨ers depending on the method used to connect the
touch panel.
Attention
You must have local administrative privileges for the user account. For information on user account privilege
settings, contact your system administrator.
Depending on the user account control settings, the following window may appear. Click “Yes”.
Note
When you add or change a touch panel monitor to be connected to your computer, you need to install a driver for
the touch panel monitor.
The installation method of the touch panel driver di󰀨ers depending on the connection cable.
- For details on the installation procedure for “COM port connection” that uses an RS-232C cable, refer to
"Installing the Touch Panel Driver (COM Port Connection)" (page 10).
- For details on the installation procedure for “USB connection” that uses a USB cable, refer to "Installing the
Touch Panel Driver (USB Connection)" (page 10).
The COM port connection and the USB connection cannot be used at the same time on the same touch panel
monitor.
10
Chapter 2 Setup
Installing the Touch Panel Driver (USB Connection)
The touch panel driver will be installed automatically when a USB cable is connected after DMT-DD
is installed. If the USB cable is already connected before installing DMT-DD, disconnect and connect
the USB cable again, or click “Install.
Attention
After the installation procedure is completed, you must reboot the computer.
Installing the Touch Panel Driver (COM Port Connection)
1.
Check if the signal cable is properly connected.
2.
Launch DMT-DD.
3.
From the “Touch Panel Device List”, select the icon of the touch panel to which
the touch panel driver is to be installed.
Note
Touch the screen of the monitor to which the touch panel driver is to be installed, then the icon connected
with the monitor that you touched will be selected.
11
Chapter 2 Setup
4.
Click “Install”.
Attention
When you click “Install, a message may appear.
Check the following points, then click “Install” again.
- Uncheck “Disabled COM port search” if it is checked.
- Check that the RS-232C cable is properly connected.
The conrmation window will appear.
12
Chapter 2 Setup
5.
Click “Yes”.
Installation will start.
Note
If the driver is being installed for the rst time, the following window will appear several times. Click “Install”.
When the installation procedure is completed, a message will appear.
6.
Click “OK”.
Installation is completed at this point.
When the installation procedure has been completed successfully, the icon in the “Touch Panel
Device List” will change to the “Installed” icon.
7.
Reboot the computer.
13
Chapter 2 Setup
2-4. Conguring a Touch Panel
Associate the touch panel device (USB connection or COM port connection) with the monitor (video
signal cable connection such as DVI and D-Sub).
Attention
If you replace the monitor or change the COM port or USB port used to connect the monitor, you will need to run
Monitor conguration” from “Device Addition”.
If you have changed any display setting(s) of the monitor (expansion or reproduction display, or aspect ratio), you
will need to perform the procedure shown below.
1.
In “Monitor Setting”, click the “Monitor conguration” button.
The following window will appear on the rst monitor.
Touch the touch screen of this monitor twice consecutively.
If you want to proceed to set the next monitor, press the Enter button.
If you want to cancel, press the ESC button.
The driver con󳞛gured on this monitor will be indicated below.
If the monitor displaying this window is not a touch panel monitor, press “Enter” on the keyboard. The
window shown above moves to the next monitor to the right. Repeat this until the window is displayed
on the relevant touch panel monitor.
To cancel the setting, press “Esc” on the keyboard.
14
Chapter 2 Setup
2.
Touch the touch panel twice.
The touch panel device is associated with the monitor, and the display on the touch panel monitor
changes to the following window.
Touch the touch screen of this monitor twice consecutively.
If you want to proceed to set the next monitor, press the Enter button.
If you want to cancel, press the ESC button.
The driver con󳞛gured on this monitor will be indicated below.
 (1) ROOT\HIDCLASS\0001
Note
Displayed contents di󰀨er depending on the environment.
3.
Close the selection window.
Press “Enter” on the keyboard.
The execution result will appear.
The associated monitor will become active and the driver ID will appear.
4.
Reboot the computer.
15
Chapter 2 Setup
2-5. Registering a Conguration File
Register a conguration le and congure the operation mode of the touch panel.
Attention
You must register a conguration le for each installed touch panel driver.
In the default setting, no conguration le is registered. When no conguration le is registered, the “Touch.mfd”
le will be set.
1.
In “Basic Setting” - “Device Select, select the touch panel driver for which a
conguration le is to be registered.
2.
In the "Conguration File" tab, select a le according to the input method from
the "Conguration File" pull-down menu.
Touch digitizer mode
(Touch.mfd)
Mouse emulation mode
(Mouse.mfd)
Two or more simultaneous touch points are available.
*1
Only single point touch is available.
Enables the same operations as those of the mouse as well as multi-
touch operations such as image zoom and rotation.
The cursor reacts in the same way
when you operate the mouse.
*2 The allowable number of simultaneous touch points varies depending on the monitor you are using. For
details, see the Users Manual of the monitor.
Note
The “Conguration File” is not registered by default. If the conguration le is not registered, the touch
digitizer mode (“Touch.mfd” le) is selected. When you want to use mouse emulation mode, select the “Mouse.
mfd” le.
16
Chapter 2 Setup
3.
Click “Register.
A message will appear, indicating that the setting has been completed.
If you select "Touch.mfd", execute the following steps.
4.
In “Touch Settings” - “Tablet PC Settings”, click “Open”.
The windows standard “Tablet PC Settings” window will appear.
5.
Select the “Display” tab, and under “Congure”, click “Setup.
The following window will appear on the rst monitor.
Touch this screen to identity it as the touchscreen.
If this is not the Tablet PC screen, press Enter to move to the next screen.
To close the tool, press Esc.
If the monitor displaying this window is not a touch panel monitor, press “Enter” on the keyboard. The
window shown above moves to the next monitor to the right. Repeat this until the window is displayed
on the relevant touch panel monitor.
To cancel the setting, press “Esc” on the keyboard.
When the setting is completed, the message window is closed, and the display returns to the "Tablet
PC Settings".
19
Chapter 2 Setup
2-7. Calibrating the Sensitivity of the Touch Panel
Monitor
Calibrate the sensitivity of the touch panel monitor.
1.
In "Basic Setting" - "Device Select", select the touch panel monitor you want
to calibrate the sensitivity for.
2.
Click "Open" in the "Hardware Setting" tab.
The sensitivity calibration window will appear.
When the sensitivity calibration window is closed, calibration is completed.
20
Chapter 3 Touch Screen Properties
When you launch DMT-DD, the “Touch Screen Properties” window will appear.
Using the “Touch Screen Properties”, you can congure the operation settings and calibrate the touch panel.
21
Chapter 3 Touch Screen Properties
3-1. Touch Panel Device List
If you click “Device Addition”, icons of USB connected touch panels, connectable COM ports, or
installed touch panels are displayed in the “Touch Panel Device List.
Note
When you connect or disconnect a USB connected touch panel, the “Touch Panel Device List” will be
updated automatically.
Click “List Update” to update the “Touch Panel Device List”.
If you check “Disabled COM port search”, touch panels connected to COM ports will not be searched.
This check box is unchecked by default. If you uncheck this, touch panels connected to COM ports will be
searched automatically.
The “Touch panel device list” is not automatically updated when installing or uninstalling the touch panel
driver.
The icons will appear as below.
Icon
Connection
Type
Unconnected COM Port COM Port USB Port
*1
USB Port
Touch Panel
Driver
- Before installation After installation Before installation After installation
Status
- - -
√ : They can be used as a touch panel monitor.
*1 This icon appears if the touch panel monitor has been connected via USB before installing DMT-
DD. The driver will be installed by selecting the icon then clicking “Install, or by disconnecting and
connecting the USB cable again.
22
Chapter 3 Touch Screen Properties
3-2. Software Settings
Touch positions can be rotated
and calibrated in accordance with the rotation of the monitor.
To congure the settings, in “Basic Setting”, select the “Software Setting” tab.
Attention
It is necessary to complete the setup of “Monitor conguration”. (Refer to 2-6. Calibrating the Touch Panel
Monitor (page 18).)
24
Chapter 3 Touch Screen Properties
Calibration
You can calibrate the touch panel monitor. If you are using the projected capacitive touch panel
monitor, be sure to perform calibration. After the settings are congured, click “Entry” to enable the
settings.
4Point / 9Point
Align the touched position with the cursor position. For details, refer to 2-6. Calibrating the Touch Panel
Monitor (page 18).
Check
Check the result of the 4-point or 9-point calibration. The ideal positions are indicated in blue,
and the touched positions are indicated in red. Click “Enter” on the screen or press “Enter” on the
keyboard to nish the check.
Example of 4-point calibration result Example of 9-point calibration result
Reset
Delete the result of the 4-point or 9-point calibration.
On the conrmation window that appears, click “Yes” if you want to delete the calibration result.
25
Chapter 3 Touch Screen Properties
Timeout (Sec)
Default setting: None
Available range: “None” / “15” / “30” / “60” seconds
When this is set to anything other than “None”, 4-point or 9-point calibration will time out if no touch
occurs for the specied number of seconds. The system returns to the pre-adjustment state when
you click “OK” after the calibration has timed out, or when the specied timeout time has elapsed.
EEPROM
Default setting: Unchecked (do not use)
Check the “Use EEPROM” option, then click the “Entry” button to save the calibration data to the
memory in the touch panel monitor.
Attention
Depending on the monitor you are using, you may not be able to use it. In this case, the message will
appear as shown below; this is not a failure.
26
Chapter 3 Touch Screen Properties
3-3. Touch Input Setting
Touch operation can be congured for each touch panel. In “Basic Setting, select the “Touch Input
Setting” tab, and congure the settings. Click “Entry” to enable the settings.
Touch Input
You can congure the touch input actions.
Click Timing
s
The timing at which the system is notied of instances of touch down and up operations are as
follows.
√ : The system is notied at the moment the operation is carried out.
- : The system is not notied at the moment the operation is carried out.
Setting Touch down operation Touch up operation
Normal Mode
(default setting)
Click at touch up
*1
Click at touch down
*1
*1 The system is notied of instances of touch down and up operations at the same time they occur.
Attention
If “Click at touch up” / “Click at touch down” is selected, the touch input actions are as follows.
- The drag operation will not be available.
- If you select “During touch down” in Sound Timing” (page 31) for the touch sound, the touch sound will
not be played.
- If you select “Touch.mfd” in “3-9. Conguration File” (page 35), the touch input actions are as follows.
- The pointer will change to a cursor.
- Flick operations or right-clicking using a long touch will not work.
27
Chapter 3 Touch Screen Properties
Touch Form
The touch data mode of the selected touch panel driver can be congured according to the operating
system you are using. Congure this if you select Touch.mfd in “Conguration File” (page 35).
Attention
You must reboot the computer after changing the mode.
Touch Data Mode
Setting Description
Serial Mode Select this mode if you are using Windows 8.1 or an earlier operating system.
Hybrid Mode (default setting) Select this mode if you are using Windows 10 or a later operating system.
Lift-o󰀨 Delay
Default setting: Disabled
Available range: Disable / 10 ms to 100 ms (10 ms units)
The timing at which the system is notied of the user removing their nger can be delayed. The
system is notied of the user removing their nger the specied length of time after the nger is
removed from the panel surface. Increasing the length of the notication time allows the system to
ignore the users instantaneous failure to maintain contact with the panel surface.
Touch Enabled
Default setting: Not enabled (Touch enabled)
You can disable touch input by checking “Disable”.
28
Chapter 3 Touch Screen Properties
Inversion
X
Default setting: Not enabled
If “Enable” is checked, the X coordinate of the touch will be inversed before being output.
Y
Default setting: Not enabled
If “Enable” is checked, the Y coordinate of the touch will be inversed before being output.
SwapX/Y
Default setting: Not enabled
If “Enable” is checked, the X and Y coordinates of the touch will be replaced with each other before
being output.
29
Chapter 3 Touch Screen Properties
3-4. Edge Setting
You can increase or decrease the cursor’s movement when the cursor approaches the screen edges.
Click “Entry” to enable the setting.
For example, when the automatic taskbar hiding is enabled, this feature is e󰀨ective for showing the
taskbar by moving the cursor.
Edge Support
Specify the range and movement for the top, right, bottom, and left screen edges.
Range [%]
Default setting: 0
Available range: 0
% to 50 %
Move amount [%]
Default setting: 0
Available range: -50
% to 50 %
Note
By clicking “Reset, all the settings will be restored to the default setting values.
Example: When the automatic taskbar hiding is enabled and the taskbar is located at the bottom part of the
screen, go to the “Bottom” eld, then set “Range[%]” to a value around 10 and “Movement[%]” to a value
around 20. The taskbar can be displayed easier in this setting. Adjust the setting values according to your
environment.
30
Chapter 3 Touch Screen Properties
3-5. Touch Sound
The touch sound produced by the driver can be congured. In “Basic Setting”, select the “Touch Sound”
tab. Click “Entry” to enable the setting.
Play Type
Congure the method of playing the touch sound.
Setting Description Optional setting Resident
Disabled
(default setting)
No touch sound. Unnecessary
Hardware The touch sound will be emitted using the BEEP
function of the computers motherboard.
Beep Setting” (page 31) Unnecessary
Software The touch sound will be output from the speaker
by emitting BEEP sounds.
Beep Setting” (page 31) Necessary
File An audio le will be played to emit the touch
sound.
Name of the le to play”
(page 31)
Necessary
Attention
- Depending on the computer you are using, the touch sound may not be played.
- When “Hardware” is selected, depending on the hardware conguration of the computer, the touch sound
may not be played.
- When “Software” or “File” is selected, the resident function must be enabled.
- If the resident function is disabled during registration, a message will appear. When you click “OK, the
resident function will be enabled, and playback of the touch sound will be enabled. (Refer to Resident
Function” (page 39).)
31
Chapter 3 Touch Screen Properties
Sound Timing
Set the timing to emit the touch sound.
Setting Description
At touch up (default setting) The touch sound will be emitted at touch up (when a touch ends).
At touch down The touch sound will be emitted at touch down (when a touch begins).
During touch down The touch sound will continue when the panel surface is being touched.
*
1
*1 If “Click at touch up” or “Click at touch down” is selected in Touch Input” (page 26), the touch sound
will not be emitted.
Beep Setting
If “Hardware” or “Software” is selected in Play Type” (page 30), congure the frequency and sound
duration of the touch sound to be emitted from the speaker.
Frequency [Hz]
Default setting: 1000 Hz
Available range: 37 Hz to 32767 Hz
The frequency of the touch sound can be congured.
Sound Duration [ms]
Default setting: 55 ms
Available range: 1 ms to 5000 ms
The duration of the touch sound can be congured.
Name of the le to play
If you select “File” in Play Type” (page 30), set the audio le to be played.
Note
Wav les (le extension: .wav) can only be used as an audio le.
32
Chapter 3 Touch Screen Properties
3-6. Right-click
You can congure the touch panel operation to achieve the same result as that which can be achieved by
right-clicking the mouse. In “Basic Setting”, select the “Right-click” tab to congure the setting. Click
“Entry” to enable the setting.
Attention
If the “Touch.mfd” le is selected in 3-9. Conguration File” (page 35), the “Right-click” tab will not appear.
If the “Touch.mfd” le is selected, congure the right-click method using Windows’ standard “Pen and Touch”
window. (Refer to Pen and Touch” (page 37).)
Method of right-click
Select from the following.
Setting Description
Disabled (default setting) No right-click input.
Long touch Pressing and holding down a nger on the touch panel will produce the same
result as that which can be achieved by right-clicking.
2-point touch If you touch the touch panel monitor simultaneously with several ngers, it will
produce the same result as that which can be achieved by right-clicking.
Set “Right-click detection time” and “Right-click detection area” when “Long touch” is selected.
Right-click detection time
Default setting: 300 ms
Available range: 100 ms to 1000 ms
Pressing and holding down a nger on the touch panel for a time period that is longer than the set
time will produce the same result as that which can be achieved by right-clicking.
Right-click detection area
You can congure the setting so that the result produced by right-clicking can be achieved even if you
move your nger within the set area.
34
Chapter 3 Touch Screen Properties
3-8. Hardware Information
Check the version information and status of the touch panel driver. In “Basic Setting”, select the
“Hardware Information” tab.
Version
You can check the version of the touch panel being selected. Click “Request” to display the version of
the selected touch panel.
Status
You can check the status of the touch panel being selected. Click “Request” to display the status of
the touch panel being selected.
36
Chapter 3 Touch Screen Properties
3-10. Monitor Setting
Associate the touch panel device (USB connection or COM port connection) with the monitor (video
signal cable such as DVI and D-Sub).
Attention
Before you run the monitor conguration, “Installing the Touch Panel Driver” must be completed. (Refer to 2-3.
Installing the Touch Panel Driver” (page 9).)
Monitor Update
The positions of the connected monitors can be updated. Click “Monitor Update” to update the
positions.
Monitor Conguration
The touch panel device and the monitor can be associated. When the settings are completed, the
monitors will be activated.
38
Chapter 3 Touch Screen Properties
3-12. Mouse Setting
Windows’ standard mouse setting window will appear.
Mouse Property
1. Under “Mouse Properties”, click “Open”.
Windows’ standard “Mouse Properties” setting window will appear.
Input Settings
- DoubleClickSpeed
The interval between two successive clicks that are recognized as a double-click can be set.
- DoubleClickArea
The area that is recognized as a double-click response area can be set.
39
Chapter 3 Touch Screen Properties
3-13. Tool Setting
Various types of information are shown.
Version information of the driver and setting tool can be checked.
Resident Function
Depending on the function, DMT-DD may have to be installed as a resident function on the PC.
Enable the resident function as needed.
- Resident function checkbox
Checkbox Resident function
Checked Enabled
*1
Unchecked (default setting) Disabled
*2
*1 The resident function will be automatically executed when the computer is started.
*2 Normal touch operation is possible.
Resident function
When the resident function is enabled, the following functions will be enabled.
- Touch sound
If “Software” or “File” is selected in “Touch Sound” - “Play Type” in the “Touch Input Setting” tab, the touch
sound will be played according to the setting. (Refer to 3-5. Touch Sound” (page 30).)
- Auto-rotate function
Functions if the “Mouse.mfd” le is selected in “3-9. Conguration File” (page 35). (Refer to 3-2.
Software Settings” (page 22).)
40
Chapter 4 Troubleshooting
Symptom Cause and countermeasure
1. The touch panel driver
cannot be installed.
Connect the touch panel to another COM port or USB port, and try to install the
driver.
Connect the monitor and the computer using the cable specied in the Setup
Manual or Users Manual of the monitor. Use of a conversion adapter may prevent
the touch panel monitor from operating properly.
When the touch panel is connected to a COM port, if “Disabled COM port search” in
Device Addition” is checked, the touch panel driver cannot be installed. Congure
the settings in accordance with the following procedure. (Refer to 3-1. Touch Panel
Device List” (page 21).)
1. Uncheck “Disabled COM port search”.
2. Click “List Update”.
3. Select the port from which you wish to install the driver, and click “Install”.
2. The mouse cursor
does not appear.
In “Basic Setting” - “Conguration File”, select “Mouse.mfd”, and click “Register.
(Refer to 3-9. Conguration File” (page 35).)
Uninstall the touch panel driver, and then install it again. (Refer to “5-1. Uninstalling
the Touch Panel Driver” (page 42) and 2-3. Installing the Touch Panel Driver
(page 9).)
3. The cursor position is
displaced / the cursor
jumps.
Go to “Basic Setting” and open the “Software Setting” tab. In “Calibrate”, try
calibrating the position by using “4Point” or “9Point. (Refer to 2-6. Calibrating the
Touch Panel Monitor” (page 18).)
Go to “Basic Setting” and open the “Edge Setting” tab. Try adjusting the range and
movement. (Refer to “3-4. Edge Setting” (page 29).)
In “Touch Setting” - “TablePC Setting”, open the calibration window for the touch
panel and try resetting “Calibrate”. (Refer to 3-11. Touch Setting” (page 37).)
Turn the monitor o󰀨 and on again.
4. The touch operation
does not work.
Check that the communication cable (USB or RS-232C) is correctly connected.
Check that the touch panel driver is installed. (Refer to 2-3. Installing the Touch
Panel Driver” (page 9).)
The setting may have been changed by another user. Congure the settings again.
Display the “Touch Input Setting” tab from “Basic Setting”, uncheck “Disable”. (Refer
to Touch Enabled” (page 27).)
Try to check whether touch operation is disabled for any touch panel monitor
function, referring to the touch panel monitor’s user’s manual.
Restart the setting tool of the touch panel driver, or reboot the computer.
5. Two or more
touch actions are
not recognized
simultaneously
In “Basic Setting” - “Conguration File”, select “Touch.mfd”, and click “Register.
(Refer to 3-9. Conguration File” (page 35).)
Try rebooting the computer.
6. Right-clicking does
not work.
Select “Basic Setting” - “Right-click, and check the setting of “Method of right-
click. (Refer to 3-6. Right-click” (page 32).)
If the “Right-click” tab is not displayed, select “Touch Setting” - “Pen and Touch”,
click “Open” to display Windows’ standard “Pen and Touch” window, and congure
the right-click settings. (Refer to 3-11. Touch Setting” (page 37).)
41
Chapter 4 Troubleshooting
Symptom Cause and countermeasure
7. The touch sound is
not emitted.
In “Basic Setting, congure the “Touch Sound” settings. (Refer to 3-5. Touch
Sound” (page 30).)
If “During touch down” is selected in “Basic Setting” - “Touch Sound” - “Sound
Timing”, select “Normal Mode” in “Basic Setting” - “Touch Input. (Refer to Touch
Input” (page 26).)
If “Software” or “File” is selected in “Basic Setting” - “Touch Sound” - “Play Type”,
check the following points.
- Connect the speaker.
- Turn up the speaker volume.
- In “Tool Setting” - “Resident function”, check “Enable”. (Refer to Resident
Function” (page 39).)
- If “File” is selected, check that the correct wav le is selected.
Depending on the hardware conguration of the computer, the touch sound may not
be output.
8. The touch position is
displaced when the
screen is rotated.
In “Basic Setting” - “Software Setting”, check “Auto Rotation”, or congure “Rotation
[degree]” according to the screen rotation. (Refer to “Software Settings” (page
23).)
In “Tool Setting” - “Resident function”, check “Enable”. (Refer to Resident Function”
(page 39).)
9. Dragging is
interrupted in
the middle of the
operation.
The system may have recognized that your nger had been removed momentarily
from the panel surface. Change the setting for Lift-o󰀨 Delay” (page 27) to
anything other than “Disable”.
10. (Multiple monitor
conguration)
When touching the
screen, the cursor
appears on a di󰀨erent
monitor.
Refer to 2-4. Conguring a Touch Panel” (page 13) to associate the monitor with
the touch panel.
If you select “Touch.mfd” in 2-5. Registering a Conguration File” (page 15), you
must associate the monitor with the touch panel in “Tablet PC Settings”. (Refer to
3-11. Touch Setting” (page 37).)
11. (Multiple monitor
conguration)
A message stating
“Multiple monitors are
detected” will appear.
The touch panel setting is not complete. Refer to 2-4. Conguring a Touch Panel”
(page 13) to associate the monitor with the touch panel.
12. DMT-DD cannot be
uninstalled.
Under “Tool Setting”, uncheck “Enable” for “Resident Function”. (Refer to Resident
Function” (page 39).).
42
Chapter 5 Reference Information
5-1. Uninstalling the Touch Panel Driver
USB Connection
When you uninstall DMT-DD, the touch panel driver will be automatically uninstalled.
COM Port Connection
1.
Launch DMT-DD.
The “Touch Screen Properties” window will appear.
2.
Select a touch panel from which you want to uninstall the software.
From the Touch Panel Device List, select the icon of the touch panel from which you will uninstall the
software.
Note
Touch the screen of the monitor from which the touch panel driver is to be uninstalled, then the icon
connected with the monitor that you touched will be selected.
3.
Click “Uninstall”.
The conrmation window will appear.
43
Chapter 5 Reference Information
4.
Click “Yes”.
Uninstallation will start.
When the uninstallation procedure is completed, a message will appear.
5.
Click “OK”.
The uninstallation procedure is completed at this point.
6.
Reboot the computer.
44
Chapter 5 Reference Information
5-2. Uninstalling DMT-DD
Attention
If you uninstall DMT-DD, all installed touch panel drivers will be automatically uninstalled.
If the resident function is enabled, uninstallation may fail. Disable the resident function when uninstalling DMT-
DD. (Refer to Resident Function” (page 39))
1.
Double-click “DMT-DDSetup_ms.msi”.
The installer starts up. The “Welcome to the DMT-DD Setup Wizard” window will appear.
2.
Select “Remove DMT-DD”, and click “Finish.
Uninstallation will start. When the uninstallation procedure is completed, the completion window will
appear.
Note
Depending on the user account control settings, the following window may appear. If you wish to delete the
software, click “Yes”.
45
Chapter 5 Reference Information
3.
Click “Close.
The uninstallation procedure is completed at this point.
Copyright © 2016 - 2022 EIZO Corporation. All rights reserved.
www.eizoglobal.com
03V25879F1
UM-DMT-DD-C
6th Edition - June, 2022


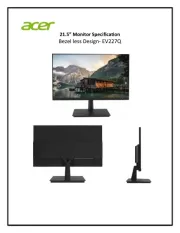
Produkt Specifikationer

Mærke: Eizo
Kategori: overvåge
Model: DuraVision FDF2382WT
Vekselstrømsindgangsspænding: 100 - 240 V
Vekselstrømsindgangsfrekvens: 50 - 60 Hz
Produktfarve: Sort
Skærm diagonal: 23 "
Skærmopløsning: 1920 x 1080 pixel
Berøringsskærm: Ja
HD-type: Fuld HD
Skærmteknologi: LED
Naturligt aspektforhold: 16:9
Skærmens lysstyrke: 260 cd/m²
Responstid: 11 ms
Synsvinkel, horisontal: 178 °
Synsvinkel, vertikal: 178 °
Skærm form: Flad
Skærm diagonal (metrisk): 58 cm
Indbyggede højttaler(e): Ja
DVI-port: Ja
Udgange til hovedtelefoner: 1
Skærmvisning (OSD): Ja
OSD-sprog: CHI (SIMPL), DEU, ENG, ESP, FRE, ITA, JPN, SWE
VESA montering: Ja
Panel montering grænseflade: 100 x 100 mm
Strømforbrug (standby): 0.7 W
Strømforbrug (typisk): 14 W
Bredde (uden stativ): 556.7 mm
Dybde (uden stativ): 54 mm
Højde (uden stativ): 339.2 mm
Vægt (uden stativ): 6000 g
Bredde (med stativ): 556.7 mm
Dybde (med stativ): 216.3 mm
Højde (med stativ): 353.9 mm
Vægt (med stativ): 6600 g
Kabler inkluderet: AC, Audio (3.5mm), DVI, DisplayPort, USB
Energiforbrug (SDR) pr. 1000 timer: 21 kWh
Certificering: CE, C-Tick, CB, cTÜVus, FCC-B, CAN ICES-3 (B), TÜV/S, \nVCCI-B, RoHS, WEEE, CCC, GOST-R
Energieffektivitetsklasse (SDR): F
Energieffektivitetsskala: A til G
Harmoniseret systemkode (HS): 85285210
LED-baggrundsbelysning: Ja
Indbygget kamera: Ingen
Understøttet placering: Vandret
Paneltype: IPS
Mikrofonindgang: Ja
Vis antal farver: 16,78 millioner farver
Type af baggrundslys: LED
Maksimal opdateringshastighed: 60 Hz
Kontrastforhold (typisk): 1000:1
Pixel pitch: 0.265 x 0.265 mm
Synlig størrelse, horisontal: 509.2 mm
Synlig størrelse, vertikal: 286.4 mm
AMD FreeSync: Ingen
NVIDIA G-SYNC: Ingen
Indbygget USB-hub: Ja
Antal DisplayPorts: 1
Udgang til hovedtelefoner: Ja
Antal VGA-porte (D-sub): 1
Antal USB type-A downstream-porte: 2
Højdejustering: Ja
Akse: Ja
Hældningsvinkelområde: 17 - 70 °
Berøringsskærmstype: Bordplade
Berøringsteknologi: Multi-touch
Antal upstream-porte: 1
USB upstream port type: USB Type-B
Hældningsindstilling: Ja
Antal simultane touchpunkter: 10
Berøringsskærm teknologi: Projekteret kapacitivt systemet
USB-berøringsporte: Ja
Antal USB-berøringsporte: 1
Kode for europæisk produktregister for energimærkning (EPREL): 373359

Har du brug for hjælp?

Hvis du har brug for hjælp til Eizo DuraVision FDF2382WT stil et spørgsmål nedenfor, og andre brugere vil svare dig