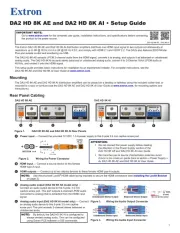
Extron XPA U 358 Manual

Extron Modtager XPA U 358

Læs gratis den danske manual til Extron XPA U 358 (3 sider) i kategorien Modtager. Denne vejledning er vurderet som hjælpsom af 51 personer og har en gennemsnitlig bedømmelse på 4.4 stjerner ud af 26 anmeldelser. Har du et spørgsmål om Extron XPA U 358, eller vil du spørge andre brugere om produktet?

Side 1/3
1
IMPORTANT:
Go to www.extron.com for the complete
user guide, installation instructions, and
specifications before connecting the
product to the power source.
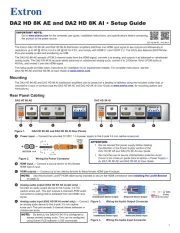
XPA Ultra Series Audio Power Amplifiers • Setup Guide
(XPA U 358, XPA U 358-70V, XPA U 358-100V, XPA U 358C-70V, XPA U 358C-100V, XPA U 1004,
XPA U 1004-70V, XPA U 1004-100V, XPA U 1004C-70V, XPA U 1004C-100V, XPA U 1002,
XPA U 1002-70V, XPA U 1002-100V)
WARNING: Installation and service must be performed by experienced, professional installers only.
AVERTISSEMENT : L’installation et l’entretien doivent être effectués par des installateurs professionnels
expérimens.
This guide provides startup instructions for experienced, professional installers to set up and operate the XPA Ultra Series audio
power ampliers. All references are to the XPA Ultra Series User Guide which can be found on www.extron.com.
Step 1 — Powering Down Equipment
Be sure that power to the amplier is turned off rst.
NOTE: Adjust the audio level to (full attenuation) prior to powering the amplier in Step 7 on page3.=
Turn off all other equipment and disconnect the power cables. Verify that the amplier is disconnected from the power source
before proceeding.
Step 2 — Mounting and Applications
Rack Mounting
The XPA Ultra Series ampliers can be rack mounted using one of the following methods.
NOTE: See the XPA Ultra Series User Guide for instructions on mounting to a rack shelf.
Rack Ear Mounting (Single Unit)
The XPA Ultra Series ampliers ship with a set of rack ears so the half rack-width ampliers can be installed in a full rack-width
space.
Mount the amplifier with the rack ears as follows:
1. If feet were installed on the bottom of the amplier, remove them.
2. Attach the included rack ears to the sides of the amplier with the four provided #6 machine screws (
1 in the gure below).
3. Insert the amplier into the rack, align the holes in the rack ears with the holes on the rack.
4. Secure the amplier to the rack using four provided 10-32 x 3/4” screws (2 in the gure below).
e
XPA U 1 004 SER IES
1 2 3 4
OVER
TEMP
LIMITE R/PRO T E C T
S IGNAL
POWER AMPL IFIERS
1
e
XPA U 10 04 SER IES
1234
OVER
TEMP L IMITER/P ROT E C T
S IGNAL
POWER AMPL
IFIERS
2
2
Bridge Plate Rack Mounting (Side-by-Side Units)
The XPA Ultra Series ampliers ship with a bridge plate connector for connecting two XPA Ultra Series ampliers together to form
a full rack-width unit.
Connect and mount two XPA Ultra Series amplifiers as follows:
1. If feet were installed on the bottom of the ampliers, remove them.
2. Position the two ampliers upside down and next to each other (see the gure below).
3. Use the bridge plate connector and four provided #4 machine screws to connect the two ampliers together (1 in the gure
below).
4. Attach the two short rack ears to the ampliers with four provided #6 machine screws (
2 in the gure below).
5. Insert the ampliers into the rack, align the holes in the rack ears with the holes on the rack.
6. Secure the amplier to the rack using four provided 10-32 x 3/4” screws (3 in the gure below).
e
XPA U 1
0
04 SERIES
1 2 3 4
OVER
TEMP LIMITE R/P RO T E
CT
SIG NAL
POWER AMPLIFIERS
e
XPA U 1004 SERIES
1 2 3 4
OVER
TEMP L
IMITER/P R
OTE C T
S
IGNAL
POWER AMPLIFIE RS
Mounting
screws (4)
2
1
e
XPA U 1004 S ERIE
1 2 3 4
OVER
TEMP LIMITER/PROTECT
SIGNAL
POWER AMPLIFIER
E
RS
e
XPA U 1004 S ERIES
1 2 3 4
OVER
TEMP LIMITER/PROTECT
SIGNAL
POWER
AMPL
IFIERS
3
Rack Mounting Ventilation Recommendations
Excessive heat can decrease the optimal lifetime of the power amplier.
An over temp indicator LED on the front panel of the amplier lights red
whenever the recommended operating temperature has been exceeded.
To reduce the chances of an over temp condition, the XPA Ultra ampliers
should be arranged in a rack environment so the environment around the
amplier does not reach or exceed +122 °F (+50 °C). No more than four
stacks of XPA Ultra ampliers should be arranged one-on-top-of-the-other
in a rack without an open space between the stacks (see the gure to the
right).
XPA Ultra ampliers can also be arranged above or below another
non-XPA Ultra device. In this case, the environment around the amplier
should not reach or exceed +122 °F (+50 °C).
Step 3 — Captive Screw Audio Cable Wiring
Wire the source output to the amplier 3.5 mm captive screw input connectors as shown in the following illustrations.
Balanced Stereo Input
Tip
Ring
Tip
Ring
Slee
ves
L R
Unbalanced Stereo Input
Tip
Sleeve
Sleeve
Tip
L R
Do not tin
the wires!
Balanced Dual Mono Input
Tip
Ring
Slee (s)ve
Tip
Ring
L R
Unbalanced Dual Mono Input
Tip
Sleeve
Tip
Sleeve
L R
Vent Space
Vent Space
Vent Space
Vent Space
Vent Space
Vent Space


Produkt Specifikationer

Mærke: Extron
Kategori: Modtager
Model: XPA U 358

Har du brug for hjælp?

Hvis du har brug for hjælp til Extron XPA U 358 stil et spørgsmål nedenfor, og andre brugere vil svare dig