Manhattan 102032 Manual


Læs gratis den danske manual til Manhattan 102032 (2 sider) i kategorien Ikke kategoriseret. Denne vejledning er vurderet som hjælpsom af 4 personer og har en gennemsnitlig bedømmelse på 5.0 stjerner ud af 2.5 anmeldelser. Har du et spørgsmål om Manhattan 102032, eller vil du spørge andre brugere om produktet?

Side 1/2
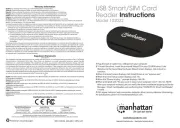
USB Smart/SIM Card
Reader Instructions
Model 102032
manhattanproducts.com
Important: Read before use. • Importante: Leer antes de usar.
English: For warranty information, go to manhattanproducts.com/warranty.
Deutsch: Garantieinformationen nden Sie unter manhattanproducts.com/warranty.
Español: Si desea obtener información sobre la garantía, visite manhattanproducts.com/warranty.
Polski: Informacje dotyczące gwarancji znajdują się na stronie manhattanproducts.com/warranty.
Italiano: Per informazioni sulla garanzia, accedere a manhattanproducts.com/warranty.
En México: Póliza de Garantía Manhattan — Datos del importador y responsable ante el consumidor:
IC Intracom México, S.A.P.I. de C.V. • Av. Interceptor Poniente # 73, Col. Parque Industrial La Joya, Cuautitlán Izcalli, Estado de
México, C.P. 54730, México. • Tel. (55)1500-4500
La presente garantía cubre los siguientes productos contra cualquier defecto de fabricación en sus materiales y mano de obra.
A. Garantizamos los productos de limpieza, aire comprimido y consumibles, por 60 dias a partir de la fecha de entrega, o por
el tiempo en que se agote totalmente su contenido por su propia función de uso, lo que suceda primero.
B. Garantizamos los productos con partes móviles por 3 años.
C. Garantizamos los demás productos por 5 años (productos sin partes móviles), bajo las siguientes condiciones:
1. Todos los productos a que se reere esta garantía, ampara su cambio físico, sin ningún cargo para el consumidor.
2. El comercializador no tiene talleres de servicio, debido a que los productos que se garantizan no cuentan con
reparaciones, ni refacciones, p1-ya que su garantía es de cambio físico.
3. La garantía cubre exclusivamente aquellas partes, equipos o sub-ensambles que hayan sido instaladas de fábrica y
no incluye en ningún caso el equipo adicional o cualesquiera que hayan sido adicionados al mismo por el usuario o
distribuidor.
Para hacer efectiva esta garantía bastará con presentar el producto al distribuidor en el domicilio donde fue adquirido o en el
domicilio de IC Intracom México, S.A.P.I. de C.V., junto con los accesorios contenidos en su empaque, acompañado de su póliza
debidamente llenada y sellada por la casa vendedora (indispensable el sello y fecha de compra) donde lo adquirió, o bien, la
factura o ticket de compra original donde se mencione claramente el modelo, número de serie (cuando aplique) y fecha de
adquisición. Esta garantía no es válida en los siguientes casos: Si el producto se hubiese utilizado en condiciones distintas a las
normales; si el producto no ha sido operado conforme a los instructivos de uso; o si el producto ha sido alterado o tratado de
ser reparado por el consumidor o terceras personas.
Warranty Information
Printed on recycled paper.
MH-102032_QiG-0817_REV-5.01
© IC Intracom. All rights reserved. Manhattan is a trademark of IC Intracom, registered in the U.S. and other countries.
All trademarks and trade names are the property of their respective owners.
Regulatory Statements
FCC Class B
This equipment has been tested and found to comply with the limits for a Class B digital device, pursuant to Part 15 of Federal
Communications Commission (FCC) Rules. These limits are designed to provide reasonable protection against harmful
interference in a residential installation. This equipment generates, uses and can radiate radio frequency energy, and if not
installed and used in accordance with the instructions may cause harmful interference to radio communications. However, there
is no guarantee that interference will not occur in a particular installation. If this equipment does cause harmful interference
to radio or television reception, which can be determined by turning the equipment o and on, the user is encouraged to try
to correct the interference by one or more of the following measures: reorient or relocate the receiving antenna; increase the
separation between the equipment and the receiver; connect the equipment to an outlet on a circuit dierent from the receiver;
or consult the dealer or an experienced radio/TV technician for help.
CE
English: This device complies with the requirements of CE RED 2014/53/EU, 2014/30/EU and/or 2014/35/EC. The Declaration of Conformity
for this product is available at:
Deutsch: Dieses Gerät enspricht der CE RED 2014/53/EU, 2014/30/EU und / oder 2014/35/EC. Die Konformitätserklärung für dieses
Produkt nden Sie unter:
Español: Este dispositivo cumple con los requerimientos de CE RED 2014/53/EU, 2014/30/EU y / o 2014/35/EC. La declaración de
conformidad esta disponible en:
Français: Cet appareil satisfait aux exigences de CE RED 2014/53/EU, 2014/30/EU
et / ou 2014/35/EC
. La Déclaration de Conformité est
disponible à:
Polski: Urządzenie spełnia wymagania CE RED 2014/53/EU, 2014/30/EU I / lub 2014/35/EC. Deklaracja zgodności dostępna jest na stronie
internetowej producenta:
Italiano: Questo dispositivo è conforme alla CE RED 2014/53/EU, 2014/30/EU e / o 2014/35/EC. La dichiarazione di conformità è
disponibile al:
manhattanproducts.com
North & South America
IC Intracom Americas
550 Commerce Blvd.
Oldsmar, FL 34677 USA
Asia & Africa
IC Intracom Asia
4-F, No. 77, Sec. 1, Xintai 5th Rd.
Xizhi Dist., New Taipei City 221, Taiwan
Europe
IC Intracom Europe
Löhbacher Str. 7
D-58553 Halver, Germany
1 Plug the built-in cable into a USB port on your computer.
2 To install the driver, insert the enclosed Setup CD in your CD-ROM drive. If the
Welcome to the Found New Hardware Wizard screen displays, click Cancel to
continue.
3 When the Install screen displays, click Install Driver or run “autorun.exe.”
4 When the Driver Setup screen displays, click Yes.
5 When the “Please re-plug...” prompt displays, click OK
6 When prompted with “Do you want to restart your computer now?” click Yes. NOTE:
After your computer re-boots, you can verify the driver installation by going to Device
Manager / Smart Card Readers and conrming that “EZUSB PC/SC Smart Card Reader”
is listed.
7 LED: power indicator (red), connection indicator (blue), activity indicator (alternating).
For specications, please visit manhattanproducts.com.
Deutsch: Smartcard-Lesegerät
1 Schließen Sie das integrierte Kabel an einen USB-Port Ihres Computers an.
2 Um die Treiber zu installieren, legen Sie die beiliegende CD in Ihr Laufwerk ein. Wird
der automatische Installations- assistent von Windows gestartet, klicken Sie auf
Abbrechen.
3 Wenn der Installationsassistent von der CD startet, klicken Sie auf Treiber installieren.
Sollte er nicht starten, doppel- klicken Sie auf die “autorun.exe” im CD-Verzeichnis.
4 Wenn der Installationsbildschirm eingeblendet wird, klicken Sie auf Ja.
5 Bei der Meldung “Bitte schließen Sie das Gerät erneut an”, klicken Sie auf OK.
6 Bei der Frage “Möchten Sie Ihren Computer jetzt neu starten?” klicken Sie auf Ja.
HINWEIS: Nach dem Neustart, können Sie die Treiberinstallation überprüfen, indem
Sie unter Geräte-manager / Smart Card Readers nach dem Eintrag “EZUSB PC/SC
Smart Card Reader” suchen. Ist dieser vorhanden, wurde die Karte ordnungsgemäß
installiert.
7 LED: Stromanzeige (rot), Verbindungsanzeige (blau), Aktivitätsanzeige (Farbe wechselt)
Die Spezikationen nden Sie auf manhattanproducts.com.
Español: Lector USB de tarjetas Smart/SIM
1 Conecte el cable en un puerto USB de su computadora.
2 Para instalar el controlador, inserte el CD la unidad de CD- ROM. Si se muestra la
pantalla de bienvenida del asistente, haga clic en Cancelar para continuar con la
instalación.
3 En la pantalla de instalación, haga clic en Instalar Controlador o ejecute “autorun.exe”.
4 Cuando se muestre un cuadro de dialogo, haga clic en Si.
5 Un aviso le solicitará reconectar el dispositivo, haga clic en Aceptar.
6 Cuando le pida reiniciar haga clic en Si. : Después de reiniciar, puede vericar NOTA
la instalación en el administrador de dispositivos ubicando en la lista a “EZUSB PC/SC
Smart Card Reader”.
7 LED: Indicador de encendido(Rojo), indicador de conexión ( azul), indicador de
actividad (alterno)
Para más especicaciones, visite manhattanproducts.com.
Français: USB Smart standard / Lecteur de cartes SIM
1 Branchez le câble intégré à un port USB de votre ordinateur.
2 Pour installer le pilote, insérez le CD d’installation inclus dans votre lecteur CD-ROM. Si
l’assistant d’installation automatique de Windows s’ache, cliquez sur Annuler pour
continuer.
3 Quand l’écran d’installation s’ache, cliquez sur Installer le pilote ou lancez “autorun.
exe.”
4 Quand l’écran d’installation de pilote s’ache, cliquez sur Oui.
5 Quand le message “Veuillez reconnecter...” s’ache, cliquez sur OK.
6 Quand le message “Voulez-vous redémarrer votre ordinateur maintenant?” cliquez
sur Oui. REMARQUE: Après le redémarrage de votre ordinateur, vous pouvez vérier
l’installation en accédant Gestionnaire de périphérique / Lecteurs de carte à puce et
conrmant que “Lecteur de carte à puce EZUSB PC/SC” s’ache.
7 Voyant d’alimentation (rouge), voyant connexion (bleu), voyant d’activité (en
alternance)
Vous trouvez les spécications sur manhattanproducts.com.
Polski: Lettore/Scrittore di Smart Card
1 Podłącz zintegrowany z czytnikiem kabel USB do wolnego portu komputera.
2 Umieść dołączoną płytę CD w napędzie CD/DVD komputera. Jeśli pojawi się system-
owy Kreator znajdowania nowego sprzętu, wciśnij Anuluj.
3 Po pojawieniu się głównego okna instalacji wciśnij Install Driver lub uruchom z płyty
„autorun.exe”.
4 Po pojawieniu się okna instalacji sterownika wciśnij Yes.
5 Po pojawieniu się komunikatu „Please re-plug…”, wciśnij OK.
6 Po pojawieniu się komunikatu o konieczności ponownego uruchomienia komputera,
wciśnij Yes. : Po ponownym uruchomieniu komputera można zwerykować UWAGA
instalację sterownika przechodząc do Menadżera urządzeń / Czytniki kart Smart i
potwierdzić, że znajduje się tam urządzenie „EZUSB PC/SC Smart Card Reader”.
7 Sygnalizacja diodowa: zasilanie (czerwona), połączenie (niebieska), aktywność
(migająca)
Specykacja techniczna dostępna jest na stronie manhattanproducts.com.
Italiano: Lettore/Scrittore di Smart Card
1 Collegare il cavo alla porta USB del computer.
2 Per installare i driver, inserire nel lettore il CD di settaggio incluso nella confezione. Se
compare sullo schermo il messaggio di benvenuto relativo al nuovo hardware rilevato,
cliccare Cancella per continuare con l’installazione.
3 Quando compare la videata relativa all’installazione, cliccare Installa Driver o avviare l’
“autorun.exe.”
4 Appena compare sullo schermo la nestra relativa al settaggio dei Driver, cliccare Si.
5 Quando viene visualizzato il prompt “Please re-plug...”, cliccare OK.
6 Appena viene suggerito di riavviare il computer (“Do you want to restart your
computer now?” = vuoi riavviare il tuo computer ora?) cliccare Si. NOTA: Dopo che il
computer è stato riavviato, è possibile vericare l’installazione dei driver andando su
Gestione periferiche / Lettori di Smart Card e confermare che il “Lettore di Smart Card
EZUSB PC/SC” sia presente nella lista.
7 LED: indicatore di alimentazione (rosso), indicatore di connessione (blu), indicatore di
attività (alternato)
Per ulteriori speciche, visita il sito manhattanproducts.com.
English: This symbol on the product or its packaging means that this product
must not be treated as unsorted household waste. In accordance with EU
Directive 2012/19/EU on Waste Electrical and Electronic Equipment (WEEE),
this electrical product must be disposed of in accordance with the user’s
local regulations for electrical or electronic waste. Please dispose of this
product by returning it to your local point of sale or recycling pickup point in your
municipality.
Deutsch: Dieses auf dem Produkt oder der Verpackung angebrachte Symbol
zeigt an, dass dieses Produkt nicht mit dem Hausmüll entsorgtwerden
darf. In Übereinstimmung mit der Richtlinie
2012/19/EU
des Europäischen
Parlaments und des Rates über Elektro- und Elektronik-Altgeräte (WEEE)
darf dieses Elektrogerät nicht im normalen Hausmüll oder dem Gelben
Sack entsorgt werden. Wenn Sie dieses Produkt entsorgen möchten,
bringen Sie es bitte zur Verkaufsstelle zurück oder zum Recycling-
Sammelpunkt Ihrer Gemeinde.
Español: Este símbolo en el producto o su embalaje indica que el producto no
debe tratarse como residuo doméstico. De conformidad con la Directiva
2012/19/
EU
de la UE sobre residuos de aparatos eléctricos y electrónicos (RAEE), este
producto eléctrico no puede desecharse se con el resto de residuos no clasicados.
Deshágase de este producto devolviéndolo a su punto de venta o a un punto de
recolección municipal para su reciclaje.
Français: Ce symbole sur Ie produit ou son emballage signie que ce produit
ne doit pas être traité comme un chet nager. Conformément à la Directive
2012/19/EU
sur les chets d’équipements électriques et électroniques (DEEE), ce
produit électrique ne doit en aucun cas être mis au rebut sous forme de chet
municipal non trié. Veuillez vous débarrasser de ce produit en Ie renvoyant à son
point de vente ou au point de ramassage local dans votre municipalité, à des ns
de recyclage.
Italiano: Questo simbolo sui prodotto o sulla relativa confezione indica che il
prodotto non va trattato come un riuto domestico. In ottemperanza alla Direttiva
UE
2012/19/EU
sui riuti di apparecchiature elettriche ed elettroniche (RAEE),
questa prodotto elettrico non deve essere smaltito come riuto municipale misto.
Si prega di smaltire il prodotto riportandolo al punto vendita o al punto di raccolta
municipale locale per un opportuno riciclaggio.
Polski: Jeśli na produkcie lub jego opakowaniu umieszczono ten symbol,
wówczas w czasie utylizacji nie wolno wyrzuctego produktu wraz z odpadami
komunalnymi. Zgodnie z DyrektyNr
2012/19/EU
w sprawie zużytego sprzętu
elektrycznego i elektronicznego (WEEE), niniejszego produktu elektrycznego
nie wolno usuw jako nie posortowanego odpadu komunalnego. Prosimy o
usuniecie niniejszego produktu poprzez jego zwrot do punktu zakupu lub oddanie
do miejscowego komunalnego punktu zbiórki odpadów przeznaczonych do
recyklingu.
Waste Electrical & Electronic Equipment
Disposal of Electric and Electronic Equipment (applicable in the E.U. and other European countries with separate collection systems)


Produkt Specifikationer

Mærke: Manhattan
Kategori: Ikke kategoriseret
Model: 102032
Bredde: 45 mm
Dybde: 83 mm
Højde: 15 mm
Vægt: 22 g
Produktfarve: Sort
Opbevaringstemperatur (T-T): -20 - 60 °C
Relativ luftfugtighed ved drift (H-H): 0 - 96 %
Driftstemperatur (T-T): 0 - 40 °C
Hurtig installationsvejledning: Ja
Strømkilde: USB
Certificering: RoHS2, FCC, CE\nCCID rev 1.1\nEMV2000 Level 1\nCAC
Strømforbrug (maks.): 0.06 A
LED-indikatorer: Activity, Power
Kabellængde: 0.035 m
Understøttet placering: Indendørs
Bæredygtighedscertifikater: RoHS
Understøttede Windows-operativsystemer: Windows 10, Windows 7, Windows 8.1, Windows Vista, Windows XP Home, Windows XP Home x64, Windows XP Professional, Windows XP Professional x64
Understøttede Mac-operativsystemer: Mac OS 9.0, Mac OS 9.1, Mac OS 9.2, Mac OS X 10.0 Cheetah, Mac OS X 10.1 Puma, Mac OS X 10.10 Yosemite, Mac OS X 10.11 El Capitan, Mac OS X 10.12 Sierra, Mac OS X 10.2 Jaguar, Mac OS X 10.3 Panther, Mac OS X 10.4 Tiger, Mac OS X 10.5 Leopard, Mac OS X 10.6 Snow Leopard, Mac OS X 10.7 Lion, Mac OS X 10.8 Mountain Lion, Mac OS X 10.9 Mavericks
Understøttede Linux-operativsystemer: Ja
Grænseflade: USB 2.0
Driftsspænding: 5 V
USB-drevet: Ja
Overholdelse af branchestandarder: CCID 1.1, EMV2000 lv. 1, CAC, SLE4418, 4428, 4432, 4442, AT88SC1608, 45D041
Understøtter SIM-kort: Ja

Har du brug for hjælp?

Hvis du har brug for hjælp til Manhattan 102032 stil et spørgsmål nedenfor, og andre brugere vil svare dig


Ikke kategoriseret Manhattan Manualer
Manhattan

Manhattan 102681 Manual

2 Februar 2025
Manhattan

Manhattan 168373 Manual

2 Februar 2025
Manhattan

Manhattan 130752 Manual

2 Februar 2025
Manhattan

Manhattan 461504 Manual

11 Januar 2025
Manhattan

Manhattan 153973 Manual

4 September 2024
Manhattan

Manhattan 190299 Manual

4 September 2024
Manhattan

Manhattan 180962 Manual

3 September 2024
Manhattan

Manhattan 461245 Manual

2 September 2024

Ikke kategoriseret Manualer

Nyeste Ikke kategoriseret Manualer