Nitecore AC10 Manual


Læs nedenfor 📖 manual på dansk for Nitecore AC10 (24 sider) i kategorien Batterioplader. Denne guide var nyttig for 22 personer og blev bedømt med 4.5 stjerner i gennemsnit af 2 brugere

Side 1/24
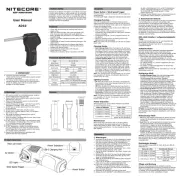
User Manual
Please place the AC10 at for more than 30 minutes before the
rst usage, or after long distance or bumpy transportation.
Caution
Contents
English
·······································································
2
Francais
·····································································
6
Español
······································································
10
Русский
·····································································
14
简体中文
·······································································
18
Features
Applicable to lower the outlet air temperature with a dual hose system in 10
minutes
3 adjustable cooling speed
Equipped with the real-time display to monitor temperatures directly
Constructed from lightweight ABS and PC materials
Installation free, breaking loose from the space
Technical Specications
Rated Voltage 24V DC
Rated Current 12.5A
Cooling Power 2550 BTU
Refrigerant R134A
IP Rating IPX4
Sound Level ≤50 dB
Operation Temperature 3-42°C
Dimensions 583mm 314mm 260mm 23.0" 12.4" 10.2"× × / × ×
Weight 10kg (22 lbs)
1
Cooling Air Outlet
Evaporator Inlet
Operation Panel
Condenser Air Inlet
Power Button
"+" Temperature Button
"-" Temperature Button
Hot Air Outlet
Drain
Power Input
Wind Speed Button
Sleep Mode Button
2
(English) User Manual
Accessories
Hot Air Hose Connection
1×
Cooling Air Hose Connection
× 1
Mounting Screw (M4*12)
2×
Hose Power Adapter Drain Pipe × 2× 1× 1
2m Aerial Power Cord × 1
Installation
There are 3 ways to install the product:
1. When the product is placed in the tent, exhaust the hot air out of that.
Pic 1
a. As Pic 1 illustrated, connect 2 hoses with
the threaded end of the Hot Air Hose
Connection.
Pic 2
b. As Pic 2 shown, connect the Hot Air Hose
Connection with the end of the product
and extend the hoses outside the tent.
Note: DO NOT bend the hose in use to
avoid aecting the heat dissipation.
3
Pic 3
2. When the Cooling Air Outlet is placed in
the tent, place the Condenser Air Inlet
and the Hot Air Outlet outside as Pic 3
illustrated.
Pic 4
3. When the product is placed outside the
tent, the cooling air should be blown into
that as Pic 4 shown.
Screw the Cooling Air Connection to the
front end of the product and connect
two hoses with the threaded end of the
Cooling Air Hose Connection. Then the
cooling air should be blown into the tent.
Drain Pipe Installation:
Connect the Drain Pipe with the Drain and place the
other end outside to avoid bending and clogging.
Note: Place the product in a at and ventilated area
and make sure there is no obstruction around it at
least 50cm (20"). Keep the Drain Pipe in a straight
line and DO NOT extend the hose or exchange
dierent hoses, or the product may be damaged.
Power Connection
Use the Power Adapter to connect an external power supply (e.g. an AC power supply or
power station) to the Power Input. The real-time display will ash to inform the user after the
connection is completed.
Operating Instructions
On / O
On: When the product is o, short press the Power Button to turn it on.
O: When the product is on, long press the Power Button for 3 seconds to turn it o.
4
Temperature Adjustment
Short press "+" Temperature Button / "-" Temperature Button to control the temperature from
16°C to 30℃. If there is no operation in adjustment, the product will automatically exit the
setting status after the real-time display ashes for 5 seconds.
Wind Speed Adjustment
Short press the Wind Speed Button to cycle through the following levels: LOW – MID - HIGH.
Mode Selection
Long press the Sleep Mode Button for 3 seconds to switch between the Cooling Mode and
Sleep Mode.
The Snowake Icon will be turned on if the product accesses the Cooling Mode. This mode
is ideal for daily use.
The Snowake Icon will be turned o if the product accesses the Sleep Mode. Once the
Sleep Mode is on, only the built-in fan runs continuously with minimal noise, suitable for
sleeping.
When the product is reactivated, it will automatically access its previous mode
Maintenance
Cleaning Guidance:
Please wipe the exterior of the product with a moistened cloth. If the dirt cannot be wiped
up, clean it with a mild detergent followed by wiping again with a clean cloth.
The air lters of the Evaporator Inlet and Condenser Air Inlet are detachable. Rinse them
with water and reinstall them after fully dry.
Plastic Parts Maintenance:
Please operate the product properly to avoid the oil stain and deforming. DO NOT expose
the product to the sun and it is recommended to use it in the shade.
DO NOT directly rinse the product with water to avoid degradation of the electrical insulation
performance of the internal circuit and rust of the internal parts. The following items are
prohibited to clean the product, avoiding damage to the coating and plastic parts: hot water,
brush, gasoline, alcohol and soap.
Warnings
1. The product is only to be used by adults above 18 years old. Children under this age must
be supervised by an adult when using the product.
2. Please place the product in ventilated areas. DO NOT use the product in a moist
environment.
3. DO NOT touch the plug or other parts with wet hands.
4. DO NOT operate the product if the power cord or plug is damaged.
5. DO NOT operate the product that has been hit, damaged, placed outside for a long time or
dropped into the water.
6. DO NOT expose the product to open ames or extremely high ambient temperatures.
8
Réglage de la température
Appuyez brièvement sur le bouton de température « + » / bouton de température « - » pour
contrôler la température de 16°C à 30°C. S’il n’y a pas d’opération de réglage, le produit
quittera automatiquement l’état des paramètres après que l’achage en temps réel clignote
pendant 5 secondes.
Réglage de la vitesse de l’air
Appuyez brièvement sur le bouton de vitesse de l’air pour parcourir les niveaux suivants :
FAIBLE – MOYEN - HAUT.
Sélection du mode
Appuyez longuement sur le bouton de mode veille pendant 3 secondes pour basculer entre
le mode refroidissement et le mode veille.
L’icône Flocon de neige sera activée si le produit accède au mode de refroidissement. Ce
mode est idéal pour une utilisation quotidienne.
L’icône Flocon de neige sera désactivée si le produit accède au mode veille. Une fois le mode
veille activé, seul le ventilateur intégré fonctionne en continu avec un bruit minimal, adapté
au sommeil.
Lorsque le produit est réactivé, il accède automatiquement à son mode précédent.
Entretien
Conseils de nettoyage :
Veuillez nettoyer/essuyer l’extérieur du produit avec un chion humidié. Si la saleté ne
peut pas être essuyée, nettoyez-la avec un détergent doux, puis essuyez à nouveau avec un
chion propre.
Les ltres à air de l’entrée de l’évaporateur et de l’entrée d’air du condenseur sont
détachables. Rincez-les à l’eau et réinstallez-les après séchage complet
Entretien des pièces en plastique :
Veuillez utiliser le produit correctement pour éviter la tache d’huile et la déformation. NE PAS
exposer le produit au soleil et il est recommandé de l’utiliser à l’ombre.
NE PAS rincer directement le produit à l’eau pour éviter la dégradation des performances
d’isolation électrique du circuit interne et la rouille des pièces internes. Les articles suivants
sont interdits pour nettoyer le produit, en évitant d’endommager le revêtement et les pièces
en plastique : eau chaude, brosse, essence, alcool et savon.
Avertissements
1. Le produit ne doit être utilisé que par les adultes de plus de 18 ans. Les enfants de moins de
cet âge doivent être surveillés par un adulte lors de l’utilisation du produit.
2. Veuillez placer le produit dans des endroits ventilés. NE PAS utiliser le produit dans un
environnement humide.
3. NE TOUCHEZ PAS la prise ou d’autres parties avec les mains mouillées.
4. NE PAS utiliser le produit si le cordon d’alimentation ou la prise est endommagé.


Produkt Specifikationer

Mærke: Nitecore
Kategori: Batterioplader
Model: AC10

Har du brug for hjælp?

Hvis du har brug for hjælp til Nitecore AC10 stil et spørgsmål nedenfor, og andre brugere vil svare dig


Batterioplader Nitecore Manualer

Nitecore

Nitecore UHX1 PRO Manual

11 Januar 2025
Nitecore

Nitecore EMR05 TAC Manual

11 Januar 2025
Nitecore

Nitecore FSP30 Manual

16 December 2024
Nitecore

Nitecore NES2000 Manual

16 December 2024
Nitecore

Nitecore FSP100 Manual

16 December 2024
Nitecore

Nitecore NC10000 Manual

16 December 2024
Nitecore

Nitecore NES500 Manual

16 December 2024
Nitecore

Nitecore NPS400 Manual

16 December 2024
Nitecore

Nitecore NPB1 Manual

16 December 2024
Nitecore

Nitecore NPB2 Manual

16 December 2024

Batterioplader Manualer

Nyeste Batterioplader Manualer