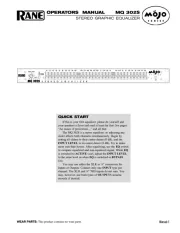
Rane MPE 47 Manual

Rane Blander MPE 47

Læs gratis den danske manual til Rane MPE 47 (5 sider) i kategorien Blander. Denne vejledning er vurderet som hjælpsom af 2 personer og har en gennemsnitlig bedømmelse på 3.5 stjerner ud af 1.5 anmeldelser. Har du et spørgsmål om Rane MPE 47, eller vil du spørge andre brugere om produktet?

Side 1/5
OPERATING / SERVICE MANUAL
MPE 47
QUICK START
Reading the owners manual is an absolute unmitigated drag. I mean its for wimps. For the non-wimps in the crowd we
offer this Quick Start section, so you dont embarrass yourself in front of your friends.
Upon initial power-up, you should see the words, Rane MPE 47 . . . r1.0 (the current revision level) scroll by in the SYS-
TEM display window. Then the SYSTEM display indicates the last memory location used before the power was turned off,
and the green MEMORY indicator lights. The MPE 47 is now ready to use.
consult the enclosed MPE
Users Guide
for further instructions.)
Two terms need to be learned early on. The first is Stored Memory. Stored Memory is any of the 128 locations provided
for curves. The second is Working Memory. Working Memory is a scratch-pad location used for changing curves before
you put them into Stored Memory. Working Memory is also what you hear.
The first few Stored Memory locations (up to 32 maximum) were preset at the factory. In the beginning these may be
used to give you instant curves for experimenting. If you want a different curve, press the UP/DOWN buttons to scroll, or
directly enter a Stored Memory number via buttons 0 through 9 (observe the red SYSTEM display). Please note that all
Stored Memory numbers must be at least two digits; e.g., Stored Memory number 4 is entered as 04, etc. For direct access
to Stored Memory locations above 99, push the 100 button, then the next two digits. For example, to recall Stored Memory
125, press 100, 2 and 5, and you will have arrived! Once the last digit is entered, the Stored Memory is instantly called up
(what you see is what you hear).
Changing the overall level or equalizer curve of either channel requires the use of the EQ Edit mode. Push the EQ button
(repeated operation cycles between Ch.s l-2, Ch.s 3-4, and neither) to select the channels you wish to modify. Now press
LEVEL (repeated operation cycles between 1 and 2, or 3 and 4) or press the frequency button desired (the yellow LED
lights). Next scroll the UP/DOWN buttons until the desired level shows on the green EQUALIZER display. When finished
editing, push the STORE button once, enter a new Stored Memory number if needed, then push STORE again to place the
new curve into the Stored Memory location shown on the red SYSTEM display. Presto facto, its Miller time. Please see
the enclosed MPE Users Guide for further details.
SOFTWARE UPDATES
Please till out and mail in the enclosed registration card. Notification of any software revisions will be mailed to all
registered users. Failure to register could result in missing important update information.
SYSTEM CONNECTION
When connecting the MPE 47 to other components in your system for the first time, LEAVE THE POWER SUPPLY
FOR LAST. This will give you a chance to make mistakes and correct them before any damage is done to your fragile
speakers, ears, headphones, et al.
INPUTS. Inputs on the MPE 47 are balanced/unbalanced. This means that standard 1/4" connectors on the ends of any
good quality cable will work well between your signal sources, signal processing and amplification. If balanced 1/4" inputs
are your choice, use Tip - Ring - Sleeve connectors; wire the tip as hot, the ring as return (-) and the sleeve as signal ground.
Use 1/4" mono connectors for unbalanced sources.
OUTPUTS. The MPE 47 offers unbalanced (only) output connectors. Use standard 1/4" mono shielded cable for intercon-
nect.
You should be aware, also, that just because we indicate that a sleeve on a 1/4" is used for grounding, it is not always wise
to use it. Rane Note 110 (included with your unit) goes into the reasons and logic behind all of this madness. Please have a
look at it to attain the best performance possible from your MPE 47.
Front Panel Description
1. BYPASS 1, 2, 3 & 4. Pressing any button toggles between Bypass and Active modes (LED on = Bypass).
2. STORE. Pressing this control transfers the contents of Working Memory into Stored Memory at a location selected by
either the number keys or the UP/DOWN buttons. Pressing STORE once prompts the user for the Stored Memory location;
pressing it again writes the information to Stored Memory.
3. OL 1, 2, 3 & 4. Ch.s 1, 2, 3 & 4 overload (OL) indicators. These red LEDs illuminate any time the inputs, filters or out-
puts of the channels reach 4 dB below clipping.
all level, whichever is selected (LED on). The MPE 47 must be in the EQ Edit mode to activate this display.
5. EQ. Pressing this button once places the MPE 47 in the Channels 1-2 EQ Edit mode (CHANNELS 1-2 LED on); a
second depression enters the Channels 3-4 EQ Edit mode (CHANNELS 3-4 LED on); and a third time takes the MPE 47
out of the EQ Edit mode (both LEDs off).
6. LEVEL/ EXPRESS. In the EQ Edit mode, this button allows setting the overall level of either channel. When not in the
EQ Edit mode, this button sets Expression parameters. Expression is a mode that allows an EQ curve to bend (change)
based on MIDI continuous controller or channel pressure aftertouch commands. Please see the MPE Users Guide for fur-
ther information.
7. 50Hz/BANK. In the EQ Edit mode, this button selects the 50 Hz filter. In the Normal Operating mode, pressing this
control locks the MPE to the current bank; something similiar to a tens hold function. When using the octal numerical
base system of notation instead of the decimal numerical base system of notation (explained in the MPE Users Guide) it has
a similar function.
8. 125Hz/100/OCTAL A/B. In the EQ Edit mode, this button selects the 125 Hz filter. In the Normal Operating mode this
gets you directly to the 100s, or switches between A/B banks when using the octal numerical base system of notation.
9. Filters/Numerals. In the EQ Edit mode, these buttons select the filters associated with their labels. In the Normal
Operating mode they allow direct access number entry for Stored Memory selection. They also select several secret fea-
tures when used with the FUNCTION button. To find out more about their other uses, please see the MPE Users Guide.
10. 12.5kHz/FUNCTION. In the EQ Edit mode, this button selects the 12.5 kHz filter. In the Normal Operating mode it
acts as a shift-key to select secondary functions. Again we must reference the MPE Users Guide for details. Sorry.
11. UP & DOWN. Used to increase or decrease parameters in all operating modes.
12. SYSTEM Display. This red digital display indicates system information, such as Stored Memory locations, MIDI Chan-
nel selection, mapping assignments, lockout codes, Factory preset numbers, ramp step size, revision number, and so on.
13. MEMORY. Used to enter the Normal Operating mode. A flashing LED indicates Working Memory differs from
Stored Memory. When in the EQ Edit mode, all changes to the Working Memory are compared with the Stored Memory
version by simply pressing and holding the MEMORY button. What is heard is the Stored Memory curve; releasing the
MEMORY button allows you to hear edited Working Memory.
14. MIDI CHANNEL. Pressing this button displays the current MIDI Channel assignment for this MPE. Flashing indicates
MIDI OMNI mode is on. Change the MIDI Channel by using the UP/DOWN buttons, or number keys. Pressing this button
again returns the unit to Normal Operating mode.
15. MAP. Used for MIDI Mapping covered in the MPE Users Guide.


Produkt Specifikationer

Mærke: Rane
Kategori: Blander
Model: MPE 47

Har du brug for hjælp?

Hvis du har brug for hjælp til Rane MPE 47 stil et spørgsmål nedenfor, og andre brugere vil svare dig


Blander Rane Manualer
Rane

Rane DA 216 Manual

20 Juni 2025
Rane

Rane RA 27 Manual

20 Juni 2025
Rane

Rane GE 30 Manual

20 Juni 2025
Rane

Rane CP R1 Manual

20 Juni 2025
Rane

Rane DA 26 Manual

20 Juni 2025
Rane

Rane MPE 47 Manual

20 Juni 2025
Rane

Rane FSC 22 Manual

20 Juni 2025
Rane

Rane ME 15 Manual

20 Juni 2025
Rane

Rane FDA 18 Manual

20 Juni 2025

Blander Manualer

Nyeste Blander Manualer

DNA

DNA HLC 10 MK2 Manual

17 Juni 2025
Roland

Roland VR-3 Manual

16 Juni 2025
DNA

DNA EF-MIX 4 Manual

16 Juni 2025
DNA

DNA MIX 4 EQ Manual

16 Juni 2025
DNA

DNA QFX6 Manual

15 Juni 2025
Globe

Globe SP30 Manual

13 Juni 2025
Globe

Globe SP20 Manual

13 Juni 2025
DNA

DNA CM8-DSP Manual

9 Juni 2025
DNA

DNA HLC 14 MK2 Manual

9 Juni 2025