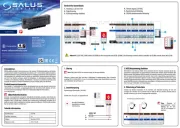
Salus 091PRORF Manual

Salus Termostat 091PRORF

Læs gratis den danske manual til Salus 091PRORF (2 sider) i kategorien Termostat. Denne vejledning er vurderet som hjælpsom af 3 personer og har en gennemsnitlig bedømmelse på 4.9 stjerner ud af 2 anmeldelser. Har du et spørgsmål om Salus 091PRORF, eller vil du spørge andre brugere om produktet?

Side 1/2
SALUS Controls is a member of the Computime Group
Maintaining a policy of continuous product development SALUS
Controls plc reserves the right to change specications, design and
materials of products listed in this brochure without prior notice.
SALUS Controls plc,
Units 8-10,
Northeld Business Park,
Forge Way, Parkgate
SALUS Controls GmbH,
Dieselstrasse 34,
63165 Mühlheim am Main,
Germany
Quick Guide
UK: tech@salus-tech.com
DE / NL: info@salus-controls.de
PL: poland@saluscontrols.com
FR: technicalsupport@saluscontrols.fr
RO: tehnic@saluscontrols.ro
DK: Support@salus-controls.dk
V02
03/2025
www.saluscontrols.com
091PRO-RF
PROGRAMMABLE THERMOSTAT
MULTI-LANGUAGE
MANUAL
Refer to the wiring diagrams for proper receiver installation.
This product complies with the essential requirements and other relevant
provisions of Directives: 2015/863/EU, 2014/53/EU
868.0 MHz <13dBm
The full text of the EU Declaration of Conformity is available at the following
internet address: www.saluslegal.com
Product Compliance
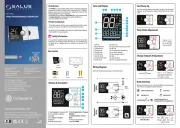
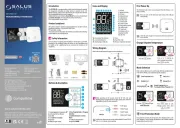
Introduction
The 091PRO-RF is a programmable weekly controller designed to regulate
the temperature of heating or cooling systems. It operates on AA, 1.5V
alkaline batteries, which must be inserted into the compartment under the
ap. Rechargeable batteries are not supported.
Additionally, the device features a that can be activated based Boost Mode
on , ensuring optimal comfort and eciency.motion detection
Full manual available on our website.
4 x Screws 4 x Wall AnchorsNC-NO CablePower Cable
2 x AA
Batteries
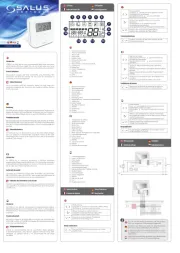
Buttons & description
Icons and Display
Wiring Diagram
Use in accordance to national and EU regulations. Use the device as intended,
keeping it in dry condition. Product for indoor use only. Installation must
be carried out by a qualied person in accordance to national and EU
regulations.
Safety Information
1 2 3 4 5 6 7
8
9
10
11
12
13
14
15
16
17
18
19
1. Settings
2. Motion detection
3. RF Status
4. Child protection
5. Cooling mode
6. Heating mode
7. Comfort mode
8. Economic mode
9. Frost protection mode
10. Holiday mode
11. Party mode
12. Manual mode or
Temporary override
13. AM / PM
14. Personalised time indicator
15. Low battery indicator
16. Hourly program indicator
17. Clock
18. Day of the week
19. Room or Setpoint temperature
1. Comfort Setting or Temperature UP
2. Set the day ( ), hour ( ) and D H
minute (M)
3. Comfort Economy Set or
temperature
4. Weekly Program setting
5. New Program Mode or Program
Selection
6. Service Conrm function or
Menu
7. Setting Economic Mode or
Temperature DOWN
OK
SETUP
MODE
PROG #
PROG
TEMP
BACK
3
2
4
5
6
7
1
RF
ON OFF
AUTO MA NUAL
Follow the steps on page 2 to re-pair your thermostat and receiver
in case of need.
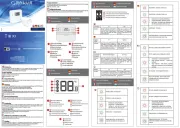
Mode Selection
Mode selection allows users to cycle through dierent operating modes
of the 091Pro-RF(TX), each tailored for specic situations.
Party Mode
Manual Mode
Frost Protection Mode
Holiday Mode
Press the
TEMP
BACK
button.
Press
or buttons to
adjust setpoint temperature.
Press
OK
SETUP
to conrm.
Change Setpoint Temperature
OK
SETUP
P
PR G
TEMP
BACK
OK
SETUP
MODE
PROG #
PROG
TEMP
BACK
Receiver
RXRT55 R0 XRT550
Receiver
Thermostat
091Pro-RF(TX)
COM
L
L
M
N
N
NO
or
MAX
16 (5) A
L
L
NO
N
N
COM
Thermostat
091Pro-RF(TX)
Press the
MODE
PROG #
button to open
Mode Selection.
O
SE
MODE
PROG #
PROG
TEMP
BACK
Press
MODE
PROG #
again to cycle
through modes, then press
OK
SETUP
to conrm.
OK
SETUP
MODE
PROG #
PROG
TEMP
BACK
Frost protection prevents the temperature from dropping below a safe
level, helping to avoid freezing temperatures and maintain minimal
heating when the system is o.
Frost Protection Mode
091Pro-RF(TX)
Thermostat
RXRT550
Receiver
Screw Mounting
Template
The thermostat and receiver come pre-paired from the factory, so no
setup is needed.
First Power Up
Once you turn on the thermostat and receiver, they will pair
automatically.
When powering on the receiver, check the RF LED color and
blinking pattern to determine the RF signal quality. Refer below for
explanation of each LED color and pattern.
RF
RXRT550
RF
No RF signal
-
R
-
Weak RF signal
RF
-
Good RF signal
Position the thermostat and receiver within reliable RF range (RF LED
color ) to ensure correct operation.green
Hourly Program Mode or
Personalised Time Program Mode
OR
RF
-
Waiting for RF signal
Program Mode
Factory reset
Re-Pairing of Thermostat and Receiver
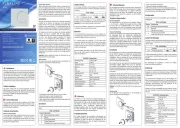
Create a personalised or preset heating schedule to match your routine. Set
dierent temperatures for specic times, ensuring comfort and eciency.
The thermostat then adjusts automatically to your settings.
Follow bellow steps to select one of the two programming modes that can
be used.
1st Period: 6:30, 20
o
C (1st period is active until 2nd period starts)
2nd Period: 8:00, 24.5
o
C (2nd period is active until 3rd period starts)
6th Period: 22:00, 20
o
C (6th period is active until 1st period of the next
day starts).
Example:
The thermostat oers 9 programs in total. PROG 0–5 are factory preset
and cannot be edited, but you can select and use them. PROG 6–8 are
customizable, allowing you to create your own heating schedule.
is a special type of program that allows the user to set the
whole day to frost protection temperature.
How to personalize a hourly program:
When reaching a program that can be personalised (PROG 6 to 8), use the
and buttons to select if you want to use the or Economic Comfort
Mode. Selection should be done by circling through all hours.
The thermostat also includes additional settings to customize your
experience, allowing you to adjust preferences to suit your needs.
Conrm by pressing
OK
SETUP
button.
Continue by pressing
OK
SETUP
button.
The user can set custom temperatures for both Comfort Economic and
modes to match their personal preferences.
Hourly Program -
Choose the program mode
For Hourly Program
For Personalised Time Program
Personalised Time Program -
OK
SETUP
MODE
PROG #
PROG
TEMP
BACK
Comfort mode - maintains a higher
set temperature for a warm and cozy
environment, ideal for times when you are at
home and active.
Economic mode - maintains a lower
set temperature to save energy while still
keeping the space comfortable, ideal for
times when less heating or cooling is needed.
Manual Mode
Manual mode allows users to set and maintain a desired temperature
without following a schedule. The setpoint can be adjusted anytime.
From main screen it can be selected one of the two settings by pressing
button with the representing icon:
Holiday mode keeps the thermostat at a set temperature for an extended
period while you're away, helping to save energy while preventing the
home from getting too cold or too hot.
Holiday Mode
Press or buttons to adjust
the number of days active.
Conrm by selecting
OK
SETUP
.
OK
SETUP
MODE
PROG #
PROG
TEMP
BACK
Press the
TEMP
BACK
button.
Press
or buttons to
adjust setpoint temperature.
Conrm by selecting
OK
SETUP
.
Hold
OK
SETUP
for 5 seconds to enter SETUP then
cycle through settings by pressing the same
button until reaching Program Mode selection.
HourlyPersonalised Time
OR
OK
SETUP
P
PR G
TEMP
BACK
OK
SETUP
MODE
PROG #
PROG
TEMP
BACK
Then press the
MODE
PROG #
button to
circle through programs.
Press
PROG
multiple times to select
the day of the week you want to
change.
Press
PROG
to select the days of the week you want to change and circle
through options by and buttons.
Full week: 1 2 3 4 5 6 7
Working days: 1 2 3 4 5
Weekend: 6 7
Individual days
Only programs 6, 7 and 8 can be personalised.
Please note: Each period's start and end time must be strictly between
the previous period's end an the next period's start to ensure a logical,
conict-free schedule.
Set the temperature
by pressing and .
Then conrm by pressing
OK
SETUP
.
OK
SETUP
MODE
PROG #
PROG
TEMP
BACK
Press or buttons to choose. Conrm
selection
OK
SETUP
. Hold
OK
SETUP
5 seconds
again to exit SETUP mode.
To conrm your changes, hold
OK
SETUP
for 5 seconds. The screen will then
return to the home display.
Boost Mode functions only in Program Mode and applies only for heating.
How to turn on the motion detection (Boost mode):
In an hourly program, Boost Mode overrides Economy mode
based
on motion detection. When motion is detected, the system automatically
switches to Comfort mode in a hour time frame.
In a personalised time program, Boost Mode overrides the current set
temperature with the highest setpoint scheduled for that day when motion
is detected.
Press and hold for 5 seconds the
Factory Setup button.
OK
SETUP
MODE
PROG #
PROG
TEMP
BACK
Select YES by pressing or .
Then conrm by pressing
OK
SETUP
.
Each day includes 6 programs. After setting one, the next
automatically appears for adjustment.
OK
SETUP
MODE
PROG #
PROG
TEMP
BACK
5 sec
Other Settings
OK
SETUP
MODE
PROG #
PROG
TEMP
BACK
5 sec
OK
SETUP
MODE
PROG #
PROG
TEMP
BACK
5 sec
OK
SETUP
MODE
PROG #
PROG
TEMP
BACK
Party mode temporarily overrides the scheduled temperature for a set
number of hours, ensuring comfort during gatherings without changing
the regular schedule.
OK
SETUP
MODE
PROG #
PROG
TEMP
BACK
Press or buttons to adjust
the number of active hours.
Conrm by selecting
OK
SETUP
.
Thermostat will start the Party
Mode countdown.
Pairing mode .ON
Enter settings and turn on
synchronization mode on thermostat.
Conrm by selecting
OK
SETUP
.
Synchronization will stay on
for 10 minutes.
Party Mode
OK
SETUP
MODE
PROG #
PROG
TEMP
BACK
OK
SETUP
MODE
PROG #
PROG
TEMP
BACK
OK
SETUP
MODE
PROG #
PROG
TEMP
BACK
3 sec
3s P
3s P
3s P
3s P
3s Pairing
airing
airing
airing
airing
3s P
3s P
3s P
3s P
3s Pairing
airing
airing
airing
airing
RF
ON OFF
AUTO MANUAL
RF
ON OFF
AUTO MANUAL
3
OK
SETUP
MODE
PROG #
PROG
TEMP
BACK
5 sec
Display Description
Enable the based on motion detection.Auto Boost Mode
Allows the display to turn on automatically when motion is
detected.
Disclaimer: Enabling the motion-activated display
will signicantly reduce battery life.
Adjust the motion detection sensitivity 1-3 levels
/
Heating or cooling mode selection.
/
Program mode selection.
or
24 or 12 hours format.
or
LCD displayed resolution of temperature.
Temperature oset adjustment: Range from -3.5°C to +3.5°C
in 0.1°C steps, default set to 0.0°C.
Activates RF test mode for the receiver to check signal quality.
Activates thermostat-receiver pairing. If select YES it will be
open for 10 minutes
Allows the user to set a PIN for security.
/ TPI
Select the control algorithm - SPAN 0.25C/0.5C/1.0C or
TPI 3/6/9 CPH
Enables a 5-minute heating switch delay
(heat mode only).
NC or NO output control setup
The lowest temperature that can be set.
The highest temperature that can be set.
Receiver manual controls - for admin user to disable the
manual controls on the receiver (set to NO).
Motion detection (Boost mode)
Motion detected
Motion detected
Economy Mode Comfort Mode
(for 1h time frame)
Heating starts to highest
setpoint scheduled
override
override
Set the hour by using and .
Then conrm by pressing
OK
SETUP
.
Set the minute by using
and .
Then conrm by pressing
OK
SETUP
.
OK
SETUP
MODE
PROG #
PROG
TEMP
BACK
OK
SETUP
MODE
PROG #
PROG
TEMP
BACK


Produkt Specifikationer

Mærke: Salus
Kategori: Termostat
Model: 091PRORF

Har du brug for hjælp?

Hvis du har brug for hjælp til Salus 091PRORF stil et spørgsmål nedenfor, og andre brugere vil svare dig


Termostat Salus Manualer
Salus

Salus RT20 Manual

23 Juli 2025
Salus

Salus EL600F Manual

23 Juli 2025
Salus

Salus VS35B Manual

23 Juli 2025
Salus

Salus 091PRORF Manual

23 Juli 2025
Salus

Salus HTRP24 Manual

23 Juli 2025
Salus

Salus CB500X Manual

23 Juli 2025
Salus

Salus CB500 Manual

23 Juli 2025
Salus

Salus RT310iSPE Manual

22 Juli 2025
Salus

Salus VS35W Manual

22 Juli 2025
Salus

Salus RT310TX Manual

22 Juli 2025

Termostat Manualer

Nyeste Termostat Manualer