14mm F2.8 ED AS IF UMC Lens
Thank you for purchasing the 14mm F2.8 ED AS IF UMC lens.
We believe that you will have a special photographic experience with the 14mm F2.8
The 14mm F2.8 ED AS IF UMC lens mount is uniquely designed for Canon, Nikon
(Fujifilm) F, Pentax (Samsung GX) K, Sony α (Minolta), Canon M, Sony E, Fujifilm X,
Samsung NX, Four Thirds, and Micro Four Thirds cameras.
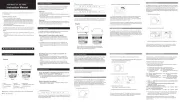
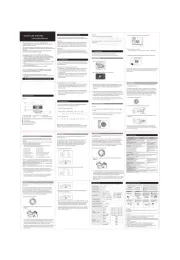
Hold the lens hood gently and press the lens release button on the camera. Turn the
lens in the opposite direction of the attaching direction to detach the lens.
You can adjust the focus by turning the focusing ring when using the 14mm F2.8 ED
AS IF UMC lens, as it is a Manual Focus (MF) adjustment lens.
Some cameras require special settings when using this lens.
Please refer to the following and set the camera when necessary.
※ For some Canon cameras, if you set the camera mode dial to Av and set the
brightness by turning the aperture adjustment ring on the lens, the camera
automatically changes the shutter speed. Therefore you don't need to adjust the
shutter speed as well, which is required in M mode.
(The procedures above are for the 40D. The settings for the camera or the menu may vary based
on the model or due to a functional upgrade. Refer to the camera instruction manual or contact the
camera manufacturer for detailed information.)
※ If the release lock is disengaged in the above way, the state of disengagement is
maintained even though the main switch is turned off. If you want to enable the
release lock function, perform the above procedure again.
※ For some Samsung NX cameras, if you set the camera mode dial to A and set the
brightness by turning the aperture adjustment ring on the lens, the camera
automatically changes the shutter speed. Therefore you don't need to adjust the
shutter speed as well, which is required in M mode.
1) Set the camera mode dial to M.
2) Adjust the shutter speed to achieve the appropriate exposure for the
The diaphragm of the 14mm F2.8 ED AS IF UMC Canon mount is not compatible with
If the brightness is set to F8 or above, you may not be able to set the correct focus
due to a difficulty in viewing the subject through the camera viewfinder. Turn the
aperture adjustment ring so it is fully open when attaching the lens to the camera, and
then set the depth of field and brightness you want prior to shooting.
You can set the depth of field and brightness by turning the aperture adjustment ring
when using the 14mm F2.8 ED AS IF UMC lens.
The F numbers can be set from 2.8 to 22.
The 14mm F2.8 ED AS IF UMC lens is a wide-angle lens and captures a vivid wide
angle of view by minimizing image distortion. You can capture extensive panoramas,
which is very useful for landscape shooting.
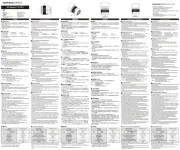
① To change the focus from a subject that is far away to a subject that is close,
turn the focusing ring to the left (∞ to 0.28 m) and focus on the clearest subject
by using the indication signal on the camera, or by checking visually.
② To change the focus from a subject that is close to a subject that is far away,
turn the focusing ring to the right (0.28 m to ∞) and focus on the clearest
subject by using the indication signal on the camera, or by checking visually.
① To change the focus from a subject that is far away to a subject that is close,
turn the focusing ring to the right (∞ to 0.28 m) and focus on the clearest
subject by using the indication signal on the camera, or by checking visually.
② To change the focus from a subject that is close to a subject that is far away,
turn the focusing ring to the left (0.28 m to ∞) and focus on the clearest subject
by using the indication signal on the camera, or by checking visually.
Hold the lens hood gently and align the camera mount attachment point with the
attachment reference point or line on the lens. Push the lens into the camera and
gently rotate the lens in the attachment direction until it makes a clicking sound.
Advantages of the 14mm F2.8 ED AS IF UMC lens
This product is designed with its own mount so you can easily take photographs by
mounting the lens directly onto the camera, without installing an additional adaptor .
Read this manual carefully to familiarize yourself with your lens for correct use.
※ Please read the Safety Precautions at the back of this instruction manual prior to use.
Please read this instruction manual prior to use.
2. Attaching and Detaching
Do not wet this product or expose it to a moist environment. It may cause a
Do not use this product or store it close to devices that generate heat i.e.,
heaters, thermal regulators, stoves or stereo amplifiers.
Do not leave the lens in conditions where drastic temperature changes can
Do not touch the surface of the lens by hand, and avoid making contact with
Do not soak the lens in water, and avoid water splashing onto the lens.
If there are foreign bodies on the lens, use a lens cleaning kit only.
ensure the lens is held in place
properly; otherwise the lens may
become loose and cause an
Don't put excessive pressure
on the lens attached to the
cause damage to the lens or
to the camera mount. Be sure to
hold the lens when operating or
checking the lens beforehand or by
test shooting for important events
Don't leave the lens within
reach of babies, as it may
cause injury to the baby if the
lens falls or is dropped.
Don't attempt to modify or
alter the lens. It may lead
to failure of the camera. Modified
or altered lenses may not be
cause a fire, depending on
directly through a camera
with a lens attached. It may
If this instruction is not
followed, it may cause death
or severe injury to the user.
If this instruction is not
followed, it may cause death
or severe injury to the user.
The following precautions are divided into two types
according to the level of danger.
The following pictograms are used in the below precautions:
Requires caution. Inside the pictogram it shows contents of precautions.
(It shows outbreak of fire in the pictogram on the left.)
Shows prohibition. Inside the pictogram it shows contents of prohibition.
(It shows prohibition of dismantling in the pictogram on the left.)
Shows instruction. Inside the pictogram it shows contents of instructions.
(It shows instruction of precaution in the pictogram on the left.)
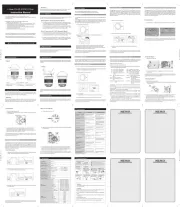
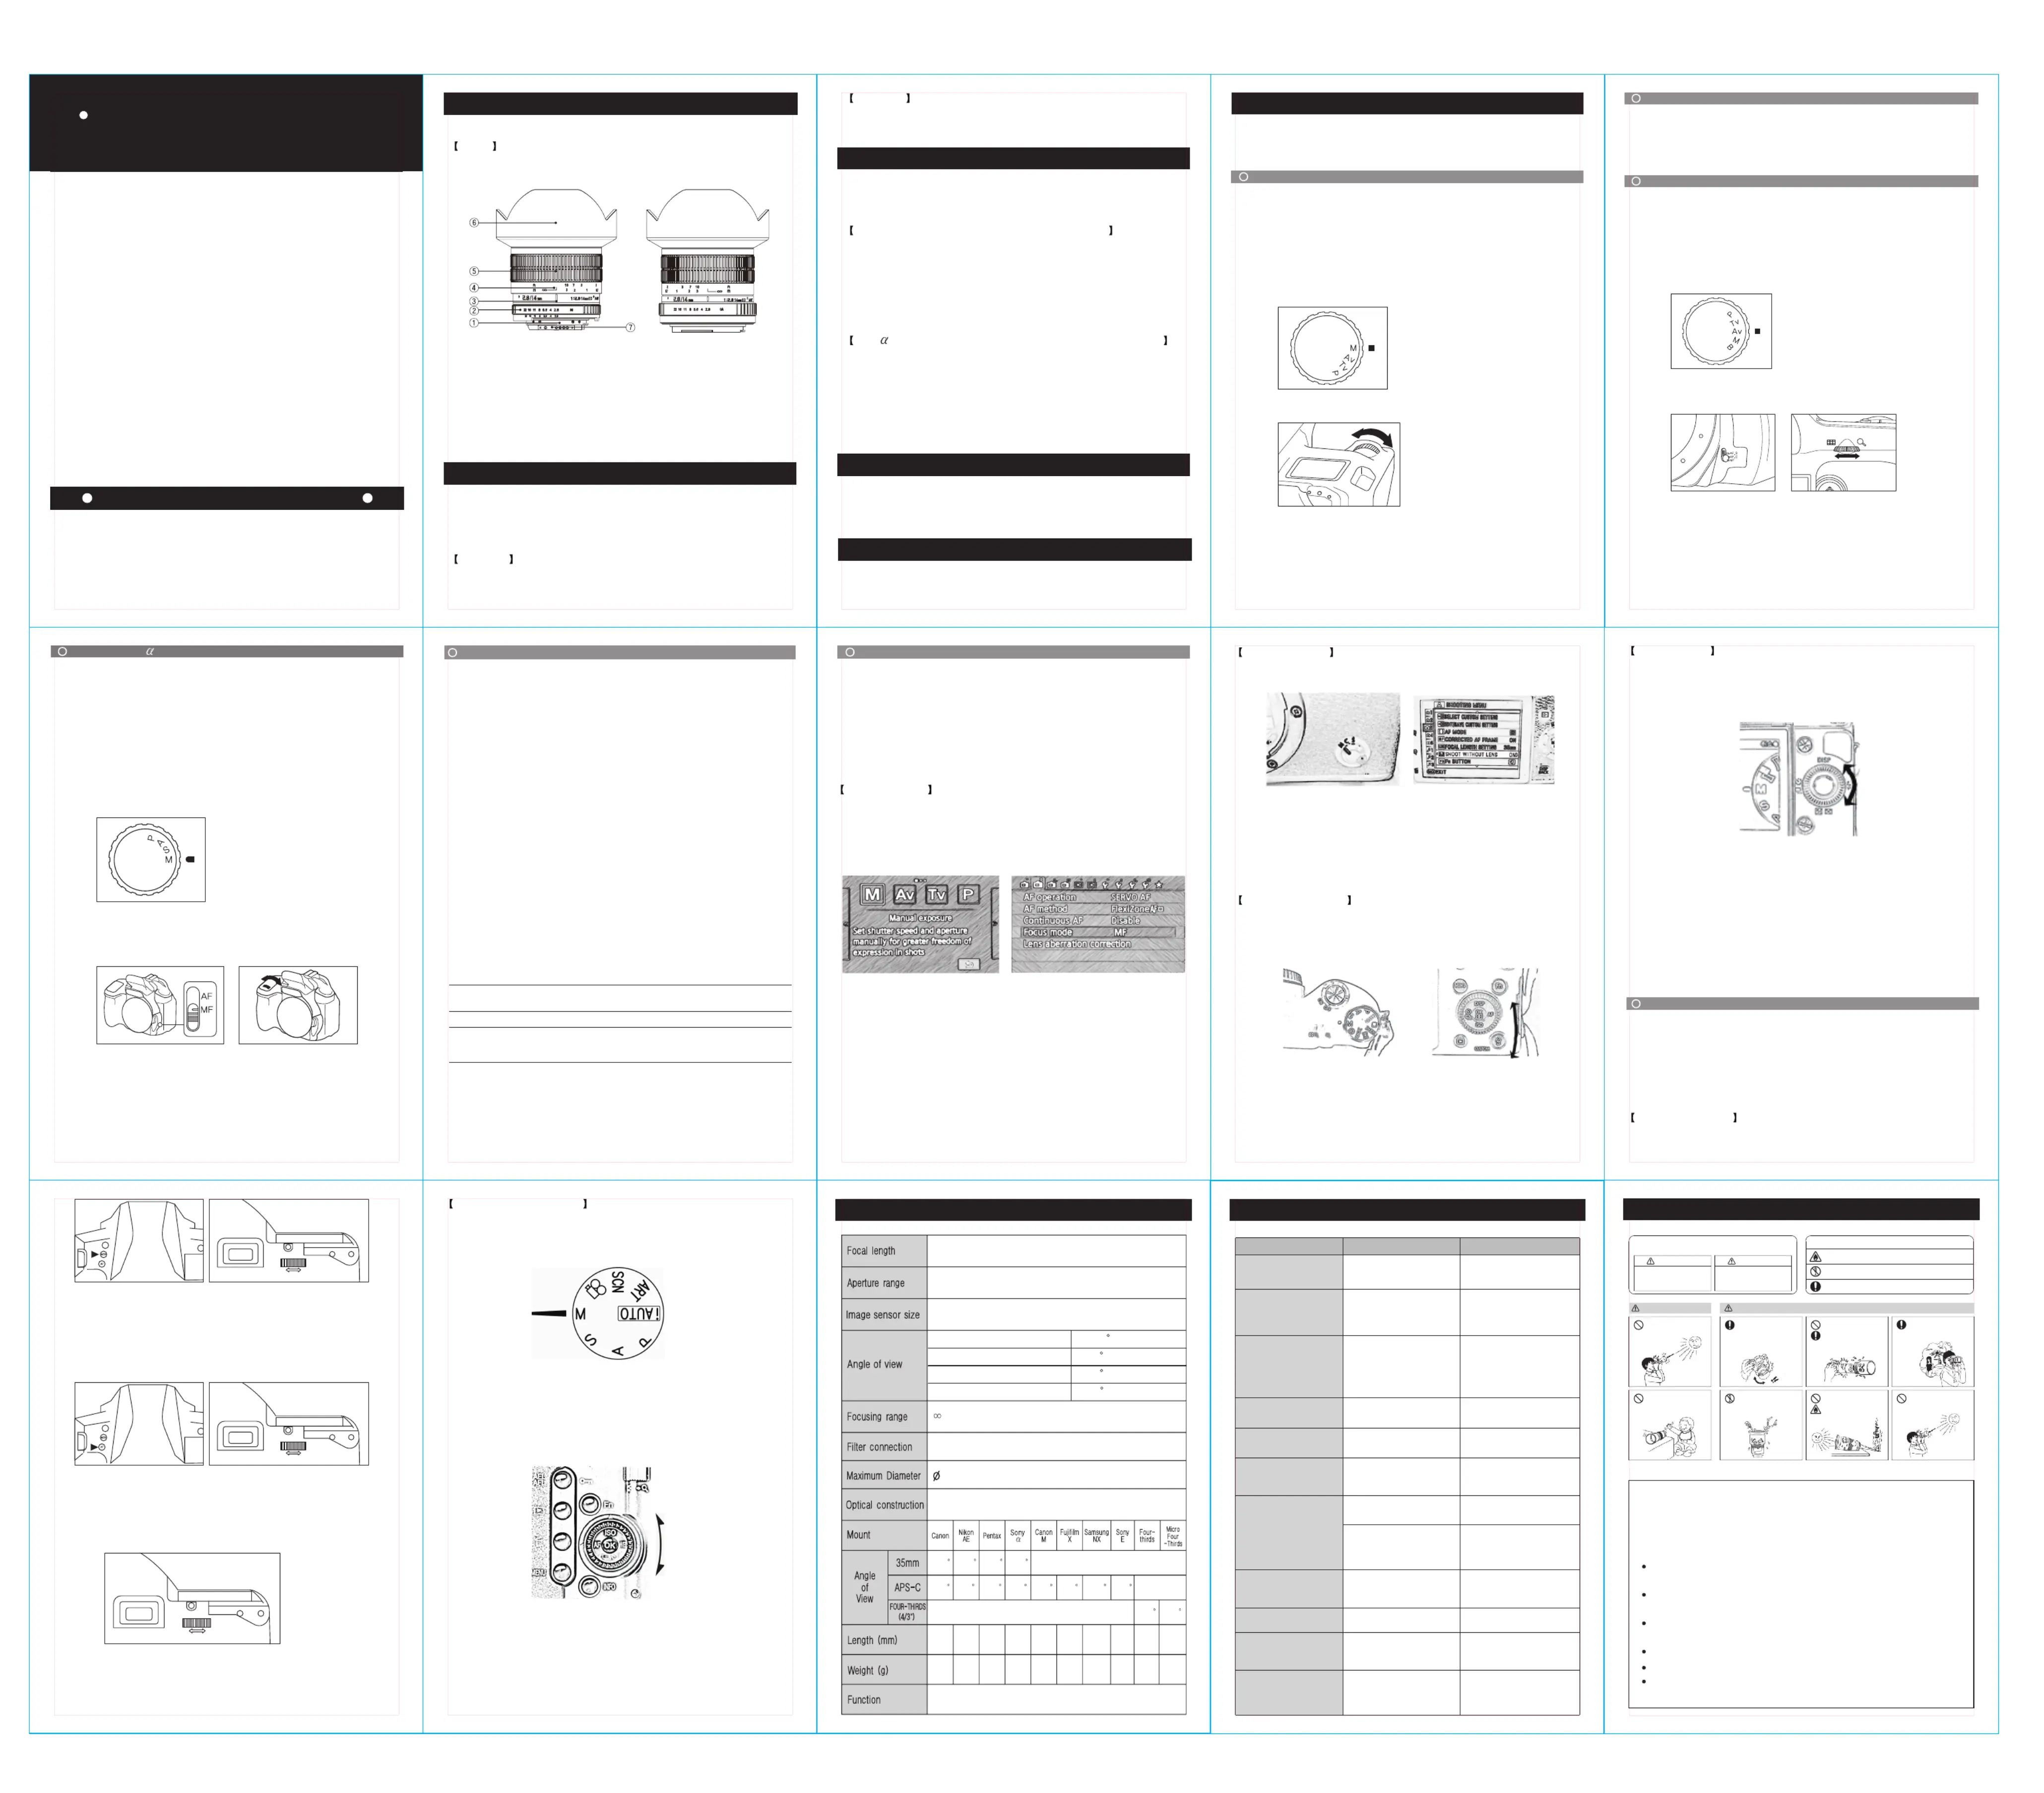
① Mount CPU (electronic contacts)④Distance scale ⑦
② Aperture adjustment ring Focusing ring ⑤
Nikon (Fujifilm) F / Pentax (Samsung GX) K Mount
Sony , E / Canon, Canon M / FT, MFT / Fujifilm X / Samsung NX Mount
Konica Minolta (Minolta), DYNA Series Cameras
Mirrorless Cameras (Canon M, Samsung NX, Sony E, Fujifilm X)
Pentax (Samsung GX) K Mount
Four Thirds, Micro Four Thirds
1) Align the A mode indicator to the distance scale indicator mark by pressing the
A button on the aperture adjustment ring of the lens.
1) Set the exposure to manual exposure (M) and change the focus mode to MF.
1) Set the focus mode to M.
1) Set the camera mode dial to M.
2) Adjust the shutter speed by turning the dial to achieve the appropriate exposure
2) Press the MENU/OK button, and select ON at 'Shoot without lens' in the
1) Set the camera mode dial to M.
2) Set the mode dial of the camera to Av.
2) Set the focus adjustment lever of the camera to MF.
3) Set the focus adjustment lever of the camera to MF.
3) Adjust the shutter speed to achieve the appropriate exposure for the
The user sets the menu. The aperture ring is used. Not allowed.► ►
5) Adjust the brightness by turning the dial at the back of the camera.
Your Nikon mount has electronic contacts that allow it to communicate with Nikon AF
cameras. These contacts enable the A, S, and P modes of the camera. When a
subject is correctly in focus, the camera emits a beep or an indicator light comes on.
The diaphragm of the 14mm F2.8 ED AS IF UMC Sony (Minolta) mount is not
compatible with the camera. If the brightness is set to F8 or above, you may not be
able to set the correct focus due to a difficulty in viewing the subject through the
camera viewfinder. Turn the aperture adjustment ring so it is fully open when
attaching the lens to the camera, and then set the depth of field and brightness you
If this lens is used on some Konica Minolta (Minolta) or DYNA series cameras, the
release lock function (misuse prevention function) of the camera must be disabled. It
is required to disable the release lock function only on the first use, as below.
The diaphragms of the 14mm F2.8 ED AS IF UMC Canon M, Samsung NX, Sony E
and Fujifilm X mounts are not compatible with the cameras. If the brightness is set to
F8 or above, you may not be able to set the correct focus due to a difficulty in viewing
the subject through the camera viewfinder. Turn the aperture adjustment ring so it is
fully open when attaching the lens to the camera, and then set the depth of field and
brightness you want prior to shooting.
function button + AE lock button 303si
AV button + self mode button
function button + AE lock button 303si SUPER
drive button + spot button
function button + spot button 101si
self-timer button + flash button
Modification is required at a service
self-timer continuous shooting
button + screen select button
AEL button + shooting scene select
self-timer continuous shooting
card button + spot button α-Sweet S
(set the function dial to multi
lens exchange button + ISO lock
P button + self-timer button
shooting scene select button
self-timer button + turn the left
dial on the main body away
Disabling the release lock function
① Set the main switch of the camera to OFF.
② Detach the lens from the camera body and set the main switch of the camera to
ON by pressing the following two buttons.
(The procedures above are for the K20D. The settings for the camera or the menu may vary based
on the model or due to a functional upgrade. Refer to the camera instruction manual or contact the
camera manufacturer for detailed information.)
(The procedures above are for the α350. The settings for the camera or the menu may vary based
on the model or due to a functional upgrade. Refer to the camera instruction manual or contact the
camera manufacturer for detailed information.)
(The procedures above are for the Olympus E-3. The settings for the camera or the menu may vary
based on the camera model or due to a functional upgrade. Refer to the camera manual or contact
the camera manufacturer for detailed information.)
(The procedures above are for the E-P2. The settings for the camera or the menu may vary based
on the camera model or due to a functional upgrade. Refer to the camera manual or contact the
camera manufacturer for detailed information.)
(The settings for the camera or the menu may vary based on the camera model or due to a
functional upgrade. Refer to the camera instruction manual or contact the camera manufacturer for
(The procedures above are for the Canon M. The settings for the camera or the menu may vary
based on the camera model or due to a functional upgrade. Refer to the camera instruction manual
or contact the camera manufacturer for detailed information.)
(The procedures above are for the X-Pro1. The settings for the camera or the menu may vary based
on the camera model or due to a functional upgrade. Refer to the camera instruction manual or
contact the camera manufacturer for detailed information.)
(The procedures above are for the NX200. The settings for the camera or the menu may vary based
on the camera model or due to a functional upgrade. Therefore refer to the camera manual or
contact the camera manufacturer for detailed information.)
The 14mm F2.8 ED AS IF UMC Pentax (Samsung GX) K Mount supports Av mode.
The diaphragms of the 14mm F2.8 ED AS IF UMC Four Thirds and Micro Four Thirds
mounts are not compatible with the cameras. If the brightness is set to F8 or above,
you may not be able to set the correct focus due to a difficulty in viewing the subject
through the camera viewfinder. Turn the aperture adjustment ring so it is fully open
when attaching the lens to the camera, and then set the depth of field and brightness
you want prior to shooting.
Set the camera to custom function 14 and change selection number
Set the camera to custom function 16 and change the selection number
MENU ⇒ ⇒ *2 Release lock without the lens ⇒ To the right ⇒ N.A. ⇒ Execute ● ⇒ MENU
MENU ⇒ ⇒ *3 Release lock without the lens ⇒ To the right ⇒ N.A. ⇒ Execute ● ⇒ MENU
Execute the following operation.
α-7 Digital - Execute the following operation.
※ For some Sony E cameras, if you set the camera mode dial to A and set the
brightness by turning the aperture adjustment ring on the lens, the camera
automatically changes the shutter speed. Therefore you don't need to adjust the
shutter speed as well, which is required in M mode.
1) Set the camera mode dial to M.
2) Adjust the shutter speed by turning the dial to achieve the appropriate exposure
1) Set the camera mode dial to M.
2) Adjust the shutter speed by turning the dial to achieve the appropriate exposure
2) Hold down the AF button and turn the dial until it is set to MF. (Focusing)
AF + control dial MF setting (manual focusing)▶
3) Adjust the shutter speed to achieve the appropriate exposure for the brightness
1) Hold down the MODE button and turn the dial until it is set to M. (shooting conditions)
MODE + control dial M mode setting (manual shooting)▶
(The procedures above are for the NEX-5. The settings for the camera or the menu may vary based
on the model or due to a functional upgrade. Refer to the camera manual or contact the camera
manufacturer for detailed information.)
※ For some Olympus (MFT) and Panasonic (MFT) cameras, if you set the camera
mode dial to A and set the brightness by turning the aperture adjustment ring on
the lens, the camera automatically changes the shutter speed. Therefore you don't
need to adjust the shutter speed as well, which is required in M mode.
Issue Causes Corrective Action
A lens cannot be attached to
A lens cannot be detached
Automatic focusing does not
Dark or too bright pictures
The camera finder indication
This lens cannot be mounted
You want to attach our 2X or
The attachment reference point on the lens
is not aligned with the lens attachment
reference point on the camera.
Align the attachment reference point on the
lens with the lens attachment reference
Incorrect rotation direction for detaching the
If you turn the lens while holding the
camera, it may cause damage to the lens.
Press the lens release button on the
camera, and gently turn the lens to the lens
attaching/detaching reference points, in the
direction as marked on the camera, and
then pull the lens forward.
Insufficient shutter speed or camera shake.
Turn the focusing ring while checking the
indication or checking an object visually, set
the focus until it becomes clear, and then
Steady the camera and take a photograph
at a shutter speed of 1/125 secs.
The aperture adjustment ring on the lens is
not set to the minimum aperture value.
Turn the aperture adjustment ring to set it to
the minimum aperture value. (F22)
A manual focusing lens has trouble with
Use the focusing ring to adjust the focus.
Adjust the aperture adjustment ring
The non-CPU lens may not be compatible,
This lens corresponds to the Nikon AI-P
See the camera manual or flash manual.
This lens is not a “D-type” lens (which
relays distance information to the camera).
This lens does not have an electric contact
signal, so there is no communication with
the camera through electric signals.
This lens is a single lens.
This lens is designed for its own mount. Purchase the designated lens mount.
Our converter is designed for the T (M42
screw) mount only. Therefore it cannot be
used with the 16 mm F2.0 ED AS UMC CS
Use each company's own mount converter.
However, be aware that auto focusing is
1. It compensates for aberrations by using a complex aspherical and glass aspherical
lens and, at the fully opened position, produces high resolution and high contrast at
the center of the lens as well as around the periphery.
2. Controls chromatic aberratio n optimally by using premium optical glass with high
refraction and extra-low dispersion.
3. Allows precision focus control by providing a soft and wide focus operation area.
4. Ultra multi coating design for optimum suppression of ghost images and vivid color
5. Maintains an unchanged size with its inner focus design.
A / S/ M / P mode (NIKON AE)
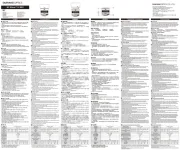
89.9 .9 .9 .9 .9 .993 93 93 93 93
96.1 .6 .6 .4 .6 .1 .1 .993 94 956 122 122 114 122 101 120
550g 530g 530g 530g 570g 575g 570g 570g 560g 570g
35mm (1:1x) 115.7 (diagonal)
APS-C (1:1.5x) 93.9 (diagonal)
APS-C (1:1.6x) 89.9 (diagonal)
Four-Thirds (1:2x) 76.2 (diagonal)
14 elements in 10 groups (1 glass ASP & 1 hybrid ASP)