Theben thePiccola S360-100 DE Manual

Theben Bevægelsesdetektor thePiccola S360-100 DE

Læs gratis den danske manual til Theben thePiccola S360-100 DE (5 sider) i kategorien Bevægelsesdetektor. Denne vejledning er vurderet som hjælpsom af 4 personer og har en gennemsnitlig bedømmelse på 4.9 stjerner ud af 2.5 anmeldelser. Har du et spørgsmål om Theben thePiccola S360-100 DE, eller vil du spørge andre brugere om produktet?

Side 1/5
1
thePiccola P360-100 DE WH
2090200
307146 05
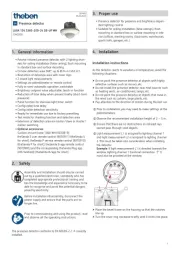
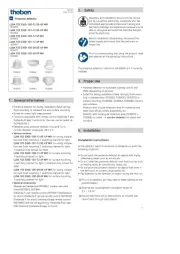
Presence detector
EN
1. Basic safety information
Danger of death through electric shock or fire!
qualied electrician!
WARNING
The device conforms with EN 60669-2-1 if correctly
installed
2. Proper use
Presence detector for automatic lighting control depen-
dent on presence and brightness
Suitable for ceiling installation (false ceilings)
Suitable for small rooms, corridors, toilets, etc.
Disposal
Dispose of the device in an environmentally sound manner
(electronic waste)
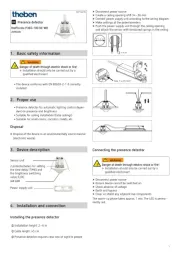
3. Device description
Sensor unit
red LED
Power supply unit
2 potentiometers for setting
the time delay (TIME) and
the brightness switching
value (LUX)
4. Installation and connection
Installing the presence detector
LInstallation height: 2–6 m
LCable length: 45 cm
LPresence detector requires clear line of sight to people
Disconnect power source
Create a ceiling opening of Ø 34–36 mm
Connect power supply unit according to the wiring diagram
Make settings at the potentiometers
Push the power supply unit through the ceiling opening
and attach the sensor with tensioned springs in the ceiling
Ø 34-36 mm
6–8 mm
max. 1 x 2,5 mm
2
Connecting the presence detector
Danger of death through electric shock or fire!
qualied electrician!
WARNING
Disconnect power source
Ensure device cannot be switched on
Check absence of voltage
Earth and bypass
Cover or shield any adjacent live components
The warm-up phase takes approx. 1 min. The LED is perma-
nently red.
2
Individual switching
In individual switching, the presence detector as master
detects presence and brightness and controls lighting.
Parallel switching / Master-Slave
If the detection area covered by a single presence detector
is insufcient (in larger rooms), then several detectors can
be operated in parallel by connecting the S and terminals.
Presence detection is performed by all detectors together. The
master measures the brightness and controls the lighting. The
other detectors (slaves) only provide presence information via
the terminal.
At the slave devices set the potentiometer for time delay
(TIME) to 30 s and for switching value (LUX) to or deac-
tive the brightness measurement with remote control, press
button .
LIf the operating voltage remains at the S terminal < 1 sec.,
the master interprets this as a key signal. Operating vol-
tage > 2 sec. is interpreted as a slave signal and executed
correspondingly. For this reason the light does not switch
on until 2 sec. after a movement has been detected by the
slave device.
SlaveMaster
Push button control
The lighting can be manually switched on/off via a button. If
the light is switched on manually, it will remain on as long as
people are present (plus time delay). Then the light goes into
the set automatic mode. If the light is switched off manually,
it will remain off as long as people are present (plus time
delay). Then the light goes back to automatic mode.
Fully or semi-automatic device
Lighting control via the presence detector operates fully
automatically for increased comfort or semi-automatically
for greater energy savings. The lighting switches on and off
automatically as „fully automatic device“. In „Semi automatic“
mode, it must be switched on manually and switches off
automatically. Settings are entered via remote control.
Switching behaviour
Every time the power supply is switched on, the presence
detector runs through two phases that are shown on an LED
and the connected lighting:
1. Warm-up phase (1 min)
The red LED ashes at one second intervals, the switch
contact is closed (light on).
The detector does not react to push button commands
and remote control commands.
2. Operation
The detector is ready for operation (LED off), and when
no one is present, the light switch contact opens (light
off).
Installation instructions and detection area
As the detector reacts to variations in temperature, avoid the
following situations:
Do not point the presence detector at objects with highly-
reective surfaces such as mirrors, etc.
Do not install the presence detector near heat sources such
as heating vents, air conditioners, lamps, etc.
Do not point the presence detector at objects that move in
the wind such as curtains, large plants, etc.
Pay attention to the direction of motion during the test run.
2,5 m
360°
Ø 2 m
Ø 8 m
Lrecommended installation height: 2 – 2.5 m/max. 6 m
LTransverse detection area: 8 m (transversal to the detector)
LFrontal detection area: 2 m (directly approaching the detector)
LDetection area sitting: 2 m
LDetection angle: 360°
5. Walking test
The walking test is used to test the detection area.
Set the time delay potentiometer (TIME) to T (Test). The
presence detector only reacts to movements, brightness
measurement is switched off.
Walk through the detection area. Every detected movement
is indicated by the LED, and the light switch contact closes.
When no one is present the light switch contact opens after
5 seconds.
LIf the walking test is carried out using the slave device, the
walking test must also be activated on the master device.


Produkt Specifikationer

Mærke: Theben
Kategori: Bevægelsesdetektor
Model: thePiccola S360-100 DE

Har du brug for hjælp?

Hvis du har brug for hjælp til Theben thePiccola S360-100 DE stil et spørgsmål nedenfor, og andre brugere vil svare dig