Viewsonic M1 mini Manual


Læs gratis den danske manual til Viewsonic M1 mini (97 sider) i kategorien videoprojektorer. Denne vejledning er vurderet som hjælpsom af 24 personer og har en gennemsnitlig bedømmelse på 4.8 stjerner ud af 12.5 anmeldelser. Har du et spørgsmål om Viewsonic M1 mini, eller vil du spørge andre brugere om produktet?

Side 1/97
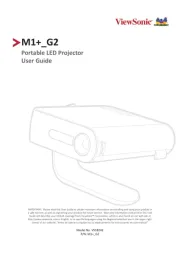
M1 mini Plus
Portable LED Projector
User Guide
Model No. VS18107
P/N: M1 mini Plus
IMPORTANT: Please read this User Guide to obtain important information on installing and using your product in
a safe manner, as well as registering your product for future service. Warranty information contained in this User
Guide will describe your limited coverage from ViewSonic Corporation, which is also found on our web site at ®
http://www.viewsonic.com in English, or in specific languages using the Regional selection box in the upper right
corner of our website. “Antes de operar su equipo lea cu idadosamente las instrucciones en este manual”
2
Thank you for choosing ViewSonic®
As a world-leading provider of visual solutions, ViewSonic® is dedicated to exceeding
the world’s expectations for technological evolution, innovation, and simplicity.
At ViewSonic®, we believe that our products have the potential to make a positive
impact in the world, and we are confident that the ViewSonic® product you have
chosen will serve you well.
Once again, thank you for choosing ViewSonic®!
3
Safety Precauons
P wing before you start using the projector.lease read the follo Safety Precauons
Keep this user guide in a safe place for later reference.
Read all warnings and follow all instrucons.
Allow at least 20“ (50 cm) clearance around the projector to ensure proper
venlaon.
Place the projector in a well-venlated area. Do not place anything on the
projector that prevents heat dissipaon.
Do not place the projector on an uneven or unstable surface. The projector may
fall over, causing personal injury or projector malfuncon.
Do not use if the projector is lted at an angle of more than 10° degrees le or
right, nor at an angle of more than 15° degrees forwards or backwards.
Do not look straight at the projector lens during operaon. The intense light
beam may damage your eyes.
Always open the lens shuer or remove the lens cap when the projector lamp is
on.
Do not block the projecon lens with any objects when the projector is under
operaon as this could cause objects to become heated and deformed or even
cause a re.
The lamp becomes extremely hot during operaon. Allow the projector to
cool for approximately 45 minutes prior to removing the lamp assembly for
replacement.
Do not use lamps beyond the rated lamp life. Excessive use of lamps beyond the
rated life could cause them to break on rare occasions.
Never replace the lamp assembly or any electronic component unless the
projector is unplugged.
Do not aempt to disassemble the projector. There are dangerous high voltages
inside which may cause death if you should come into contact with live parts.
When moving the projector, be careful not to drop or bump the projector on
anything.
Do not place any heavy objects on the projector or connecon cables.
Do not stand the projector on end vercally. Doing so may cause the projector to
fall over, causing personal injury or projector malfuncon.
Avoid exposing the projector to direct sunlight or other sources of sustained
heat. Do not install near any heat sources such as radiators, heat registers,
stoves, or other devices (including ampliers) that may increase the temperature
of the projector to dangerous levels.
4
Do not place liquids near or on the projector. Liquids spilled into the projector
may cause it to fail. If the projector does become wet, disconnect it from the
power supply and call your local service center to have the projector serviced.
When the projector is under operaon, you may sense some heated air and odor
from its venlaon grill. It is a normal operaon and not a defect.
Do not aempt to circumvent the safety provisions of the polarized or
grounding-type plug. A polarized plug has two blades with one wider than the
other. A grounding-type plug has two blades and a third grounding prong. The
wide and third blade are provided for your safety. If the plug does not t into
your outlet, obtain an adapter and do not aempt to force the plug into the
outlet.
When connecng to a power outlet, DO NOT remove the grounding prong.
Please ensure grounding prongs are NEVER REMOVED.
Protect the power cord from being treaded upon or pinched, parcularly at the
plug, and at the point where it emerges from the projector.
In some countries, the voltage is NOT stable. This projector is designed to
operate safely within a voltage between 100 to 240 volts AC, but could fail if
power cuts or surges of ±10 volts occur. In areas where voltage may uctuate
or cut out, it is recommended that you connect your projector through a power
stabilizer, surge protector, or uninterruptable power supply (UPS).
If smoke, an abnormal noise, or a strange odor is present, immediately switch
the projector o and call your dealer or ViewSonic®. It is dangerous to connue
using the projector.
Use only aachments/accessories specied by the manufacturer.
Disconnect the power cord from the AC outlet if the projector is not being used
for a long period of me.
Refer all servicing to qualied service personnel.
5
Contents
Safety Precautions 3 .......................................................
Introduction 8 ................................................................
Features 8 ..................................................................................................................
Package Contents 9 ...................................................................................................
Product Overview 10 .................................................................................................
Projector 10 ................................................................................................................
Remote Control 11 .....................................................................................................
Remote Control - Effective Range 12 .........................................................................
Remote Control - Replacing the Batteries 12 .............................................................
Initial Setup 13 ...............................................................
Choosing a Location - Projection Orientation .......................................................13
Projection Dimensions .................................................................... ......................14
Top Plate Removal/Installation 15 ............................................................................
Making Connections 16 ..................................................
Connecting to Power 16 ............................................................................................
Using the Battery 17 ..................................................................................................
Battery Usage Time Information 17 ...........................................................................
Connecting to External Devices ............................................................................18
HDMI Connection .................................................................................................. 18
USB Connection 18 .....................................................................................................
Wireless Screen Mirroring 19 .....................................................................................
Connecting to Bluetooth 20 ......................................................................................
Bluetooth Speaker 20 .................................................................................................
Bluetooth Out 22 ........................................................................................................
Connecting to Networks 23 .......................................................................................
Wi-Fi Connection 23 ...................................................................................................
Custom SSID .......................................................................................................... 25
6
Using the Projector 27 ....................................................
Starting Up the Projector 27 .................................................................... ..................
Adjusting the Projected Image 28 .............................................................................
Adjusting the Projector's Height and Projection Angle 28 .........................................
Adjusting the Focus 29 ...............................................................................................
First Time Activation 30 .............................................................................................
Preferred Language ............................................................................................... 30
Projection Orientation 31 ..........................................................................................
Network Settings 31 ...................................................................................................
Shutting Down the Projector ................................................................................32
Input Source Selected - On-Screen Display (OSD) Tree ......................................... 33
Operating the Projector 43 .............................................
Home Screen 43 ........................................................................................................
Home Screen - On-Screen Display (OSD) Menu Tree ...........................................44
Menu Operations 48 .................................................................................................
File Management 48 ..................................................................................................
How to Use the Media Control Bar Buttons 50 ..........................................................
Supported File Formats 51 .........................................................................................
Apps Center 52 ...........................................................................................................
Aptoide 53 ..................................................................................................................
Bluetooth 55 ..............................................................................................................
Setting 56 ...................................................................................................................
Screen Mirroring 69 ...................................................................................................
Power Bank Function 72 ............................................................................................
7
Appendix 73 ...................................................................
Specifications 73 .................................................................... ....................................
Projector Dimensions ............................................................................................ 74
Timing Chart 74 .........................................................................................................
HDMI Video Timing ............................................................................................... 74
HDMI Support PC Timing ....................................................................................... 75
3D Support Timing ................................................................................................. 76
LED Indicators .......................................................................................................77
Glossary 78 ................................................................................................................
Troubleshooting 80 ...................................................................................................
Maintenance.........................................................................................................82
General Precautions 82 ..............................................................................................
Cleaning the Lens .................................................................................................. 82
Cleaning the Case 82 ..................................................................................................
Storing the Projector 82 .............................................................................................
Regulatory and Service Information 83 ..........................
Compliance Information 83 .......................................................................................
FCC Compliance Statement 83 ...................................................................................
FCC Radiation Exposure Statement 84 .......................................................................
CE Conformity for European Countries 84 .................................................................
Declaration of RoHS2 Compliance......................................................................... 85
Indian Restriction of Hazardous Substances ......................................................... 86
Remote control: 86 ....................................................................................................
Battery: 86 ..................................................................................................................
Product Disposal at End of Product Life ................................................................ 87
Copyright Information 88 ..........................................................................................
Customer Service 89 ..................................................................................................
Limited Warranty .................................................................................................. 90
Mexico Limited Warranty ...................................................................................... 93
8
Introducon
This Lamp Free Pocket Cinema provides users with high-performance LED
projecon and a user-friendly design to deliver high reliability and ease of use.
NOTE: Some of the features may not be available on your projector. Actual
performance may vary and subject to model specicaons.
Features
Short throw lens design allows for a projected 39” screen size from only 1 meter
away.
Auto V. keystone to correct a distorted image automacally.
Excellent audio performance by JBL.
Instant on/o and great colors.
Swappable color top plates and exible angle adjustment.
Mul-language On-Screen Display (OSD) menus.
Embedded baery for easy outdoor projecon.
User-friendly UI design for easy navigaon.
LED light source with excellent light source life (30,000 hours).
Color modes for every occasion.
8 GB internal storage (Max. 4 GB available for user storage).
Bluetooth speaker, Bluetooth out, and Screen Mirroring features.
NOTE: The apparent brightness of the projected image will vary depending on
the ambient lighng condions, selected input signal contrast/brightness
sengs, and projecon distance.
9
Package Contents
+
CR2032
1
2
3
64
5
7
Item Descripon
[1] M1 mini Plus Projector
[2] Swappable Top Plate
[3] Quick Start Guide
[4] Lanyard
[5] CR2032 Battery
[6] Remote Control
[7] Power Adapter
NOTE: The CR2032 battery is inside the remote control.
10
Product Overview
Projector
HDMI
Focus Ring
Power Switch
IR Receiver
LED
Indicator
IR Receiver
USB Type A
Port
DC IN
(USB-C Port)
HDMI Port
Power Switch
Smart Stand
Vent
Lens
Top Plate
Lanyard
Aachment
Point
Speaker
11
Remote Control
Buon DescriponIcon
Power Turns the projector On or O
Home Access the screenHome
Up/Down/Le/Right Navigates and selects the desired menu items and
makes adjustments
OK Conrms the selecon
Sengs Displays the Sengs menu
Return Returns to the previous screen
Volume Up Increase the volume level
Mute Mute the volume
Volume Down Decrease the volume level
12
Remote Control - Eecve Range
To ensure proper funcon of the remote control
follow the steps below:
1. The remote control must be held at an angle
within 30° perpendicular to the projectors IR
remote control sensor(s).
2. The distance between the remote control and
the sensor(s) should not exceed 8 m (26 .)
NOTE: Refer to the illustraon for the locaon
of the infrared (IR) remote control
sensor(s).
IR Receiver
IR Receiver
Remote Control - Replacing the Baeries
1. Place the remote control facedown and remove the baery tray from the boom
of the remote control by pressing the side tab and pulling it out.
2. Remove any exisng baery (if necessary) and install one CR2032 baery.
NOTE: Observe the baerys polaries as indicated.
3. Replace the baery tray by aligning it with the base and pushing it back into
posion.
CR2032
OPEN
PUSH
RELEASE
CR2032
OPEN
PUSH
RELEASE
NOTE:
Avoid leaving the remote control and baeries in excessive heat or a humid
environment.
• Replace only with the same or equivalent type recommended by the
baery manufacturer.
If the baery is drained or if you will not be using the remote control for
an extended period of me, remove the baery to avoid damage to the
remote control.
Dispose of used baeries according to the manufacturers instrucons and
local environment regulaons for your region.
1313
Inial Setup
This secon provides detailed instrucons for the inial set up your projector.
Choosing a Locaon - Projecon Orientaon
Personal preference and room layout will decide the installaon locaon. Consider
the following:
Size and position of your screen.
Location of a suitable power outlet.
Location and distance between the projector and other equipment.
The projector is designed to be installed in one of the following locations:
Locaon
Front Table
The projector is placed near
the oor in front of the screen.
Front Ceiling
The projector is suspended
upside-down from the ceiling
in front of the screen.
Rear Table¹
The projector is placed near
the oor behind the screen.
Rear Ceiling¹
The projector is suspended
upside-down from the ceiling
behind the screen.
1. A rear projecon screen is required.
1414
Projecon Dimensions
16:9 Image on a 16:9 Screen
NOTE: (e) = Screen / (f) = Center of Lens
16:9 Image on a 16:9 Screen
(a) Screen Size (b) Projecon
Distance (c) Image Height Image Width
in. cm in. min. cm in. mm
30 76.2 32.16 0.82 14.7 37.36 26.15 664
40 101.6 42.88 1.09 19.6 49.81 34.86 886
50 127 53.6 1.36 24.5 62.26 43.58 1107
60 152.4 64.32 1.63 29.4 74.72 52.29 1328
70 177.8 75.04 1.91 34.3 87.17 61.01 1550
80 203.2 85.76 2.18 39.2 99.62 69.73 1771
90 228.6 96.48 2.45 44.1 112.07 78.44 1992
100 254 107.2 2.72 49 124.53 87.16 2214
NOTE: There is a 3% tolerance among these numbers due to optical component
variations. It is recommended to physically test the projection size and
distance before permanently installing the projector.
1515
Top Plate Removal/Installaon
The M1 mini Plus comes with different color top plates.
1
2
To change the top plate:
1. Remove the top plate by carefully prying up one corner and lifting the top plate
off (as shown above).
2. To install a top plate, line up the circular hole and prongs located under the top
plate with the spacing and holes of the projector. Gently press the top plate into
place.
16
Making Connecons
This section guides you on how to connect the projector with other equipment.
Connecng to Power
Connect the power adapter to the USB-C Port on the side of the projector.
NOTE: 
• Charge the projector for 2.5 hours via our included power adapter before
using it for the rst me.
• Its recommended to use the included power adapter when using the
projector, especially when the projector is low on baery.
The projector is compable with any 9V/2A power adapter or power bank
for baery charging and power on use.
• The projector supports both 5V or 9V charging. If you are not using our
included power adapter for charging, it will take longer than 2.5 hours to
reach full baery.
• To power on the projector, the power bank should be at least 18W (9V/2A)
and support Quick Charge (QC) protocol output.
17
Using the Baery
The baery level icon will show at the top right of the Home Screen. As the
baerys power level runs low, the screen will show a “low baery message”.
Baery Usage Time Informaon
Charging About 2.5 hours
Usage Hours 1.4 hours (Normal) / 1.5 hours (ECO)
Baery Level Indicator (Charging) During Charging: Red LED light is On
Full Charge: Green LED light is On
NOTE:  If you are not using our power adapter for charging, the charging me
will take longer than 2.5 hours.
1818
Connecng to External Devices
HDMI Connecon
Connect one end of an HDMI cable to the HDMI port of your video device. Then
connect the other end of the cable to the HDMI port (supports HDCP 1.4/HDMI 1.4)
of your projector.
USB Connecon
To enjoy photos, music, and movies, simply plug in a USB ash drive to the USB
Type A port. For supported le formats, see page 51.
HDMI
USB A
HDMI
1919
Wireless Screen Mirroring
Screen Mirroring provides a 5GHz Wi-Fi connecon for users to mirror the screen
on their personal device.
NOTE: Ensure your device is connected to the same network as the projector.
For iOS:
1. Access the drop down control menu.
2. Select the “Screen Mirroring” icon.
3. Choose “ViewSonic PJ-XXXX.
For Android:
1. Download and install the “Google Home” applicaon and open it.
2. Pull-to-refresh the app and wait for 30 seconds.
3. ViewSonic PJ-XXXX” will now be visible, select it.
NOTE: Some Android devices support direct “Casng. If your device does, go
to the Casng feature and choose “ViewSonic PJ-XXX” from the list of
available devices. You can also scan the FAQ QR code and follow the
steps to directly cast your Android device.
2020
Connecng to Bluetooth
Bluetooth Speaker
The projector is equipped with Bluetooth that allows the user to connect their
device wirelessly for audio playback.
Seng Screen Mir ringro
Add AppAdd AppAdd AppHDMI
Apps Center
File Management
Bluetooth
13:00
To connect and pair your device:
1. Go to: > Home Bluetooth.
2. Use the and Le Right direconal buons on the remote control to select
Bluetooth Speaker Bluetooth Pairing or . Then press on the remote control.OK
21
3. When the below dialogue box appears, select and press on the remote Yes OK
control to enter Bluetooth mode.
4. A sound eect will be audible upon entering pairing mode.
5. Upon successful connecon, another sound eect will be audible.
NOTE: 
• Once paired, if both the projector and your device are powered On they
will automacally connect via Bluetooth.
• The projectors name will be labeled as “M1 mini Plus.
22
Bluetooth Out
Connect the projector to external headphones or speakers that support Bluetooth.
To connect and pair your device:
1. Go to: > Home Bluetooth.
2. Use the and Le Right direconal buons on the remote control to select the
Bluetooth Out opon.
3. The projector will search for nearby Bluetooth devices. Select your device from
the list and press on the remote control.OK
2323
Connecng to Networks
Wi-Fi Connecon
To connect to a Wi-Fi network:
1. Go to: > > Home Seng Network Sengs > Wi-Fi
2. Press or on the remote control to select .Le Right On
3. Available Wi-Fi networks will then be displayed. Select one of the available Wi-Fi
networks.
2424
4. If you connect to a secure Wi-Fi network, you must enter the password when
prompted.
2525
Custom SSID
1. Go to: > > Home Seng Network Sengs > Wi-Fi
2. Press or on the remote control to select .Le Right On
3. From the available Wi-Fi networks list select Others OK and press on the remote
control.
4. Enter the SSID and select the security level.
2626
5. Enter the password when prompted.
NOTE:  It is recommended to let the system congure the network sengs
automacally.
27
Using the Projector
Starng Up the Projector
1. Ensure the projector is connected to a power source or that the baery has
sucient charge.
2. Push the to turn on the projector, and press the Power Switch Power buon on
the remote control.
3. Move the Smart Stand to your desired viewing angle.
NOTE: When not in use, please push the Power Switch to O. If only using the
Power buon on the remote control to power o, the projector will
enter standby mode and the embedded baery will sll consume some
power.
or
2828
Adjusng the Projected Image
Adjusng the Projector's Height and Projecon Angle
The projector is equipped with one (1) Smart Stand. Adjusng the stand will change
the projectors height and the vercal projecon angle. Carefully adjust the stand to
ne tune the projected image’s posion.
NOTE: 
If the projector is not placed on a at surface or the screen and the
projector are not perpendicular to each other, the projected image can
become trapezoidal. However, the “Auto Vercal Keystone” funcon will
correct the issue automacally.
It is not recommended to use the Smart Stand at 90° degrees.
2929
Adjusng the Focus
To adjust the image focus of the on-screen image, slowly move the focus ring
forwards or backwards.
30
First Time Acvaon
If the projector is acvated for the rst me, you will need to select your Preferred
Language, Projecon Orientaon, and Network Sengs. Follow the on-screen
instrucons using the OK and Up/Down/Le/Right buons on the remote control.
When the “Finish screen” appears, this indicates the projector is ready to use.
Preferred Language
Select the desired language and press OK to conrm the selecon.
3131
Projecon Orientaon
Select the preferred projecon orientaon and press to conrm the selecon. OK
For more informaon, see page 13.
Network Sengs
Select one of the available Wi-Fi opons. For more informaon, see page 23.
3232
Shung Down the Projector
1. Push the on the projector or press the Power Switch Power buon on the
remote control.
2. Press the Power buon on the remote control and the following message will
appear:
3. Press the Up/Down buons on the remote control to select Turn O and press
OK on the remote control.
NOTE: When not in use, please push the Power Switch to O. If only using the
Power buon on the remote control to power o, the projector will
enter standby mode and the embedded baery will sll consume some
power.
33333333
Input Source Selected - On-Screen Display (OSD) Tree
Aer your input source is selected, you can adjust the Image Seng and Advanced
menus.
Main Menu Sub-menu Menu Opon
Image Seng Color Mode Brightest
TV
Movie
Gaming
User 1
User 2
Brightness (-/+, 0~100)
Contrast (-/+, 0~100)
Color Temp 6500K
7500K
9300K
User Red Gain (-/+, 0~199)
Green Gain (-/+, 0~199)
Blue Gain (-/+, 0~199)
Red Oset (-/+, 0~100)
Green Oset (-/+, 0~100)
Blue Oset (-/+, 0~100)
Tint (-/+, 0~100)
Saturaon (-/+, 0~100)
Sharpness (-/+, 0~100)
Gamma 1.8
2.0
2.2
2.35
2.5
sRGB
Cubic
3434
Main Menu Sub-menu Menu Opon
Image Seng Reset Current Color
Sengs
Yes
Cancel
Advanced Aspect Rao Auto
4:3
16:9
HDMI Sengs Range
Auto
Full
Limited
Advanced 3D Sengs 3D Sync Auto
O
Frame Sequenal
Frame Packing
Top-Boom
Side-by-Side
3D Sync Invert Disable
Invert
JBL Audio Volume (-/+, 0~20)
Mute O
On
Light Source Level Full
Eco
Informaon Ex. HDMISource
Resoluon Ex. 1920 x 1080 @60Hz
3D Format Ex. Frame Packing
35353535
Image Seng Menu
Aer your input source is selected, you can adjust the Image Seng menu.
To access the Image Seng menu:
1. Press Seng on the remote control.
2. Use the Up/Down buons to select a menu.
3636
3. Then use the Le/Right buons to enter the sub-menu(s) and/or adjust the
sengs.
4. Press the Return buon to go to the previous menu or exit.
37373737
Menu Opon Descripon
Color Mode The projector is preset with several predened picture
modes so that you can choose one to suit your operang
environment and input signal.
Brightest
Maximizes the brightness of the projected image. This
mode is suitable for environments where extra-high
brightness is required, i.e. well-lit rooms.
TV
Opmized for viewing sports in well-lit environments.
Gaming
Designed for playing video games.
Movie
Appropriate for colorful movies, video clips from digital
cameras, or DVs through the PC input. Best for low-light
environments.
User 1/User 2
Recalls the customized user sengs.
NOTE: Only supports HDMI/USB-C signal input.
Brightness The higher the value, the brighter the image. Lower
values will result in a darker image.
1
Contrast Use this to set the peak white level aer you have
previously adjusted the Brightness seng to suit your
selected input and viewing environment.
1
3838
Menu Opon Descripon
Color Temp Select the color temperature seng.
6500K: Maintains normal white coloring.
7500K: A higher, cooler color temperature than 6500K.
9300K: The highest color temperature; makes the
image appear the most bluish-white.
User Color: Adjust red, green, and blue values as
desired.
Tint The higher the value, the more greenish the picture
becomes. The lower the value, the more reddish the
picture becomes.
Saturaon Refers to the amount of that color in a video picture.
Lower sengs produce less saturated colors; in fact,
a seng of “0” removes that color from the image
enrely. If the saturaon is too high, that color will be
overpowering and unrealisc.
Sharpness A high value results in a sharper picture; a low value
soens the picture.
Gamma Reects the relaonship between input source and
picture brightness.
Reset Current
Color Sengs
Return current color sengs to their default values.
393939
Advanced Seng Menu
Aer your input source is selected, you can adjust the Advanced menu.
To access the menu:Advanced
1. Press Seng on the remote control.
2. Press the Right buon to access the Advanced menu.
404040
3. Use the Up/Down buons to select a menu.
4. Then use the Le/Right buons to enter the sub-menu(s) and/or adjust the
sengs.
5. Press the Return buon to go to the previous menu or exit.
414141
Menu Opon Descripon
Aspect Rao The aspect rao is the rao of the image width to the
image height. With the advent of digital signal processing,
digital display devices, like this projector, can dynamically
stretch and scale the image output to a dierent aspect
than that of the image input signal.
NOTE: Only supports HDMI signal input.
Auto
Scales an image proporonally to t the projectors nave
resoluon in its horizontal width. This is suitable for the
incoming image which is neither 4:3 nor 16:9 and you
want to make the most use of the screen without altering
the image’s aspect rao.
4:3
Scales an image so that it is displayed in the center of the
screen with a 4:3 aspect rao. This is most suitable for 4:3
images like computer monitors, standard denion TV,
and 4:3 aspect DVD movies, as it displays them without
aspect alteraon.
16:9
Scales an image so that it is displayed in the center of
the screen with a 16:9 aspect rao. This is most suitable
for images which are already in a 16:9 aspect, like high
denion TV.
HDMI Sengs Range
Select a suitable color range according to the color range
seng of the connected output device.
Full: Sets the color range from 0~255.
Limited: Sets the color range from 15~235.
Auto: Sets the projector to detect the range of the
input signal automacally.
424242
Menu Opon Descripon
3D Sengs Enables you to enjoy 3D movies, videos, and sporng
events in a more realisc way by presenng the depth of
the images while wearing 3D glasses.
3D Sync
Adjust and choose from: Automac, O, Frame
Sequenal, Frame Packing, Top-Boom, Side-by-Side.
3D Sync Invert
Allows for correcon if the 3D image depth is inversed.
JBL Adjust the audio sengs.
Light Source Level Select the suitable power consumpon of the LED.
Full
100%
Eco
70%
Informaon Shows Input Source and Resoluon.
43
Operang the Projector
This secon will introduce the Home Screen and its menus.
Home Screen
The Home Screen is displayed every me you start the projector. To navigate the
Home Screen, simply use the direconal buons on the remote control. You can
return to the main Home Screen at any me by pressing the buon on the Home
remote control, regardless of what page you are on.
Seng Screen Mir ringro
Add AppAdd AppAdd AppHDMI
Apps Center
File Management
Bluetooth
13:00
Menu Descripon
File Management Provides a user interface to manage files and folders.
Apps Center Access and view all installed applications.
Bluetooth Select the appropriate Bluetooth mode.
Seng
Manage various categories such as: Network settings,
Basic and Advanced settings, Date & Time, Firmware
update, and System Information.
Screen Mirroring Mirror your personal device’s screen through the
projector.
HDMI Change to the HDMI input source.
Add App Select your favorite Apps and add them to the Home
Screen.
44
Home Screen - On-Screen Display (OSD) Menu Tree
Main Menu Sub-menu Menu Opon
File
Management
Apps Center Aptoide
Bluetooth Bluetooth
Speaker
Bluetooth
Pairing
Bluetooth Out
Seng Network Sengs OWi-Fi
On SSID:
Congure IP
IP Address
Subnet Mask
Default Gateway
DNS Server
Others
Date & Time Automac Date
& Time
O
On
Date
Time
Time Zone
Time Format 12 Hours
24 Hours
45
Main Menu Sub-menu Menu Opon
Seng Basic Sengs Language English
French
German
Italian
Spanish
Russian
繁體中文
簡體中文
日本語
韓語
Swedish
Dutch
Turkish
Czech
Portuguese
Thai
Polish
Finnish
Arabic
Indonesian
Hindi
Vietnam
Greek
Projector
Projecon
Front Table
Front Ceiling
Rear Table
Rear Ceiling
Keystone
Manual (-/+, -40~40)
Auto V Keystone Disable
Enable
46
Main Menu Sub-menu Menu Opon
Seng Advanced
Sengs
Power On Source Home
HDMI
Power On/O
Ring Tone
O
On
Smart Energy Auto Power O Disable
10 minutes
20 minutes
30 minutes
Sleep Timer Disable
30 minutes
1 hour
2 hours
3 hours
4 hours
8 hours
12 hours
Power Saving Enable
Disable
JBL Audio Volume (-/+, 0~20)
Mute O
On
Light Source
Level
Full
Eco
47
Main Menu Sub-menu Menu Opon
Seng Advanced
Sengs
High Altude
Mode
O
On
Reset Sengs Yes
Cancel
Reset to Factory
Default
Yes
Cancel
Firmware
Upgrade
Soware Update
Online
Soware Update
by USB
OTA Reminder Enable
Disable
Soware Version
Informaon Light Source Hours
System Version
Memory
Informaon
XX GB of XX GB
Used
Wi-Fi Mac Address
Serial Number
Screen
Mirroring
HDMI
Add App
Add App
Add App
48
Menu Operaons
File Management
Easily manage les and folders.
1. Select: > Home File Management.
Seng Screen Mir ringro
Add AppAdd AppAdd AppHDMI
Apps Center
File Management
Bluetooth
13:00
2. Select a device on the source list. Use the direcon buons to select the desired
le. Then press on the remote control to open the selected le.OK
File Management
/Pictu sre
Local Storage
Photo 1-3.png
Photo 1-4.png
Photo 1-5.png
Photo 1-6.png
Photo 1-7.png
USB
P
P
P
h
h
h
o
t
t
o
1
1
1
-
3
3
3
.
p
n
g
Photo 1-2.png
Photo 1-1.png
13:00
3. Press the Return buon to go to a previous a level.
NOTE:  Press the Home buon on the remote control to return to the Home
Screen at anyme.
49
How to Edit a File
1. While in File Management OK, press and hold the buon for three (3) seconds.
2. A check box will appear at the front of each le. Use the direcon buons and
press OK to select one or more les.
File Management
/Pictu sre
Local Storage Photo 1-3.png
Photo 1-4.png
Photo 1-5.png
Photo 1-6.png
Photo 1-7.png
USB
P
P
P
h
h
h
o
t
t
o
1
1
1
-
3
3
3
.
p
n
g
Photo 1-2.png
Photo 1-1.png
13:00
3. By pressing the Right buon, Copy, Paste, Cut, Delete, Select All, and Return
boxes will be available for use.
4. Select your desired acon and press OK to execute.
5. If you are Copying or Cung, select your desnaon folder to complete the
process.
50
How to Use the Media Control Bar Buons
The media control bar buons will appear on screen if a video, music, or photo le
are selected to be opened.
Picture Video Music
Back Back Back
Play Rewind Play
Next Play Pause
Zoom in Pause Next
Zoom out Fast Forward Shue
Rotate (le) Next Repeat All
Rotate (right) Volume Control Repeat One
Play List
Informaon
NOTE:
Tips for Using USB
When using USB for reading and/or storage please keep in mind the following:
1. Some USB storage devices may not be compable.
2. If you use a USB extension cable, the USB device may not recognize the USB.
3. Only use USB storage devices formaed with Windows FAT32 or NTFS le
system.
4. Larger les will need extra me to load.
5. Data on USB storage devices may be damaged or lost. Back up important les.
51
Supported File Formats
Mulmedia Formats
Extension Type Codec
.xvid Video Xvid, H.264
.avi Audio MP3
.mp4
.m4v
.mov
Video H.264/H.265/MPEG-4
Audio AAC
.mkv Video H.264
.ts
.trp
.tp
.mts
.m2ts
Video H.264, MPEG-2
Audio MP3/AAC
.vob Video MPEG-1, MPEG-2
Audio DVD-LPCM
.mpg Video MPEG-1
Oce Formats
Items Indicators
I. Document
Viewing Funcon
1 doc/docx Able to open and read documents in doc/docx
2 xls/xlsx Able to open and read documents in xls/xlsx
3 ppt/pptx Able to open and read documents in ppt/pptx
4 Able to open and read documents in pdfPdf
II.
Supporng
Interface
Language
1Supporng Interface
44 languages
English, Simplied Chinese, Chinese (TW), Chinese
(HK), Spanish (LA), French (EU), PT (EU), PT (BR),
German, Russian, Italian, Swedish, Spanish (EU),
Korean, Arabic, Farsi, Serbian, Bosnian, Macedonian,
Bulgarian, Ukrainian, Greek, Norwegian, Danish,
Czech, Hungarian, Slovak, Polish, Romanian,
Finnish, Estonian, Latvian, Lithuanian, Brish
English, Slovenian, Croaan, Turkish, Vietnamese,
Bahasa Indonesia, Dutch, Malay, Thai, Hindi,
Hebrew, Burmese, Catalan.
5252
Apps Center
View, launch, and uninstall Apps.
1. To view your Apps, select: > Home Apps Center.
Seng Screen Mir ringro
Add AppAdd AppAdd AppHDMI
Apps Center
File Management
Bluetooth
13:00
2. Use the direcon buons to select the desired App. Then press OK on the remote
control to launch the App.
NOTE:  Press the Home buon on the remote control to return to the Home
Screen at anyme.
53
Aptoide
The projector is pre-loaded with the Aptoide store, which allows users to download
and install dierent Apps.
1. Select: > Home Apps Center Aptoide > .
2. Use the direcon buons to navigate the menu opons. When you nd your
preferred App, press the OK buon to install it.
NOTE:
Users can install third-party Apps by .apk le in File Management.
However, some third-party Apps may have compability issues.
Apps not pre-loaded by ViewSonic may not be compable or work
properly.
• Some Apps may require a keyboard or mouse.
Some Apps may be Region-Specic.
5454
To Uninstall Apps
1. Open the Apps Center Home Apps Center by selecng: > .
2. Use the direconal buons to select the desired App.
3. Press and hold on the remote control for three (3) seconds. The below OK
dialogue box will appear:
4. Select to uninstall the App.OK
NOTE: Press the Home buon on the remote control to return to the Home
Screen at anyme.
5555
Bluetooth
The projector is equipped with Bluetooth that allows the user to connect their
device wirelessly for audio playback. For more informaon, see “Connecng to
Bluetooth” on page 20.
Seng Screen Mir ringro
Add AppAdd AppAdd AppHDMI
Apps Center
File Management
Bluetooth
13:00
5656
Seng
Under Seng you can adjust Network, Basic, and Advanced Sengs, Date & Time,
Firmware Update, and view Informaon.
Seng Screen Mir ringro
Add AppAdd AppAdd AppHDMI
Apps Center
File Management
Bluetooth
13:00
Network Sengs
1. Select: > > Home Seng Network Sengs.
13:00
Basic Settings
Network Settings Da & Timete
Ad nced Se In nva ttings formatioFirmware Update
5757
2. View and adjust your Wi-Fi and network sengs.
3. To setup a Wireless connecon, see “Connecng to Networks” on page 23.
5858
Basic Sengs
1. Select: > > .Home Seng Basic Sengs
13:00
Basic Settings
Network Se Da & Timettings te
Ad nced Se In nva ttings formatioFirmware Update
2. Use the and Up Down buons to select the desired opon and press OK. Then
use the and Le Right buons to make adjustments or selecons.
3. To return to a previous menu press the Return buon.
Menu Descripon
Language Select your desired language.
Projector Posion Select the preferred projecon posion.
5959
Menu Descripon
Keystone Adjust trapezoidal screen image distoron.
Manual
Keystone can be adjusted manually from -40 to 40.
Auto V Keystone
Provides a rectangular screen image by automacally
adjusng the keystone number when there is a
trapezoidal screen image caused by the lng of the
projector.
Enable: Automacally adjust the keystone number.
Disable: Manually adjust the keystone number.
NOTE:  If is selected, Manual Auto V Keystone will
change to Disable automacally.
6060
Date & Time
Adjust Date, Time, Time Zone, and Time Format.
NOTE: The me is displayed in the top-right corner aer connecng to the
Internet.
1. Select: > > Home Seng Date & Time.
13:00
Basic SettingsNetwork Settings Da & Timete
Ad nced Se In nva ttings formatioFirmware Update
2. Use the and Up Down buons to select the desired opon and press OK. Then
use the and Le Right buons to make adjustments or selecons.
6161
Menu Descripon
Automac Date & Time Users can synchronize the date and me
automacally aer connecng to the Internet.
On
Turn on synchronizaon.
O
Turn o synchronizaon.
Time Zone Select your desired locaon.
Time Format Select a dierent display me format.
12 Hours
12-hour clock.
24 Hours
24-hour clock.
6262
Firmware Upgrade
Users can update the rmware Online, or by USB, and check the version number.
NOTE:  Do not unplug the power cord, USB, or disconnect from the Internet
during the upgrading process.
1. Before entering the Firmware Upgrade menu, ensure the projector is connected
to the Internet.
2. To enter the menu, select: > > Home Seng Firmware Upgrade.
13:00
Basic SettingsNetwork Se Da & Timettings te
Ad nced Se In nva ttings formatio
Firmware Update
6363
Firmware Update Online
1. Go to: > > Home Seng Firmware Upgrade > Soware Update .Online
2. Select Enter by pressing on the remote control.OK
3. The system will check the ViewSonic website (OTA) and display the below dialog
message if their is new Firmware.
4. By selecng Yes, a progress bar will appear as the update process begins.
UPGRADING SOFTWARE
PLEASE DO NOT TURN OFF
52%
5. Upon reaching 100%, the projector will restart. The whole process will take about
10 minutes.
6. Aer updang the Firmware, it will take a few minutes to restart the projector.
64
Firmware Update by USB
1. Download the latest version from the ViewSonic website and copy the le to a
USB device.
2. Plug the USB into the projector, then go to: > Home Seng > Firmware Upgrade
> Soware Update By USB.
3. Select Enter OK by pressing on the remote control.
4. The system will detect the Firmware version and display the above dialog
message.
5. By selecng Yes, a progress bar will appear as the update process begins.
6. Aer reaching 100%, the projector will restart. The whole process will take about
10 minutes.
7. Aer updang the Firmware, it will take a few minutes to restart the projector.
NOTE: Only the USB A port can support Firmware updang (USB format: FAT32).
65
Advanced Sengs
1. Select: > > Home Seng Advanced Sengs.
13:00
Basic SettingsNetwork Se Da & Timettings te
Advanced Settings In nformatioFirmware Update
2. Use the and Up Down buons to select the desired opon and press OK. Then
use the and Le Right buons to make adjustments or selecons.
3. To return to a previous menu press the Return buon.
66
Menu Descripon
Power On Source Allows the user to enter the desired source directly
aer turning on the projector.
Power On/O Ring Tone Enable or disable the power on/o ring tone.
Auto Power On Direct Power On
Turn on the projector automacally once plugged
into an outlet.
Smart Energy Auto Power O
The projector can turn o automacally aer a set
period of me once no input source is detected.
Sleep Timer
Turn o automacally aer a set period of me.
Power Saving
Lower power consumpon if no input source is
detected aer ve (5) minutes.
NOTE:  The power consumpon of the LED will
be changed to 30% aer no signal is
detected for ve (5) minutes.
JBL Audio Volume
Adjust the volume from 0 to 20.
Mute
Mute or unmute the volume.
Light Source Level Select the suitable power consumpon of the LED.
Full
100%
Eco
70%
67
Menu Descripon
High Altude Mode It is recommended that you use High Altude
Mode when your environment is between 1,500-
3,000 m above sea level, and a temperature
between 5°C-25°C.
NOTE: If you use this projector under other
extreme condions excluding the
above, it may display auto shut-down
symptoms, which is designed to protect
your projector from over-heang. In
cases like this, you should switch to High
Altude Mode to solve these symptoms.
However, this is not to state that this
projector can operate under any and all
harsh or extreme condions.
Reset Sengs Reset the Sengs to default.
NOTE: Language, High Altude Mode, Projector
Posion, Network Sengs, All installed
Apps in the Apps Center, Add App,
and Light Source Hours will remain
unchanged.
Reset to Factory Default Factory reset.
NOTE: Light Source Hours will remain
unchanged.
6868
Informaon
1. Select: > > Home Seng Informaon.
13:00
Basic SettingsNetwork Se Da & Timettings te
Ad nced Seva ttings In nformatio
Firmware Update
2. View system status and informaon.
NOTE: Press the Home buon on the remote control to return to the Home
Screen at anyme.
69
Screen Mirroring
Mirror your personal device’s screen. To setup wireless Screen Mirroring, see
“Wireless Screen Mirroring on page 19.
NOTE: Ensure your device is connected to the same network as the projector.
Seng Screen Mir ringro
Add AppAdd AppAdd AppHDMI
Apps Center
File Management
Bluetooth
13:00
70
Adding Apps
Add your favorite Apps to the .Home Screen
1. From the Home Screen Add App OK, select and then press on the remote
control.
Seng Screen Mir ringro
Add AppAdd AppAdd AppHDMI
Apps Center
File Management
Bluetooth
13:00
2. Use the direconal buons to select the desired App and press OK.
71
3. Now your favorite App will appear on the .Home Screen
Seng Screen Mir ringro
Add AppAdd AppHDMI
Apps Center
File Management
Bluetooth
13:00
Delete Apps From the Home Screen
1. From the Home Screen, select the App you want to delete and press and hold OK
for three (3) seconds.
2. The message, “Do you want to Delete this applicaon from My Favorites?” will
appear.
Seng Screen Mir ringro
Add AppAdd AppHDMI
Apps Center
File Management
Bluetooth
13:00
3. Select , and press to delete the App.Yes OK
72
Power Bank Funcon
The projector can also act as a power bank for your mobile device.
To charge your mobile device:
1. Turn o the projector by pushing the Power Switch.
2. Use the USB Type A port on the projector to connect to a mobile device.
3. A 5V/1A power charge can be provided to the mobile device.
NOTE:  The Power Bank funcon can only work when the projector is powered
o.
73
Appendix
Specicaons
Item Category Specicaons
Projector Type 0.2” WVGA, LED
Display Size 24”~100”
Throw Distance 0.64-2.66 m (39”@1 m)
Lens F=1.7, f=7.5 mm
Opcal Zoom Fixed
Light Source Type RGB LED
Light Source Life
(Normal) up to 30,000 hours
Display Color 1.07 Billion Colors
Keystone -/+ 40 (Vercal)
Baery Capacity 5000 mAh, 3.7V
Input Signal HDMI fh: 15h~102KHz, fv:23~120Hz,
Resoluon Nave 854 x 480
Support VGA (640 x 480) to Full HD (1920 x 1080)
Input
HDMI 1 (HDMI 1.4, HDCP 1.4)
Audio In Bluetooth 4.2
USB Type-A 1 (USB 2.0 Reader; share with power)
USB Type-C 1 (Power input - 5V/4A)
Wi-Fi 1 (5G)
Ouput
Speaker 2W Cube x 1
USB Type A (Power) 1 (USB 2.0, 5V/1A; share with USB reader)
Audio Out Bluetooth 4.2
Power Adapter Input Voltage AC 100-240V, 50/60 Hz (auto switch)
Output Voltage 5V/4A
Local Storage Total: 8 GB Available: 4 GB
Operang
Condions
Temperature 0°C to 40°C (32°F to 104°F)
Humidity 0% to 90% (non-condensing)
Dimensions Physical
(W x H x D)
110 x 104 x 27 mm
(4.3” x 4.1” x 1.06”)
Weight Physical 0.3 kg (0.67 lbs)
Power Saving
Modes
On 16W (Typical)
O < 0.5W (Standby)
< 0.006W (Power O)
7474
Projector Dimensions
110 mm (W) x 104 mm (H) x 27 mm(D)
109.98 mm
Timing Chart
HDMI Video Timing
Timing Resoluon
Horizontal
Frequency
(kHz)
Vercal
Frequency (Hz)
Dot Clock
Frequency
(MHz)
480i 720(1440) x 480 15.73 59.94 27
480p 720 x 480 31.47 59.94 27
576i 720(1440) x 576 15.63 50 27
576p 720 x 576 31.25 50 27
720/50p 1280 x 720 37.5 50 74.25
720/60p 1280 x 720 45 60 74.25
1080/24P 1920 x 1080 27 24 74.25
1080/25P 1920 x 1080 28.13 25 74.25
1080/30P 1920 x 1080 33.75 30 74.25
1080/50i 1920 x 1080 28.13 50 74.25
1080/60i 1920 x 1080 33.75 60 74.25
1080/50P 1920 x 1080 56.25 50 148.5
1080/60P 1920 x 1080 67.5 60 148.5
7575
HDMI Support PC Timing
Resoluon Refresh Rate (Hz) Horizontal
Frequency (kHz)
Dot Clock
Frequency (MHz)
640 x 480
59.94 31.469 25.175
72.809 37.861 31.5
75 37.5 31.5
720 x 400 70.087 31.469 28.3221
800 x 600
56.250 35.156 36
60.317 37.879 40
72.188 48.077 50
75 46.875 49.5
1024 x 768
60.004 48.363 65
70.069 56.476 75
75.029 60.023 78.75
1152 x 864 75 67.5 108
1280 x 768
59.87 47.776 79.5
74.893 60.289 102.25
1280 x 800
59.81 49.702 83.5
74.934 62.795 106.5
1280 x 960 60 60 108
1280 x 1024
60.02 63.981 108
75.025 79.976 135
1360 x 768 60.015 47.712 85.5
1400 x 1050 59.978 65.317 121.75
1440 x 900
59.887 55.935 106.5
60 55.469 88.75
74.984 70.635 136.75
1600 x 1200 60 75 162
1680 x 1050
59.883 64.674 119.000
59.954 65.29 146.25
7676
3D Support Timing
HDMI 3D (BlueRay 3D with info frame)
Signal Resoluon (dots) Aspect Rao Refresh Rate (Hz) Support
Frame Packing
1080p 1920 x 1080 16:9 23.98/24 Yes
720p 1280 x 720 16:9 50/59.94/60 Yes
Side by Side
1080i 1920 x 1080 16:9 50/59.94/60 Yes
Top and Boom
1080p 1920 x 1080 16:9 23.98/24 Yes
720p 1280 x 720 16:9 50/59.94/60 Yes
3D (HDMI) Manual Seng
Signal Resoluon (dots) Aspect Rao Refresh Rate (Hz) Support
SVGA 800 x 600 4:3 60*/120** Yes
XGA 1024 x 768 4:3 60*/120** Yes
HD 1280 x 720 16:9 60*/120** Yes
WXGA 1280 x 800 16:9 60*/120** Yes
HDTV (1080p) 1920 x 1080 16:9 60 Yes
NOTE:
* 60Hz signals are supported for side by side, top and boom, and frame sequenal.
** 120Hz signals are supported for frame sequenal only.
7777
LED Indicators
Light Descripon
Green Power On
Red Stand-by Mode
Red Projector Charging
Green Baery is Fully Charged


Produkt Specifikationer

Mærke: Viewsonic
Kategori: videoprojektorer
Model: M1 mini
Bredde: 110 mm
Dybde: 104 mm
Højde: 27 mm
Vægt: 300 g
Brugervejledning: Ja
Produktfarve: Hvid
Batterikapacitet: 5000 mAh
Indbygget skærm: Ingen
Produkttype: Projektor med kort projiceringsafstand
Pakkevægt: 680 g
Pakkedybde: 140 mm
Pakkebredde: 210 mm
Pakkehøjde: 60 mm
Wi-Fi: Ingen
Understøttede videotilstande: 480i, 480p, 576i, 576p, 720p, 1080i, 1080p
Indbyggede højttaler(e): Ja
Smart TV: Ingen
Udgangseffekt (RMS): 2 W
Antal HDMI-porte: 1
DVI-port: Ingen
Antal USB 2.0-porte: 1
Ethernet LAN: Ingen
Skærmvisning (OSD): Ja
Antal OSD sprog: 23
OSD-sprog: ARA, CHI (SIMPL), CHI (TR), CZE, DEU, DUT, ENG, ESP, FIN, FRE, GRE, IND, ITA, JPN, KOR, POL, POR, RUS, SWE, THA, TUR, VIE
Strømforbrug (standby): 0.5 W
Strømforbrug (typisk): 10 W
Driftstemperatur (T-T): 0 - 40 °C
Markedspositionering: Bærbar
Kabler inkluderet: USB
Understøttede grafikopløsninger: 640 x 480 (VGA), 1920 x 1080 (HD 1080)
Støjniveau: 26 dB
Fjernbetjening inkluderet: Ja
Strømkilde: USB/batteri
Indbygget kortlæser: Ingen
Harmoniseret systemkode (HS): 85286200
Antal indbyggede højttalere: 1
Batterilevetid (maks.): 2.4 t
HDMI- stiktype: Fuld størrelse
Fokus: Vejledning
Antal farver: 1,07 milliarder farver
Kontrastforhold (typisk): 500:1
Horisontal scanningsområde: 15 - 102 kHz
Fast brændvidde: 7.5 mm
Brændviddeområde: - mm
Projektor lysstyrke: 120 ANSI lumens
Projektionsteknologi: LED
Projektor indbygget opløsning: WVGA (854x480)
Skærmstørrelse kompatibilitet: 24 - 100 "
Projiceringsafstand: 0.64 - 2.66 m
Trapezkorrektion, vertikal: -40 - 40 °
Matrix størrelse: 0.2 "
Vertikalt scanningsområde: 23 - 120 Hz
Blændeområde (F-F): 1.7 - 1.7
Forskydning: 0.5 %
Throw-forhold: 1.2
Zoom type: Fastgjort
Levetid for lyskilde: 30000 t
Lyskilde type: LED
Støjniveau (økonomisk tilstand): 25 dB
Interaktiv: Ingen

Har du brug for hjælp?

Hvis du har brug for hjælp til Viewsonic M1 mini stil et spørgsmål nedenfor, og andre brugere vil svare dig


videoprojektorer Viewsonic Manualer
videoprojektorer Manualer

Nyeste videoprojektorer Manualer