Crestron CLW-DELVEX-P Manual

Crestron Lysdæmper CLW-DELVEX-P

Læs gratis den danske manual til Crestron CLW-DELVEX-P (2 sider) i kategorien Lysdæmper. Denne vejledning er vurderet som hjælpsom af 17 personer og har en gennemsnitlig bedømmelse på 4.6 stjerner ud af 9 anmeldelser. Har du et spørgsmål om Crestron CLW-DELVEX-P, eller vil du spørge andre brugere om produktet?

Side 1/2
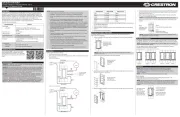
CLW-DELVEX-E/CLW-DELVEX-P
Cameo
®
Wireless In-Wall ELV Dimmer, 120 V
Installation & Operation Guide
Description
The Crestron
®
CLW-DELVEX-E and CLW-DELVEX-P are Cameo
®
designed for dimming electronic low-voltage lighting, supporting lighting loads such as
tungsten-halogen, incandescent, and dimmable LED replacement lamps. Versatile and
affordable, the CLW-DELVEX-E and CLW-DELVEX-P feature eld-replaceable, engravable
buttons and can be congured with various button layouts and designer colors.
The CLW-DELVEX-E and CLW-DELVEX-P are functionally identical. For simplicity within
this guide, the term “CLW-DELVEX-E/P” is used except where noted.
CLW-DELVEX-E/P Specications
SPECIFICATIONS DETAILS
Load Rating
Load Type
Maximum Load
Minimum Load
Electronic low-voltage, LED, incandescent,
tungsten-halogen, electronic CFL, 2-wire uorescent
ballast
500 VA/watts
10 Watts
Power Requirements 120 Vac, 50/60 Hz, line power
A dedicated neutral wire is required.
Enclosure 1-gang mountable in a 3-1/2 inch (89 mm) deep
electrical box;
Requires decorator style faceplate (not included)
Environmental
Temperature
Humidity
32° to 104 °F (0° to 40 °C)
10% to 90% RH (noncondensing)
Additional Resources
Visit the product page on the Crestron website
(www.crestron.com) for additional information
and the latest rmware updates. Use a QR reader
application on your mobile device to scan the QR
image.
CLW-DELVEX-E CLW-DELVEX-P
Important Notes
WARNING: To avoid re, shock, or death, turn off power at the circuit breaker or fuse
and test that power is off before wiring!
WARNING: New installations should be checked for short-circuits prior to installing a
CLW-DELVEX-E/P dimmer. With the power off, close the circuit and then restore power.
If the lights do not work, or a breaker trips, check and correct the wiring or xture (if
necessary). Install the dimmer only when the short is no longer present. The warranty is
void if the dimmer is installed and operated with a shorted load.
CAUTION: TO REDUCE THE RISK OF OVERHEATING AND POSSIBLE DAMAGE TO
OTHER EQUIPMENT, DO NOT INSTALL TO CONTROL A RECEPTACLE, A MOTOR-
OPERATED APPLIANCE OR A TRANSFORMER-SUPPLIED APPLIANCE.
ATTENTION: GRADATEURS COMMANDANT UN BALLAST-AFIN DE RÉDUIRE LE
RISQUE DE SURCHAUFFE ET LA POSSIBILITÉ D’ENDOMMAGEMENT À D’AUTRES
MATÉRIELS, NE PAS INSTALLER POUR COMMANDER UNE PRISE, UN APPAREIL
OPÉRÉ DE MOTEUR OU UN APPAREIL ALIMENTÉ PAR UN TRANSFORMATEUR.
NOTE: Observe the following points.
Codes: Install in accordance with all local and national electrical codes.
Installation: This product should be installed by a qualied electrician.
Wiring: Use copper wire only. For supply connections, use wire rated for at least
75 °C.
Lamp Type: For use with permanently installed incandescent, electronic
low-voltage halogen or LED, tungsten-halogen, or dimmable CFL only.
Temperature: For use where temperatures are between 32° to 104 °F (0° to 40 °C).
Electrical Boxes: Devices mount in standard electrical boxes. For easy installation,
Crestron recommends using 3-1/2 in (89 mm) deep electrical boxes. Several
devices can be installed in one electrical box (multigang). This requires derating of
the dimming device. For a smooth appearance, one-piece multigang faceplates
(not included) can be installed.
Switches: Mechanical 3- or 4-way switches do not work with CLW-DELVEX-E/P
dimmers.
Spacing: If mounting one device above another, leave at least 4-1/2 in (115 mm)
vertical space between them.
Low-Voltage Applications: Use with electronic low-voltage transformers only.
Do not use any magnetic low-voltage transformers.
Operation of a low-voltage circuit with all lamps inoperative or removed may
result in current ow in excess of normal levels. To avoid transformer overheating
and premature transformer failure, Crestron recommends the following:
> Do not operate low-voltage circuits without operative lamps in place.
> Replace burned-out lamps as quickly as possible.
> Use transformers that incorporate thermal protection to prevent transformer
failure due to overcurrent.
Installation
Install the CLW-DELVEX-E/P dimmer.
1. Turn the power off at the circuit breaker.
2. Wire the device as shown in the following diagrams. Refer to the table that follows for
wire information.
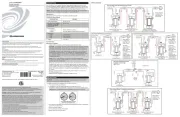
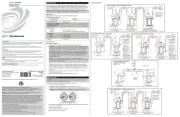
Wire the CLW-DELVEX-P
White (NEU)
Green
(GND)
Red (LOAD)
Black (HOT)
HOT
120 V~
Blue (REM)
To one or more
CLW-SLVU-P
(optional)
Load
Wire the CLW-DELVEX-E
White (NEU)
Green
(GND)
Red (LOAD)
Black (HOT)
HOT
120 V~
Load
CONNECTION WIRE GAUGE WIRE COLOR
HOT 16 AWG Black
NEU 16 AWG White
LOAD 16 AWG Red
REM 16 AWG Blue
GND 16 AWG Green
3. Push all power wires back into the electrical box and fasten the device to the electrical
box with the provided screws.
4. Attach a decorative faceplate.
5. Ensure all buttons, including the air-gap switch and program button, actuate without
sticking.
6. Restore power at the circuit breaker.
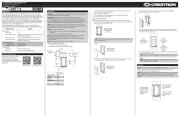
Changing the Button Assemblies
The button assembly can be removed and replaced with other button assemblies. To
replace the button assembly:
1. Squeeze the sides of the bezel near the bezel snaps to remove the button assembly.
Squeeze at arrow
points and pull to
remove the button
assembly.
NOTE: Power to the unit and load is removed automatically when the button
assembly is removed.
2. Remove the button from the front of the button assembly.
Gently spread the
frame apart to
remove the
buttons.
3. Insert the new buttons through the front of the bezel and snap them into place. Ensure
that the LED strip is on the left side.
Gently spread the
frame apart to
insert the buttons.
4. Attach the button assembly to the device. Ensure that the LED strip is on the left side.
5. Once power has been restored, press and hold the program button. After 5 seconds,
the LEDs associated with the old button layout begin to ash. Continue to hold the
button and proceed to step 6.
6. While holding the program button, press all of the buttons in the new layout. The
LED next to the pressed button lights.
NOTE: If the rocker switch is installed, press the top and bottom of the rocker.
7. Release the program button to save the settings after all of the buttons have been
pressed.
Step 5:
Press and hold the program button.
Step 7:
button to save the settings.
Step 6:
Press each of the
installed buttons
on the device.
NOTE: Changing the button conguration alters the device’s behavior. Refer to
the “Default Button Functions” for details.
Multigang Installations
In multigang installations, several devices are grouped horizontally in one electrical box.
For a smooth appearance, one-piece multigang faceplates (not included) can be installed.
NOTE: When installing into a multigang box, do not fully tighten devices to the box
until the faceplate has been aligned.
The load capacity for each device in the electrical box must be derated. Derating
information is shown in the illustration below.
Derating Information for CLW-DELVEX-E/P Dimmers
500 W 400 W 400 W 250 W 400 W400 W
Operation
NOTE: Before using the CLW-DELVEX-E/P, ensure the device is using the
latest rmware. Check for the latest rmware for the CLW-DELVEX-E/P at
www.crestron.com/rmware. Load the rmware onto the device using Crestron
Toolbox™ software.
NOTE: The device may be warm during operation. This is normal.
Basic Operation
The CLW-DELVEX-E/P is shipped with a rocker switch already installed. In this
conguration, the unit functions as shown below.
NOTE: Operation described in this guide assumes the CLW-DELVEX-E/P is operating
in Local mode (without the use of a control system). The device can also operate in
Remote mode, in which button behavior is dictated entirely by the control system
program.
The LEDs indicate
the load level.
When all loads are
off, the top LED
remains dimly lit to
act as a night light.
Press to turn the load
on. Press and hold to
raise the light level.
Press to turn the load
off. Press and hold to
lower the light level.


Produkt Specifikationer

Mærke: Crestron
Kategori: Lysdæmper
Model: CLW-DELVEX-P

Har du brug for hjælp?

Hvis du har brug for hjælp til Crestron CLW-DELVEX-P stil et spørgsmål nedenfor, og andre brugere vil svare dig