CRUX RVCCH-75WTC Manual

CRUX Bakkamera RVCCH-75WTC

Læs gratis den danske manual til CRUX RVCCH-75WTC (3 sider) i kategorien Bakkamera. Denne vejledning er vurderet som hjælpsom af 28 personer og har en gennemsnitlig bedømmelse på 3.5 stjerner ud af 14.5 anmeldelser. Har du et spørgsmål om CRUX RVCCH-75WTC, eller vil du spørge andre brugere om produktet?

Side 1/3
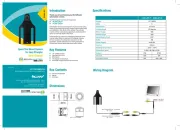
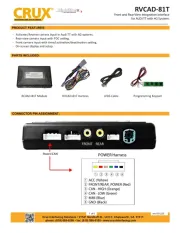
- Interface includes Audio / V eo I t to co ect an extra A/V source. id npu nn
- Spare Tire mo t reverse amera inc ed. un c lud
- tes MYGIG Screen for enabli Video features. Ac�va ng
- Su orts vehicles with ma pp nual transmission. See note below.
- Plug and Play co ec ons for ease of use. nn
NOTE: Does not supply +12V Reverse Trigger on vehicles with manual transmission. Camera power
must be tapped from the + V reverse light wire ins ad12 te . Video in Mo�on will not work for
manual transmissions.
- MyGig Naviga on Radio
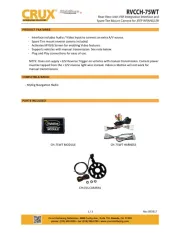
CH- WT MODULE 75
CH- WT HARNESS 75
CH- S CAMERA 01
Rev.092617
1 / 3
1. Remove the outside mounted spare re.
2. Mount the metal bracket onto the spare re bolts and secure with the star washers. camera’s
3. Route the cable towards the radio and make the power and video connecons.
4. Remove the factory radio to gain access to the factory connectors.
5. Plug in the T-harness with WHITE and GRAY connectors. (See Wiring Diagram above)
6. Connect the 8-pin Molex connector from the T-harness with GRAY connectors to the CAN Interface.
7. Use the WHITE 12V Reverse Output wire to power the camera (see Wiring Diagram above). DO NOT
connect the red power wire, near the camera, insulate this red wire to avoid to the reverse light and
from shorng. the vehicle has a manual transmission, the camera power must be tapped to the If
+12V reverse light wire instead. In this case the WHITE 12V Reverse Output wire is not used and
should be insulated to avoid from shorng.
8. Plug in the YELLOW MALE RCA from the camera cable to the YELLOW FEMALE RCA of the T-Harness
with WHITE connectors.
9. Connect GREEN wire to +12V for non permanent Video in Moon feature. a
10. Set the proper DIP Switch sengs on the CAN Interface. (See Chart above)
11. Cut the thin white wire on the camera cable to enable the parking guide lines.
12. Test the camera before re-installing the radio.
Rev.0926 17
2 / 3
Please note that the WHITE 12V
Reverse Output wire does not
supply power on vehicles with
manual transmission and should
be insulated to avoid from
shorng. Connect the camera
power to the OE reverse light
+12V wire instead.
DIP SWITCH SETTING
DIP 1
VIM Disable
DIP 2
Rear-View Camera Enable
DIP 3
N/A
DIP 4
Opon for GREEN Wire
DIP 5
CAN Terminaon Radio Side
DIP 6
CAN Terminaon Car Side


Produkt Specifikationer

Mærke: CRUX
Kategori: Bakkamera
Model: RVCCH-75WTC

Har du brug for hjælp?

Hvis du har brug for hjælp til CRUX RVCCH-75WTC stil et spørgsmål nedenfor, og andre brugere vil svare dig


Bakkamera CRUX Manualer
CRUX

CRUX CMB-17C Manual

29 December 2024
CRUX

CRUX CMB-16K Manual

29 December 2024
CRUX

CRUX CMB-16G Manual

29 December 2024
CRUX

CRUX CMB-15S Manual

29 December 2024
CRUX

CRUX RVCCH-75RC Manual

18 November 2024
CRUX

CRUX RVCCH-75DC Manual

16 August 2024
CRUX

CRUX RVCCH-75WTC Manual

15 August 2024
CRUX

CRUX CNS-03V Manual

15 August 2024
CRUX

CRUX CVW-07G Manual

15 August 2024
CRUX

CRUX RVCCH-75EC Manual

15 August 2024

Bakkamera Manualer

Nyeste Bakkamera Manualer