EXSYS EX-11049 Manual
EXSYS
Netværkskort/adapter
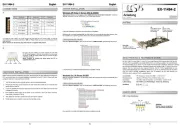
EX-11049
| Mærke: | EXSYS |
| Kategori: | Netværkskort/adapter |
| Model: | EX-11049 |
| Bredde: | 65 mm |
| Højde: | 55 mm |
| Vægt: | 108 g |
| Antal pr. pakke: | 4 stk |
| Brugervejledning: | Ja |
| Produktfarve: | Sort, sølv |
| Opbevaringstemperatur (T-T): | -20 - 85 °C |
| Relativ luftfugtighed ved drift (H-H): | 5 - 95 % |
| Antal USB 3.2 Gen 1 (3.1 Gen 1) type-A-porte: | 2 |
| Driftstemperatur (T-T): | 32 - 131 °F |
| Nem at installere: | Ja |
| Formål: | PC |
| Understøttede Windows-operativsystemer: | Windows 10, Windows 11, Windows 7, Windows 8 |
| Understøttede Linux-operativsystemer: | Ja |
| Værtsgrænseflade: | PCIe |
| Intern: | Ja |
| Oprindelsesland: | Kina |
| Drivere inkluderet: | Ja |
| Plug and play: | Ja |
| Stik: | Internal 19 pin header male |
| Understøttede operativsystemer til servere: | Windows Server 2003, Windows Server 2008 R2 |
| Monteringsbeslag inkluderet: | Ja |
| Dataoverførselshastighed: | 5 Gbit/sek. |
| Perifere (Molex) strømstik (4-pin): | 1 |
| Output-grænseflade: | USB 3.2 Gen 1 (3.1 Gen 1) |
| Hot-swap: | Ja |
| Antal PCI Express-slots: | 16 |
| Udvidelseskort formfaktor: | Fuld højde/ lav profil |
| Mængde pr. kasse: | 4 stk |
| Chipsæt: | VIA VL805 |
| Hostinterface han/kun: | Hunstik |
| Externe porte: | 2x USB 3.2 Gen 1 A-female |
| Lav effekttilstand: | Ja |
Har du brug for hjælp?
Hvis du har brug for hjælp til EXSYS EX-11049 stil et spørgsmål nedenfor, og andre brugere vil svare dig
Netværkskort/adapter EXSYS Manualer

28 November 2025

28 November 2025
13 November 2025
11 November 2025
24 Juli 2025
23 Juli 2025
23 Juli 2025
22 Juli 2025
22 Juli 2025
22 Juli 2025
Netværkskort/adapter Manualer
- Legrand
- Ferguson
- Louroe Electronics
- Sony
- Luxul
- SEH
- Perfect Choice
- Ipevo
- Topcom
- Broadcom
- Billion
- Netis
- AViPAS
- ScreenBeam
- Evolveo
Nyeste Netværkskort/adapter Manualer

18 December 2025

17 December 2025

7 December 2025

29 November 2025

29 November 2025

28 November 2025

28 November 2025

27 November 2025

27 November 2025

26 November 2025