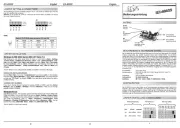
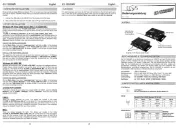
EXSYS EX-2346IS Manual
EXSYS
Ikke kategoriseret
EX-2346IS
Læs nedenfor 📖 manual på dansk for EXSYS EX-2346IS (2 sider) i kategorien Ikke kategoriseret. Denne guide var nyttig for 6 personer og blev bedømt med 4.5 stjerner i gennemsnit af 3.5 brugere
Side 1/2

6 5
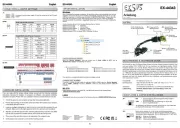
Das USB C zu seriell EX 2346IS stellt eine serielle RS 422/485 High Performance UART - - -
16C550 Schnittstelle mit 15KV ESD Überspannungsschutz und 4.0KV Isolation zur Verfügung.
Es wurde entwickelt um serielle Geräte am USB C Port eines PCs, Servers oder einer -
Workstation anzuschließen. Durch die einfache Installation am USB Port muss der Rechner -
nicht geöffnet werden und der Konverter kann bei laufendem Betrieb installiert werden. Die
Rändelschrauben können durch die beiden mitgelieferten Muttern ersetzt werden, wenn das
anzuschließende Kabel über Schrauben verfügt. Zusätzlich wird ein 9 Pin Adapter zu 5 Pin
Terminal Block mitgeliefert. Das Kabel bietet die perfekte Lösung für den Anschluss von
Barcodescanner, Kartenlesegeräte, Waagen usw.
Kompatibilität: USB 1.1, 2.0, 3.0, 3.1, 3.2
Betriebssysteme: Windows 9.x / ME / 2000 / XP / Vista / 7 / 8.x / 10 / 11 / Server 20xx /
Linux / MAC
Anschlüsse: 1x USB 2.0 C Stecker, 1x 9 Pin Stecker Seriell RS 422/485 - -
Lieferumfang: 2346IS, Adapter 9 Pin Buchse zu 5 Pin Terminal Block, EX-
2x Sechskantmuttern, Anleitung
1
BESCHREIBUNG & TECHNISCHE DATEN
AUFBAU
USB 2.0 C Stecker -
zum Anschluss an PC
S1: 9 Pin Stecker Seriell RS 422/485-
2x Sechskantmuttern
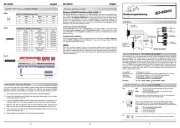
CONNECTORS & DIP SWITCH-
DIP Schalter-
DIP Switch Position Description-
1
ON (Factory Settings) 2 wire RS 485 Mode- -
OFF 4 wire RS 485 or RS 422 Mode - - -
2
ON Reserved for features in future
OFF (Factory Settings) Reserved for features in future
3
ON 120 Ohm TXD Termination Resistor is Enabled
OFF (Factory Settings) 120 Ohm TXD Termination Resistor is Disabled
ON 120 Ohm RXD Termination Resistor is Enabled
4
OFF (Factory Settings) 120 Ohm RXD Termination Resistor is Disabled
DIP Switch:-
ANSCHLÜSSE & DIP SCHALTER-
DB 9M RS 422/485 Anschlussbelegung:-
DB9 (EX-2346IS) DB9 (Endgerät)
1 TXD 1 TCD- -
2 TXD+ 2 TXD+
3 RXD+ 3 RXD+
4 RXD- 4 RXD-
5 GND 5 GND
DB9 (EX 2346IS) DB9 (Endgerät)-
1 DATA- 1 DATA-
2 DATA+ 2 DATA+
3 NC 3 NC
4 NC 4 NC
5 GND 5 GND
RS- -422 und RS 485 4 Draht Anschlussbelegung-
RS- -485 2 Draht Anschlussbelegung
Anleitun
Vers. 1.2 / 22.08.24
E 2346I
Switzerland:
EXSYS Vertriebs GmbH
Dübendorfstrasse 17
8602 Wangen
www.exsys.ch
Germany:
EXSYS Vertriebs GmbH
Industriestrasse 8
61449 Steinbach
www.exsys.de
Italy:
EXSYS Italia Srl
Via Belvedere, 45/B
I 22100 Como -
www.exsys.it
CLEANING
DRIVER INSTALLATION
After the hardware installation, the operating system will recognize the device automatically and
install the drivers. If the driver should not be installed automatically, please download the driver
from our homepage (www.exsys.de / www.exsys.ch) first. Now select the folder with your
operating system and install the driver. Follow the hardware assistant and finish the installation.
Important! Restart your PC in any case after installing the drivers.
CHECK INSTALLED DRIVER
Open the . Now you should see at >Device manager< „Ports (COM & LPT) USB“ and „-
Controller “the following new entry:
If you see this or a similar information the device is installed correctly.
To clean the unit, use only a dry, lint free cloth and apply light pressure to remove dirt. Be -
careful not to leave any fibres of the cloth in the connector area.
Never use a damp or wet cloth for cleaning!
HARDWARE INSTALLATION
Because there are large differences between PCs, we can give you only a general installation
guide. Please refer your computers reference manual whenever in doubt.
1. - - Connect the EX 2346IS USB to the USB A Port at the your PC.
2. -If you would like to screw the serial cable to the 9 Pin connector of the EX 1346IS, then
unscrew the screws (see Picture 1) and screw the supplied hexagon nuts into the holes on
the EX 2346IS (see Picture 2). Now you can attach the serial cable to the EX 1346IS.- -
Picture 1 Picture 2
Remove the Screws Insert the Hexagon Nuts
3. When you are ready you can start your PC and continue with Driver Installation .„ “
Note!
By dual assignment of the pins, the USB Type C plug can be plugged into the port on -
both sides.
USB 2.0 C Plug:-
Status LED‘s:
RXD
TXD

2 3
4
ANSCHLÜSSE & DIP SCHALTER-
DIP Schalter Position Beschreibung-
1
ON (Werkseinstellung) 2 Draht RS 485 Mode- -
OFF 4 Draht RS 485 oder RS 422 Mode - - -
2
ON Reserviert für zukünftige Features
OFF (Werkseinstellung) Reserviert für zukünftige Features
3
ON 120 Ohm TXD Abschlusswiderstand ist aktiviert-
OFF (Werkseinstellung) 120 Ohm TXD Abschlusswiderstand ist deaktiviert-
ON 120 Ohm RXD Abschlusswiderstand ist aktiviert-
4
OFF (Werkseinstellung) 120 Ohm RXD Abschlusswiderstand ist deaktiviert-
DIP Schalter:-
The EX 2346IS USB C to Serial Cable provides a high performance RS- - -422/485 UART 16C550
serial port with 15KV ESD surge protection and 4.0KV isolation. It is designed to connect serial
devices to the USB C port of a PC, server or workstation. Simple installation on the USB port -
means there is no need to open the computer and the converter can be installed while the
computer is running. A DB9 to 5 pin terminal block adapter is also supplied. The cable provides
the perfect solution for connecting barcode scanners, card readers, scales, etc.
Compatibility: USB 1.1, 2.0, 3.0, 3.1, 3.2
Operating Systems: Windows 9.x / ME / 2000 / XP / Vista / 7 / 8.x / 10 / 11 / Server 20xx /
Linux / MAC
Connectors: 1x USB 2.0 C Plug, 1x 9 Pin Serial RS 422/485 Connector - -
Extent of delivery: 2346IS, Adapter 9 Pin Female to 5 Pin Terminal Block, EX-
2x Hexagon Nuts, Manual
DESCRIPTION & TECHNICAL INFORMATION
LAYOUT
USB 2.0 C Plug -
for connection to PC
S1: 9 Pin Serial RS 422/485 Connector-
2x Hexagon Nuts
DIP Switch-
CONNECTORS & DIP SWITCH-
DB 9M RS 422/485 Pin Assignments:-
DB9 (EX-2346IS) DB9 (Device)
1 TXD 1 TCD- -
2 TXD+ 2 TXD+
3 RXD+ 3 RXD+
4 RXD- 4 RXD-
5 GND 5 GND
DB9 (EX 2346IS) DB9 (Device)-
1 DATA- 1 DATA-
2 DATA+ 2 DATA+
3 NC 3 NC
4 NC 4 NC
5 GND 5 GND
RS- -422 and RS 485 4 wire Pin Assignment-
RS- -485 2 wire Pin Assignment
Schweiz:
EXSYS Vertriebs GmbH
Dübendorfstrasse 17
8602 Wangen
www.exsys.ch
Deutschland:
EXSYS Vertriebs GmbH
Industriestrasse 8
61449 Steinbach
www.exsys.de
Italia:
EXSYS Italia Srl
Via Belvedere, 45/B
I 22100 Como -
www.exsys.it
HARDWARE INSTALLATION
TREIBER INSTALLATION
Beachten Sie bitte die folgenden Installationshinweise. Da es große Unterschiede zwischen PCs
gibt, können wir Ihnen nur eine generelle Anleitung zur Installation geben. Bei Unklarheiten halten
Sie sich bitte an die Bedienungsanleitung Ihres Computersystems.
1. - - Schließen Sie die EX 1346IS an eine USB A Buchse Ihres P s an.‘
2. -Falls Sie das serielle Kabel mit dem 9 Pin Anschluss der EX 1346IS verschrauben
möchten, dann schrauben Sie nun die Rändelschrauben heraus (siehe Abbildung 1) und
schrauben Sie hierfür die mitgelieferten Sechskantmuttern in die Löcher an der EX 1346IS -
ein (siehe Abbildung 2). Nun können Sie das serielle Kabel an der EX 1346IS befestigen. -
REINIGUNG
Nach Abschluss der Hardwareinstallation erkennt das Betriebssystem automatisch den Adapter
und installiert diesen! Falls die Treiber nicht automatisch installiert werden sollten, laden Sie
bitte als erstes den Treiber auf unserer Homepage (www.exsys.de / www.exsys.ch) herunter.
Nun wählen Sie den Ordner Ihres Betriebssystems aus und installieren Sie die Treiber. Folgen
Sie den Installationsanweisungen und schließen Sie die Installation ab. Starten Sie Wichtig!
Ihren PC nach der Installation neu.
ÜBERPRÜFEN DES INSTALLIERTEN TREIBER
Öffnen Sie den > <. Jetzt müssten Sie unter Geräte Manager-„Anschlüsse (COM & LPT)“ und
unter USB „ -Controller “folgenden Eintrag sehen:
Ist dieser oder ein ähnlicher Eintrag vorhanden, ist die EX-1346IS richtig installiert.
Zur Reinigung des Gerätes verwenden Sie bitte ausschließlich ein trockenes nicht faserndes
Tuch und entfernen Sie die Verschmutzung mit leichtem Druck. Im Bereich der Anschlüsse bitte
darauf Achten, dass keine Fasern des Tuchs in der Buchse hinterlassen werden. Verwenden
Sie bitte zu Reinigung in keinem Fall ein feuchtes oder nasses Tuch!
3. Jetzt können Sie Ihren PC starten und mit dem Punkt „Treiber Installation fortfahren.“
Abbildung 1 Abbildung 2
Entfernen der Rändelschrauben Einsetzen der Sechskantmuttern
Manua
E 2346I
Vers. 1.2 / 22.08.24
Hinweis!
Durch die Doppelbelegung der Pins, kann der USB Typ C Stecker beidseitig in die Buch--
se gesteckt werden.
USB 2.0 C Stecker:-
Status LED‘s:
RXD
TXD
Produkt Specifikationer
Mærke: | EXSYS |
Kategori: | Ikke kategoriseret |
Model: | EX-2346IS |
Har du brug for hjælp?
Hvis du har brug for hjælp til EXSYS EX-2346IS stil et spørgsmål nedenfor, og andre brugere vil svare dig
Ikke kategoriseret EXSYS Manualer
2 Juni 2025

2 Juni 2025

2 Juni 2025

1 Juni 2025

1 Juni 2025

1 Juni 2025

1 Juni 2025

1 Juni 2025

1 Juni 2025

1 Juni 2025
Ikke kategoriseret Manualer
- Ikke kategoriseret Bissell
- Ikke kategoriseret Kindermann
- Ikke kategoriseret AmpliVox
- Ikke kategoriseret Zelmer
- Ikke kategoriseret SolidDrive
- Ikke kategoriseret KS Tools
- Ikke kategoriseret Maglite
- Ikke kategoriseret Itho
- Ikke kategoriseret Dolmar
- Ikke kategoriseret Aiphone
- Ikke kategoriseret Quik Lok
- Ikke kategoriseret BMAX
- Ikke kategoriseret Aqua Computer
- Ikke kategoriseret Epiphan
- Ikke kategoriseret Corona
Nyeste Ikke kategoriseret Manualer

2 Juni 2025

2 Juni 2025

2 Juni 2025

2 Juni 2025

2 Juni 2025

2 Juni 2025

2 Juni 2025

2 Juni 2025

2 Juni 2025

2 Juni 2025