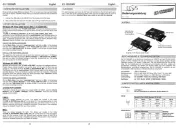
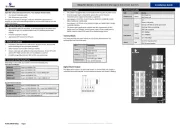
Windows 98/ ME/ 2000/ XP/ Vista/ 7/ 8/ Server 200x
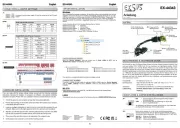
After starting Windows it recognizes a new and opens the hardware “PCI Controller“
assistant. Please choose manual installation and put the driver CD into your CD-Rom
drive. Now enter the Path and then the directory of your sys-"D:\IO\SYSTEMBASE\"
tem or“32bit_Win2000,XP,2003,Vista,2008,7,8“ “64bit_WinXP,2003,Vista,2008,7,8”
into the box for the Path/Source and click at . Now Windows will >next/continue<
search for the drivers in the specied directory. Follow the hardware assistant and nish
the installation. If Windows recognizes other new devices repeat the above described
steps. Restart Windows in any case after installing the drivers. Attention!
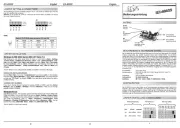
CHECK THE INSTALLED DRIVER
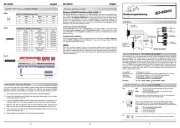
Click at <> < then enter and click at . In the windows Start Run “compmgmt.msc“ >OK<
that open select Under >Device Manager<. ”Ports (COM and LPT)“ you should nd
one or more new as sample If you see this or similar entries the ”PCI Ports“ (Com3).
card is installed correctly.
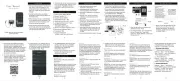
If you like to change the port number for example COM3 to COM5, open the >Device
Manager< click at >COM3<, >Settings< and then >Advance<. There you can change
between COM3 till COM256.
Start Windows NT and insert the driver CD into your CD-ROM drive (for example D:).
Click at > < > < and enter " then click Start Run „D:\IO\SYSTEMBASE\WinNT\Install.exe
>OK<. Windows NT will now start the setup program and install the driver. Please Re-
start Windows NT after installing the drivers.
CHECK THE INSTALLED DRIVER
Click at > < > < > < >Start Programs Administrative Tools[Common] Windows NT-
Diagnostics Resource IRQ „09 o < then click at > < > <. Here you should nd the entry
0 PCI“I/O-Port D400-D407 sysba-. Then click at > < here you should see the entries „
se 0 PCI“ „D800-D802 sysbase 0 PCI „DC00-DC1F sysbase 0 PCI“ “ and for
the ports. The I/O addresses can change depends which system and card is installed.
If you see these or similar entry's the card is installed correctly.
The drivers are located in the following folder on our driver CD:
Because each individual distribution and kernel version of Linux is dierent, sadly we
cant provide a installation instruction. Please refer to the installation manual for stan-
dard IO ports from your Unix/Linux version! In some newer versions of Linux the card
will even be installed automatically after starting Linux.