EXSYS EX-60121 Manual


Læs nedenfor 📖 manual på dansk for EXSYS EX-60121 (2 sider) i kategorien Netværkskort/adapter. Denne guide var nyttig for 2 personer og blev bedømt med 4.4 stjerner i gennemsnit af 1.5 brugere

Side 1/2
Windows / Linux / Unix
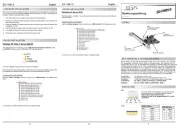
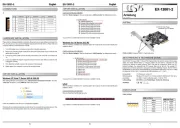
Once the hardware installation is complete, the operating system will automatically detect and
install the card. If the drivers are not installed automatically, they can be downloaded from the
EXSYS website (www.exsys.de / www.exsys.ch). Enter the article number in the search field
and select the appropriate article. Under 'Downloads' you will find the current driver as a ZIP
file. Once you have extracted the driver folder to your computer, run 'Autorun.exe'. Follow the
installation instructions to complete the installation.
Important! Reboot your PC/Server after installation.
CHECK INSTALLED DRIVER
entries:
If you see these or a similar informations the device is installed correctly.
6 5 1
BESCHREIBUNG & TECHNISCHE DATEN
AUFBAU
Anleitun
Die EX 60121 ist eine 10 Gigabit Ethernet Karte einem RJ45 Port und Power over Ethernet -
(PoE) für den PCIe Bus. Sie unterstützt Half und Full Duplex sowie Auto Negotiation zur - - -
automatischen Anpassung an die Geschwindigkeit im Netzwerk (10/100/1000/10000 Mbit/s).
Dank der integrierten PoE Funktionalität können angeschlossene PoE (PD) Endgeräte (IP- -
Telefone, IP Kameras etc.) über das Netzwerkkabel mit Strom versorgt werden. Die EX 60121 - -
unterstützt die PoE Standards IEEE 802.3af (PoE), IEEE 802.3at (PoE+) und ermöglicht eine -
maximale Leistungsabgabe von bis zu 30 W.
Kompatibilität: PCI Express p1-x2 bis x16 -
Betriebssysteme: Windows 8.x/10/11 (32/64 bit), Linux ab 3.10
Anschlüsse: 1x RJ45 Gigabit Ethernet Anschluss
Lieferumfang: 60121, Low Profile Bügel, Anleitung EX-
DRIVER INSTALLATION
HARDWARE INSTALLATION
Vers. 1.0 / 15.01.25
E 6012
Switzerland:
EXSYS Vertriebs GmbH
Dübendorfstrasse 17
8602 Wangen
www.exsys.ch
Germany:
EXSYS Vertriebs GmbH
Industriestrasse 8
61449 Steinbach
www.exsys.de
Italy:
EXSYS Italia Srl
Via Belvedere, 45/B
I 22100 Como -
www.exsys.it
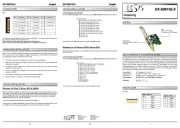
Please note the following installation instructions. As there are major differences between PCs, we
can only provide you with general instructions for installing the EX-60121. If in doubt, please consult
the manual for your computer system.
1. Switch off your computer and all connected peripheral devices and unplug all devices from the
mains.
2. Loosen the housing screws on the back of your computer and carefully pull off the housing.
3. Now locate a free PCI Express slot (x4 or larger) and carefully insert the card into the selected
PCI Express slot. Make sure that the card is seated correctly and that there is no short circuit.
4. Then secure the card to the housing with a screw.
5. Now close the computer housing with the previously removed screws.
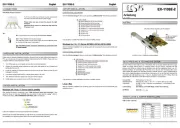
CONNECTORS & LEDs
RJ45 Port:
Status LEDs:
87654321
RJ45 Port
Pin Signal Pin Signal Pin Signal
1 BI_DA+ 4 BI_DC+ 7 BI_DD+
2 BI_DA 5 BI_DC 8 BI_DD - - -
3 BI_DB+ 6 BI_DB -
LED Name Color LED Function
Speed
Green
Yellow
Green: 10Gbps
Yellow: 10/100/1000Mbps, 2.5/5Gbps
LINK (ACT) Green
Steady on: Connected
Blinking: data transmission
PoE Speed Green
Steady on: PoE (PD) device connected
Off: no PD device detected
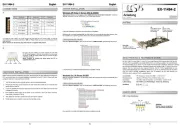
SATA connector:
Pin Description Pin Description Pin Description
1 3.3V (orange) 6 ground (black) reserved 11
2 3.3V (orange) 5V (pre charge) ground (black) 7 - 12
3 3.3V (pre charge) 8 5V (red) 12V (pre charge) - 13 -
4 ground (black) 9 5V (red) 12V (yellow) 14
5 ground (black) ground (black) 12V (yellow) 10 15
If no SATA cable is connected, PoE power is supplied via the PCIe bus. If the computer does not
have sufficient power on the PCIe bus, PoE power can be supplied via the 15-pin SATA connector.
Caution!
Never connect or disconnect the connector while the PC is switched on!
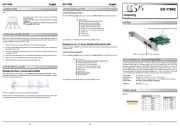
2x RJ45 Port
Status LEDs
Windows / Linux / Unix
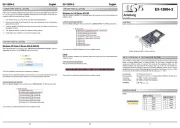
Nach Abschluss der Hardwareinstallation erkennt das Betriebssystem die Karte automatisch
und installiert sie. Sollten die Treiber nicht automatisch installiert werden, können diese von der
EXSYS Website (www.exsys.de / www.exsys.ch) heruntergeladen werden. Geben Sie die
Artikelnummer in das Suchfeld ein und wählen Sie den entsprechenden Artikel aus. Unter
Downloads finden Sie den aktuellen Treiber als ZIP Datei. Nachdem Sie den Treiberordner -
auf Ihren Rechner entpackt haben, starten Sie Autorun.exe Folgen Sie den “.
Installationsanweisungen und schließen Sie die Installation ab.
Wichtig! Starten Sie Ihren PC/Server nach der Installation neu.
ÜBERPRÜFEN DES INSTALLIERTEN TREIBER
Öffnen Sie den . Jetzt müssten Sie unter folgende >Geräte Manager<- Netzwerkadapter
neuen Einträge sehen:
Sind diese oder ähnliche Einträge vorhanden, ist die Karte richtig installiert.
2 3
4
TREIBER INSTALLATION
LAYOUT
Manua
Vers. 1.0 / 15.01.25
E 6012
HARDWARE INSTALLATION
DESCRIPTION & TECNICAL INFORMATION
The EX 60121 is a 10 Gigabit Ethernet card with an RJ45 connector and Power over Ethernet -
(PoE) for the PCIe bus. It supports half and full duplex as well as auto negotiation for automatic -
adjustment to the network speed (10/100/1000/10000 Mbps). Thanks to the integrated PoE
functionality, connected PoE (PD) end devices (IP phones, IP cameras, etc.) can be powered
via the network cable. The EX 60121 supports the PoE standards IEEE 802.3af (PoE), IEEE -
802.3at (PoE+) and provides a maximum power output of up to 30W.
Compatibility: PCI Express p2-x2 to x16 -
Operating System: Windows 8.x/10/11 (32/64 bit), Linux from 3.10
Connectors: 1x RJ45 Gigabit Ethernet Port
Extent of Delivery: 60121, Low Profile Bracket, Manual EX-
Schweiz:
EXSYS Vertriebs GmbH
Dübendorfstrasse 17
8602 Wangen
www.exsys.ch
Deutschland:
EXSYS Vertriebs GmbH
Industriestrasse 8
61449 Steinbach
www.exsys.de
Italia:
EXSYS Italia Srl
Via Belvedere, 45/B
I 22100 Como -
www.exsys.it
2x RJ45 Port
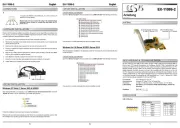
Bitte beachten Sie die folgenden Installationshinweise. Da es große Unterschiede zwischen den
PCs gibt, können wir Ihnen nur eine allgemeine Anleitung zur Installation der EX-60121 geben. Im
Zweifelsfall konsultieren Sie bitte das Handbuch Ihres Computersystems.
1. Schalten Sie Ihren Rechner und alle angeschlossenen Peripheriegeräte aus und ziehen Sie
die Netzstecker aller Geräte.
2. Lösen Sie die Gehäuseschrauben auf der Rückseite Ihres Computers und ziehen Sie das
Gehäuse vorsichtig ab.
3. Suchen Sie nun einen freien PCI Express Steckplatz (x2 oder größer) und stecken Sie die - -
Karte vorsichtig in den gewählten PCI Express Steckplatz. Achten Sie darauf, dass die Karte - -
richtig sitzt und kein Kurzschluss entsteht.
4. Danach befestigen Sie die Karte mit einer Schraube am Gehäuse.
5. Schließen Sie nun das Computergehäuse mit den zuvor entfernten Schrauben.
87654321
ANSCHLÜSSE & LEDs
RJ45 Anschluss:
Status LEDs:
RJ45 Anschluss
Pin Signal Pin Signal Pin Signal
1 BI_DA+ 4 BI_DC+ 7 BI_DD+
2 BI_DA 5 BI_DC 8 BI_DD - - -
3 BI_DB+ 6 BI_DB -
LED Name Farbe LED Funktion
Speed
Gelb
Grün
Gelb: 10Gbps
Grün: 10/100/1000Mbps, 2.5/5Gbps
LINK (ACT) Grün
An: Verbunden
Blinken: Datenübertragung
PoE Speed Grün
An: PoE (PD) Gerät verbunden
Aus: kein (PD) Gerät erkannt
SATA Anschluss:
Pin Bezeichnung Pin Bezeichnung Pin Bezeichnung
1 3.3 V (Orange) 6 Ground (Schwarz) Reserviert 11
2 3.3 V (Orange) 5 V (pre charge) Ground (Schwarz) 7 - 12
3 3.3 V (pre charge) 8 5 V (Rot) 12 V (pre charge) - 13 -
4 Ground (Schwarz) 9 5 V (Rot) 12 V (Gelb) 14
5 Ground (Schwarz) Ground (Schwarz) 12 V (Gelb) 10 15
Ohne angeschlossenes SATA Kabel erfolgt die PoE- -Stromversorgung über den PCIe Bus. Sofern
der Rechner nicht über genügend Leistung am PCIe Bus verfügt, kann die PoE-Stromversorgung
über den 15 poligen SATA- -Anschluss sichergestellt werden.
Achtung!
Stecker nie bei eingeschaltetem PC ein oder ausstecken!
Status LEDs


Produkt Specifikationer

Mærke: EXSYS
Kategori: Netværkskort/adapter
Model: EX-60121

Har du brug for hjælp?

Hvis du har brug for hjælp til EXSYS EX-60121 stil et spørgsmål nedenfor, og andre brugere vil svare dig