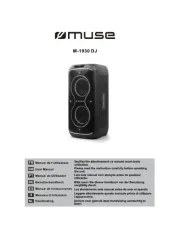
In standby mode, press (9/R13) or (10/R14) button, alarm type ALARM 1 ALARM 2
will ash on display. Press (11/R9) or (12/R10) button to select to wake up
by buzzer, iPod/iPhone/iPad, or radio. The icon “ ”/“ ”, “ ”/” ” or “ ”/ “
” will show on display accordingly.
- “ ” or “ ” : “Beep“ sound comes when the alarm time is (wake up by buzzer)
reached.
- “ ” or ” ” : Follow the procedure in “(wake up by iPod/iPone/iPad) PLAY
YOUR DOCKABLE iPod/iPhone/iPad”. The iPod/iPhone/iPad will start playing au-
tomatically when the alarm time is reached and the unit is off.
- “ ” or “ ” : Follow the procedure in “ (wake up by radio) LISTENING TO THE
RADIO” to select your desired radio station. The radio will turn on automatically when
the alarm time is reached and the unit is off.
Press (9/R13) or (10/R14) button again, the hour digit ashes ALARM 1 ALARM 2
on display. Press the (11/R9) or (12/R10) button to adjust the hour.
Press (9/R13) or (10/R14) button again, the minute digit ashes ALARM 1 ALARM 2
on display. Press the (11/R9) or (12/R10) button to adjust the minutes.
Press (9/R13) or (10/R14) to save the setting of alarm 1 or ALARM 1 ALARM 2
alarm 2. The display will resume to the current time.
This unit can be set for two different wake up times which you can choose to use inde-
pendently or simultaneously ALARM1, ALARM2 or both ALARM1 and ALARM 2.
Alarm 1 or Alarm 2 setting
1.
2.
3.
4.
5.
6.
7.
8.
9.
10.
11.
12.
13.
14.
15.
16.
17.
18.
19.
20.
21.
button (STANDBY)
VOLUME+ / - buttons
EQ button (equalizer)
M button (memory/clock setting)
FUNCTION button
iPod/iPhone/iPad Socket
SNOOZE/DIMMER button
SLEEP Button
ALARM1/MEMO- button
ALARM2/MEMO+ button
TUNING/ button
TUNING/ button
button (play/pause)
LCD display
Remote sensor
Speakers
FM Wire Antenna
VIDEO OUT jack
AUX IN jack
DC input (AC adaptor jack)
Battery Backup Compartment
M-158 IP
GB - 1
User Manual
Docking for iPod/iPhone/iPad Clock Radio PLL
Please read the instruction carefully
before operating the unit.
English GB - 2
GB - 4
Main unit
Top View
BASIC OPERATION
Turn on the unit
The unit is in clock mode when it is plugged in, press STANDBY button (1/R1) to
turn on or turn off the unit.
Operating mode selection (FUNCTION)
Press button (5/R2) repeatedly to select iPod/iPhone/iPad, AUX or Radio FUNCTION
mode.
Sound volume
Press button (2/R12) to adjust sound level. There are a total of 32 volume lev-VOL +/-
els.
Press button (R3) to cut off the sound temporarily, press this button again to re-
sume the sound.
Equalizer
When listening to the radio, iPod/iPhone/iPad or other music source from AUX IN, press
the button (3) repeatedly to select different modes: CLASSIC, ROCK, POP, JAZZ, EQ
X-B (bass boost) or EQ off.
Display dimmer
In standby mode, press the button (7) repeatedly will change the SNOOZE/DIMMER
backlight brightness of the display. There are 3 levels: low, medium, and high.
Front View
Back View
5. Press button (5/R2) to complete time setting.M
NOTE: With clock display blinking, if no button is pressed within 8 seconds, it will return
to previous clock display.
SLEEP (Automatic turn off)
In sleep mode, the unit will turn off automatically after a specied time.
Note: Sleep time can only be set when the unit is turned ON.
You can select a duration in minutes before the unit turns off automatically. Press
SLEEP button (8/R15) repeatedly to select 90-80-70-60-50-40-30-20-10 or 00 minutes,
then release button (8/R15), “SLEEP” shows on display.SLEEP
NOTES:
- To turn off the unit before the SLEEP activates, press STANDBY button (1/R1), or
press button (8/R15) repeatedly until value is adjusted to “00”. It will return to SLEEP
normal display after 5 seconds, the sleep function will be cancelled and “SLEEP” icon
will not be displayed.
- If the playing time from your iPhone or other player is shorter than the selected sleep
time, the music will stop at the end of the playing time.
GB - 3 GB - 5
When you unpack your new iPod/iPhone/iPad clock-radio, make sure that you have
removed all the accessories and information papers:
- Docking Clock Radio PLL for iPod/iPhone/iPad
- Remote Control
- AC adaptor
- 6 pieces iPod/iPhone/iPad interchangeable adaptors
- 1 piece Dust Cover
- iPad table bracket
- User manual
UNPACKING YOUR UNIT
PRODUCT DESCRIPTION
Battery backup system
DC power: 2x1.5V, battery type AAA/R03/UM4(not provided) for clock and alarm time
backup system.
An alkaline type battery is recommended. For optimum performance, this battery should
be replaced every 6 months.
BACKUP SYSTEM: All clock settings will be kept in memory; however, the clock time
may require adjustment for exact accuracy. If the backup battery is not installed, the
display will show the clock ashing to indicate that you have to reset the time and the
alarm.
NOTE: When the battery backup is functioning, the display has no backlight.
Remote control
R1. STANDBY button
R2. button FUNCTION
R3. button (mute)
R4. button (play/pause)
R5. button (return to previous menu in MENU
iPhone/iPod mode)
R6. button (navigate menu in iPod/iPhone/iPad
mode)
R7. button (navigate menu in iPod/iPhone/iPad
mode)
R8. button (conrm a selection in iPod/ENTER
iPhone/iPad mode)
R9. button (fast backward)
R10. button (fast forward)
R11. button (memory/clock setting)M/Clock
R12. + / - buttons VOLUME
R13. - button (alarm 1)ALM.1/MEMO
R14. ALM.2/MEMO+ button (alarm 2)
R15. button SLEEP
R16. button (snooze)SNZ
- Remove the spacer tab before use
Remove the spacer tab when you use the remote control for
the rst time.
To remove the tab, pull it in the direction of the arrow in the il-
lustration as shown.
- Replacing battery for the remote control
1. Press the stopper and pull out the battery holder.
2. Install 1pc “CR2025” lithium battery according to the polarity diagram on the battery
compartment.
3. Insert the battery holder into the remote control.
TIME SETTING
Current time
When used for the rst time, or if the mains plug has been removed with no backup bat-
tery inside, the clock display will blink.
1. In Standby mode, Press the button (4/R11) on the unit, the clock blinks on the dis-M
play.
2. With clock display blinking, press button (5/R2) to select 12 or 24 hour FUNCTION
format.
3. Press the button (4/R11), the hour digits will ash, set the hour with (11/R9) or M
(12/R10) button.
4. Press the button (4/R11) to save the hour setting, the minute digits ash Set the M
minutes with (11/R9) or (12/R10) button.
ALARM SETTING
D1. - Alarm #1 wake to buzzer
- Alarm #2 wake to buzzer
- Alarm #1 wake to iPod/iPhone/iPad
- Alarm #2 wake to iPod/iPhone/iPad
- Alarm #1 wake to radio
- Alarm #2 wake to radio
D2. -iPod/iPhone/iPad mode playback
D3. - Radio mode
D4. - AUX IN mode
D5. Equalizer modes
D6. Volume
D7. - mute
D8. SNOOZE
D9. SLEEP
D10. Memory
D11.Time or radiofrequency display
D12. FM Stereo
D13. Radio frequency unit
D14. “PM”-12hr time mode display
POWER SUPPLY
Using the AC adaptor
This AC adaptor operates on AC100-240V~50/60Hz.
• The supplied AC adaptor is suitable for use on AC mains supplies of 100-240V~50/
60Hz and should only be connected to a mains supply within these parameters.
• Use the supplied AC adaptor only. Using any other AC adaptor could damage the unit.
Cautions:
- The included AC adaptor is for use with this unit only. Do not use it with other equip
ments.
- When the unit is not going to be used for long time, disconnect the AC adaptor from
the AC outlet.
- Be sure to use it near the wall outlet. If a malfunction occurs, disconnect the plug from
the wall outlet at once.
- When the AC adaptor is plugged in, the apparatus is not completely disconnected
from the main power source, even when the unit is turned off.
- AC adaptor is used as the disconnect device. It shall remain readily operable and
should not be obstructed during intended use. To disconnect the apparatus from sup
ply mains, completely disconnect the AC adaptor of the apparatus from the mains
socket outlet
To check the alarm settings
In standby mode, press (9/R13) or (10/R14) button. Time and ALARM 1 ALARM 2
alarm source of the corresponding alarm are displayed for 5 seconds.
1.
2.
3.
4.
iPod/iPhone/iPad not included
LCD DISPLAY