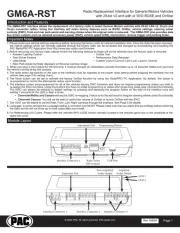
PAC GM6A-RST Manual


Læs gratis den danske manual til PAC GM6A-RST (6 sider) i kategorien Ikke kategoriseret. Denne vejledning er vurderet som hjælpsom af 8 personer og har en gennemsnitlig bedømmelse på 3.8 stjerner ud af 4.5 anmeldelser. Har du et spørgsmål om PAC GM6A-RST, eller vil du spørge andre brugere om produktet?

Side 1/6
Radio Replacement Interface for General Motors Vehicles
with 29-bit V2 and with or W/O BOSE and OnStar
C
Rev. 12/2/24
© 2024 PAC. All rights reserved. PAC-audio.com
GM6A-RST
Page 1
Introduction and Features
Important Notes
16-pin connector radios. Using this interface will retain factory features such as BOSE, OnStar, vehicle settings, steering wheel
controls (SWC), front and rear park assist and warning chimes when the original radio is removed. The GM6A-RST also provides data
bus driven outputs such as retained accessory power (RAP), vehicle speed (VSS), illumination, reverse trigger and parking brake.
1. Please make your vehicle settings selections before removing the factory radio for optimal installation time. Once the radio has been removed,
the vehicle settings which are normally selected through the factory radio can be accessed and changed by downloading and installing the
PAC RadioPRO PC Application from http://www.pac-audio.com/rmware.
2. Before removing your factory radio, please review the following settings as these will not be retained once the factory radio is removed:
USB PortRadio Select
DIP switches
Interface Connector 4
Adjustment Dial Programming Button
Module Layout
Interface Connector 1 Interface Connector 2 Interface Connector 3
LED 2
Expansion Port
Non-Amplied
Audio Output
LED 1
Amplied
Audio Output
Ambient Lighting Control
Teen Driver Feature
Valet Mode
Rear Park Assist Symbols displayed on Reverse Camera Image
OnStar Text
Performance Data Recorder
Custom Launch Control (Line Lock, Launch Control)
3. When you plug in the module for the rst time, it must go through an initialization process that takes up to 12 seconds. Make sure you have
the vehicle running diring this process.
4. The radio select dip-switchs on the side of the interface must be adjusted to the proper radio setting before plugging the interface into the
vehicle (see page 2 for setting chart).
5. The Voice button can be set to activate the factory OnStar function by using the RadioPRO PC Application. By default, this button is
re-programed to control the aftermarket radios voice function.
6. The interface comes pre-programmed for all of the vehicles factory SWC functions and does not require programming unless you wish to
re-assign the SWC functions, utilize the buttons that have no initial programming or utilize short press long press dual command functionality.
The SWC can always be restored to default settings by pressing and releasing the program button on the side of the interface once and
waiting 7 seconds for the LED to ash 4 times.
Chevrolet Malibu and Camaro will require SWC re-mapping. Failure to do this will result in irregular steering wheel control functionality.
Chevrolet Camaro: You will not be able to control the volume of OnStar or launch OnStar with the SWC.
7. The VS41 can be added to control Rear, Frotn ,Left, Right cameras through the interface. See Page 5 for details.
8. Language: In some vehicles the Lauguage setting is controled over MOST. Please make sure that you adjust this accordlingly before removing
the radio as this will not show up in most cases after your install.
9. For Referencing (IO) Codes. Please refer the vehicles RPO CODE sticker normally located in the vehicles glove box or the underside of the
spare tire cover.
Radio Replacement Interface for General Motors Vehicles
with 29-bit V2 and with or W/O BOSE and OnStar
C
Rev. 12/2/24
© 2024 PAC. All rights reserved. PAC-audio.com
GM6A-RST
Page 2
Installation Steps
Set DIP switches that correspond with your radio to the ON position.
Set all other DIP switches to the OFF position.
If your brand is not listed above, please use ALL OTHER BRANDS.
Alpine JVC
Kenwood /
Lightning
Audio
Stinger
Clarion /
Nakamichi
All Other
Brands
Pioneer Sony Fusion
1 2 1 & 2 3 3 1, 2, & 3 1, 2, & 3 4 1 & 4
1. Set the Radio Select DIP switches according to the radio you are installing.
2. Wire your aftermarket radio to the GM6A-RSTs harness according to the wiring connections chart on Page.3.
3. Cut the Brown mute loop in If not cut will turn the GM6As accessory output off, when any OnStar Interface Connector 4.
function is active.
4. Plug into the appropriate ports on the GM6A-RST interface (using the diagram on page 1 or Interface Connectors 1 & 2
the label on the bottom of the interface).
5. The Interface Connector 3 connection port will be dependent upon whether or not the vehicle has a factory amplied
system. Plug this connector into the appropriate port on the GM6A-RST (using the diagram on page 1 or the label on the
bottom of the interface).
6. Remove the factory radio and plug in the GM6A-RSTs Vehicle Connector 1, 2, & 3 into the factory vehicle harness. Vehicle
Connector 3 might . In vehicles with IOA / IOB use not be present in all vehicles Vehicle Connector 7 to adapt your main
harness to your vehicle. (NOT FOR USE IN IMPALA, IMPROPER USE OF THIS HARNESS WILL RESULT IN EQUIPMENT
DAMAGE.)
7. Vehicle Connectors 4 & 5 are used when removing the factory CD player in the dash and are mandatory that they are
plugged in to keep the MOST loop Intact. Failing to plug these in will result in no sound. Not all connectors may be present.
8. Vehicle Connector 6 (GM5CAM-DIS-HAR) will only be used in vehicle with an IOB Build Code and will be connected to
the harness that was plugged in to the factory display once removed. This is used to maintain the camera signal in IOB build
code vehicles.
Interface Connector 1
(3-pin)
Interface Connector 2
(20-pin)
Interface Connector 4
(24-pin)
Interface Connector 3
(12-pin)
Vehicle Connector 1
(20-pin)
Vehicle Connector 2
(16-pin)
Vehicle Connector 3
(8-pin)
Vehicle Connector 7
(Adapter)
NOT FOR IMPALA
Vehicle Connector 4
(10-pin)
Vehicle Connector 5
(12-pin)
Vehicle Connector 6
(20-pin)


Produkt Specifikationer

Mærke: PAC
Kategori: Ikke kategoriseret
Model: GM6A-RST

Har du brug for hjælp?

Hvis du har brug for hjælp til PAC GM6A-RST stil et spørgsmål nedenfor, og andre brugere vil svare dig


Ikke kategoriseret PAC Manualer
PAC

PAC CAM-GM51 Manual

11 Juli 2025
PAC

PAC TY1A-RS Manual

11 Juli 2025
PAC

PAC SR-F15009HX Manual

10 Juli 2025
PAC

PAC SRK-RAM13HX Manual

10 Juli 2025
PAC

PAC AAI-TY3 Manual

30 Juni 2025
PAC

PAC SRK-GM14HX Manual

10 Marts 2025
PAC

PAC C2A-CHY Manual

19 Februar 2025
PAC

PAC MCI-FD22 Manual

19 Februar 2025
PAC

PAC GM6A-RST Manual

19 Februar 2025
PAC

PAC SWI-X Manual

19 Februar 2025

Ikke kategoriseret Manualer

Nyeste Ikke kategoriseret Manualer