AFX SADW0518L30D1 Manual
| Mærke: | AFX |
| Kategori: | Lys |
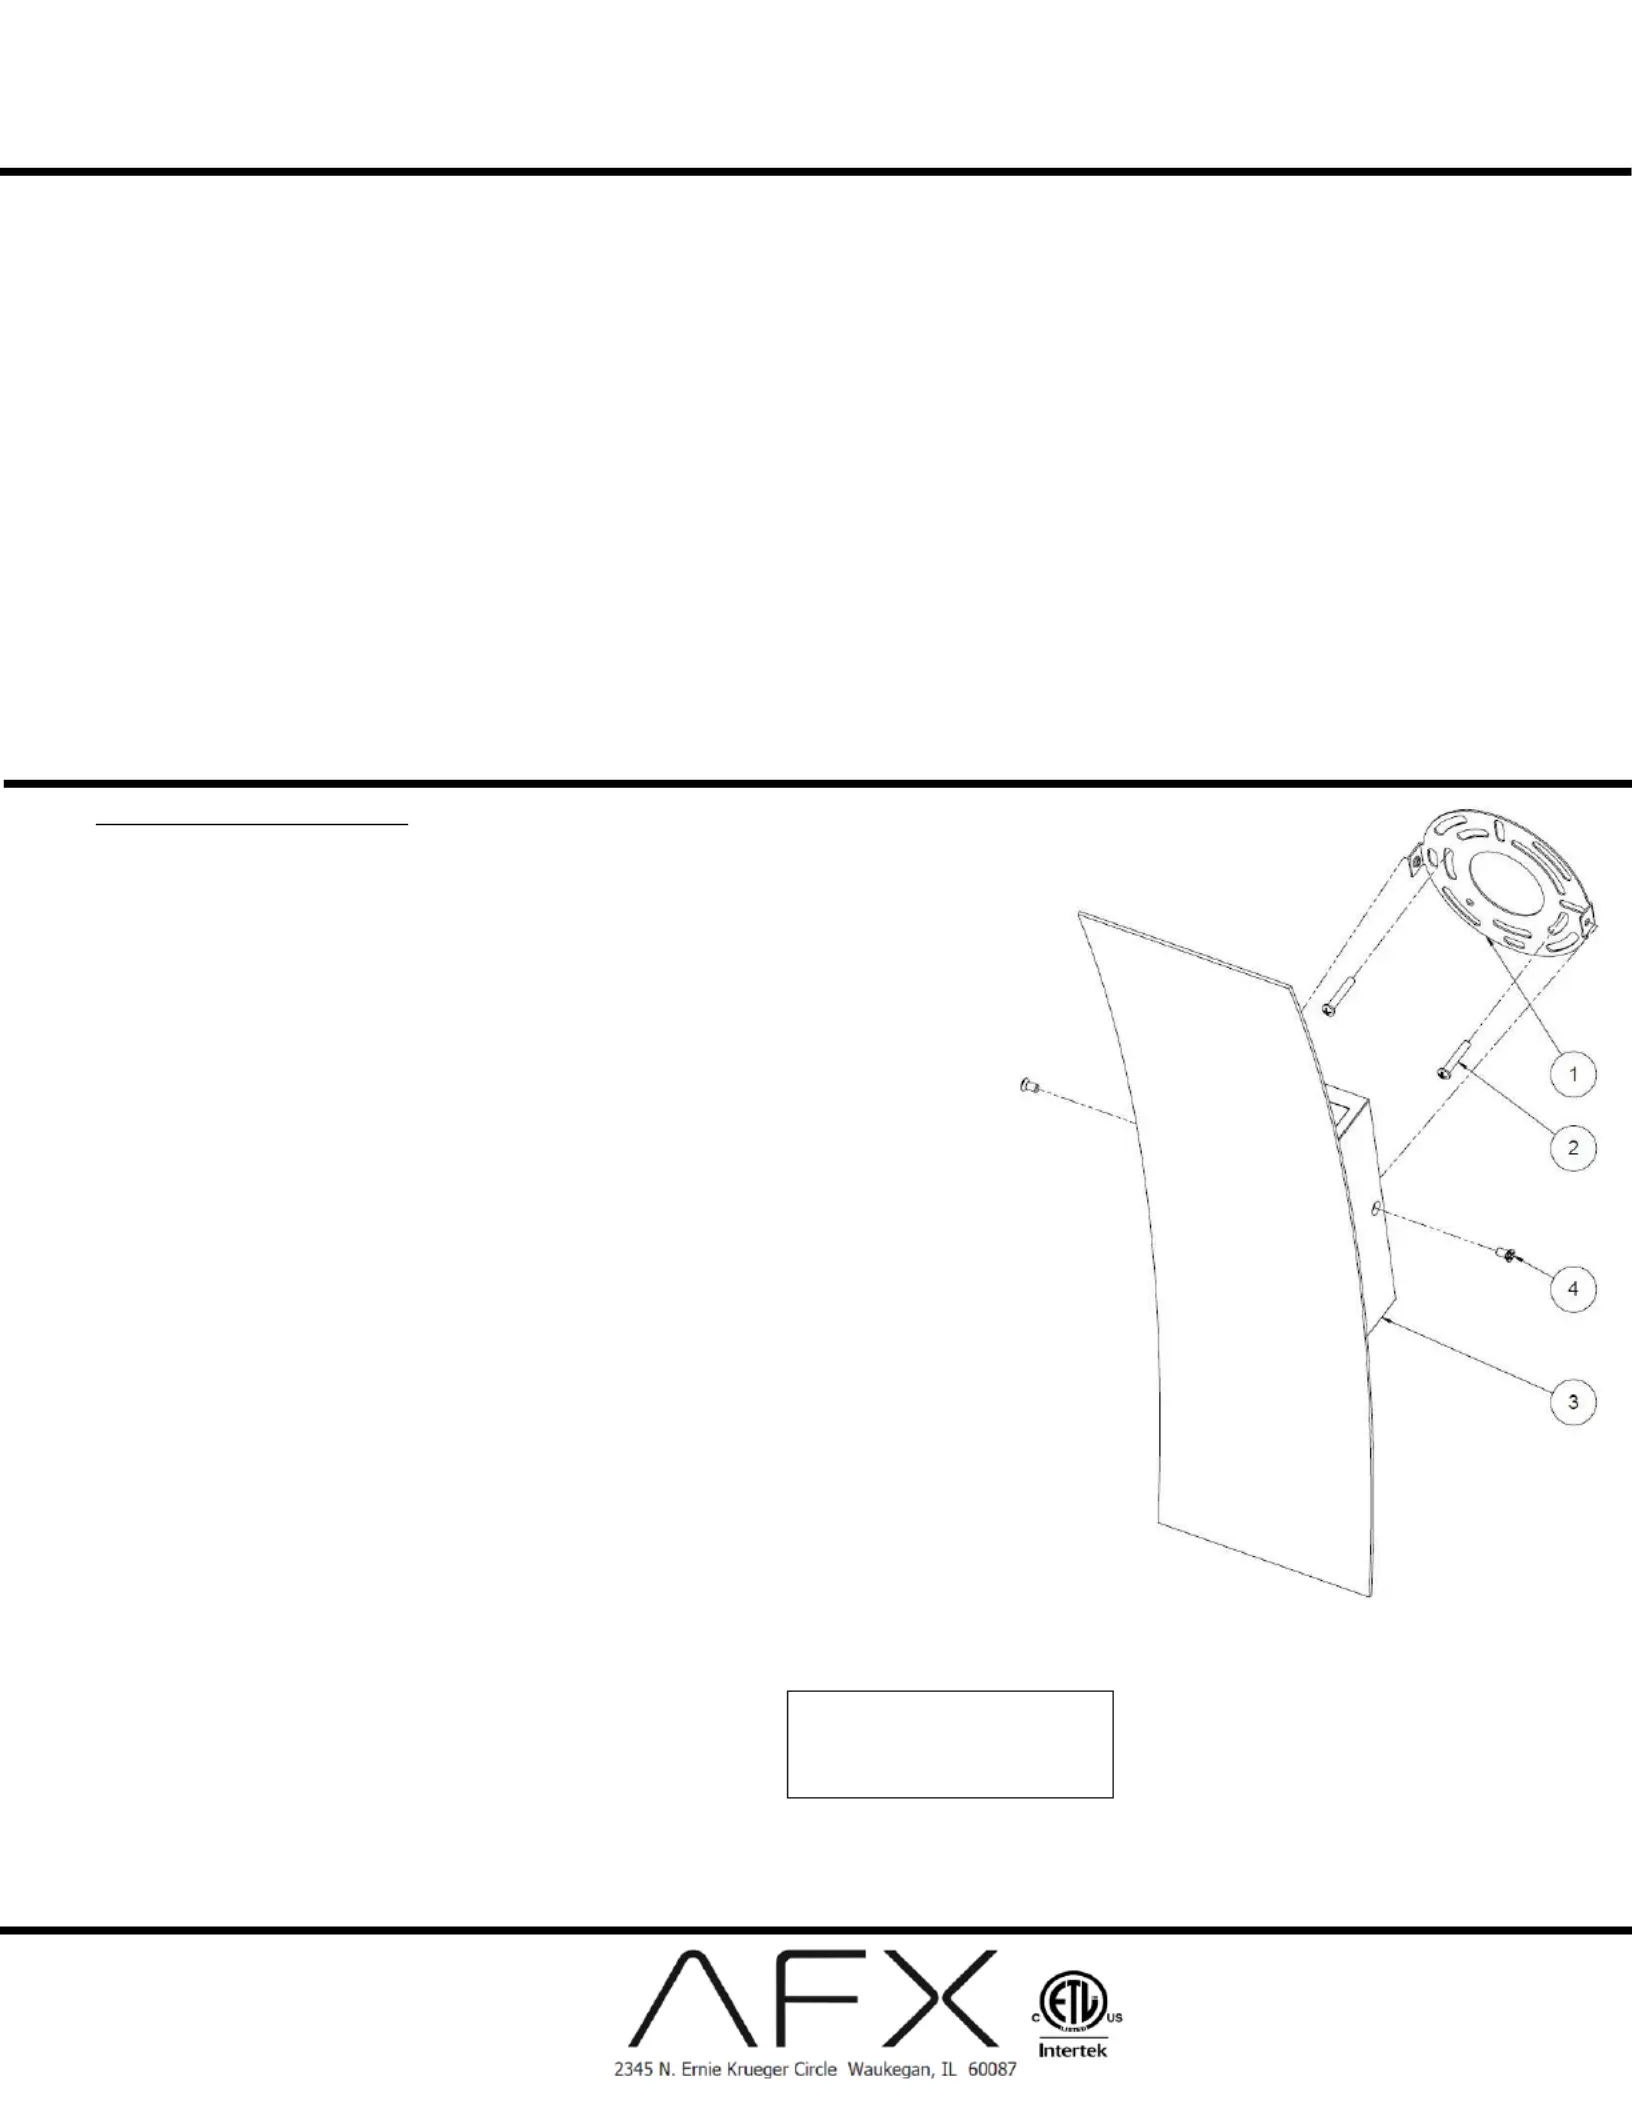
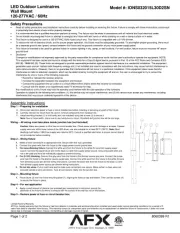
| Model: | SADW0518L30D1 |
Har du brug for hjælp?
Hvis du har brug for hjælp til AFX SADW0518L30D1 stil et spørgsmål nedenfor, og andre brugere vil svare dig
Lys AFX Manualer

9 December 2025

9 December 2025

9 December 2025
18 August 2025
18 August 2025
18 August 2025
18 August 2025
25 Juli 2025
25 Juli 2025
24 Juli 2025
Lys Manualer
- Fluval
- Livarno
- Jands
- Capture Atlas
- ADB
- Craftmade
- Dainolite
- Innr
- BenQ
- Sanitas
- Norwell
- Blizzard
- Sokani
- ServIt
- Bigben
Nyeste Lys Manualer

10 December 2025

10 December 2025

10 December 2025

9 December 2025

9 December 2025

9 December 2025

9 December 2025

9 December 2025

9 December 2025

9 December 2025