EXSYS EX-1311-2IS Manual
EXSYS
Ikke kategoriseret
EX-1311-2IS

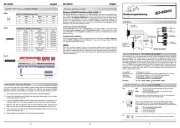
| Mærke: | EXSYS |
| Kategori: | Ikke kategoriseret |
| Model: | EX-1311-2IS |
| Vægt: | 150 g |
| Antal pr. pakke: | 1 stk |
| Brugervejledning: | Ja |
| Produktfarve: | Sort |
| Opbevaringstemperatur (T-T): | -40 - 75 °C |
| Driftstemperatur (T-T): | 0 - 55 °C |
| Certificering: | CE, FC |
| LED-indikatorer: | Ja |
| Kabellængde: | 1.8 m |
| Bæredygtighedscertifikater: | RoHS |
| Kompatible operativsystemer: | Win98SE/ ME/ XP/ 200x/ Vista/ 7/ 8.x/ 10 (32&64-Bit)\nWinCE/ Linux/ Mac OS 10.x |
| Drivere inkluderet: | Ja |
| USB-drevet: | Ja |
| Isolering: | 4 kV |
| Stik 1: | USB Type-A |
| Stik 2: | DB-9 |
| Stik 1 køn: | Hanstik |
| Stik 2 køn: | Hanstik |
| Data-bits: | 7, 8 |
| Stop bits: | 1, 1.5, 2 |
| Relativ luftfugtighed: | 5 - 95 % |
| Beskyttelse ved overspænding: | Ja |
| FIFO (først ind, først ud): | 16 B |
| Flow Control type: | DTR/DSR |
| Paritetsbit: | Even, Mark, N,Odd, Space |
Har du brug for hjælp?
Hvis du har brug for hjælp til EXSYS EX-1311-2IS stil et spørgsmål nedenfor, og andre brugere vil svare dig
Ikke kategoriseret EXSYS Manualer
23 September 2025
23 September 2025
24 Juli 2025
24 Juli 2025
24 Juli 2025
24 Juli 2025

23 Juli 2025
23 Juli 2025
23 Juli 2025
23 Juli 2025
Ikke kategoriseret Manualer
- Hamron
- Jinbei
- Sharkoon
- Lanberg
- EQ-3
- SpyTec
- Rocktrail
- Ikon
- Avantree
- AVPro Edge
- Palson
- 3Doodler
- Krinner
- Solid State Logic
- SRS
Nyeste Ikke kategoriseret Manualer

4 November 2025
4 November 2025
4 November 2025

4 November 2025
4 November 2025

4 November 2025

4 November 2025

4 November 2025

4 November 2025

4 November 2025