PAC GMK367B Manual


Læs gratis den danske manual til PAC GMK367B (2 sider) i kategorien Ikke kategoriseret. Denne vejledning er vurderet som hjælpsom af 21 personer og har en gennemsnitlig bedømmelse på 4.7 stjerner ud af 11 anmeldelser. Har du et spørgsmål om PAC GMK367B, eller vil du spørge andre brugere om produktet?

Side 1/2
CUSTOMER HELP LINE
USA 800-323-4329
iGMK367
GMK367 Mounting Kit
CHEVROLET
2011-15 CRUZE
VEHICLE APPLICATIONS
©2015 AMERICAN INTERNATIONAL INDUSTRIES, INC. TECH Ver.8/15 PRINT Ver. 08/15
WWW.AIUS.NET
2500 East Francis Street Ontario, CA 91761, U.S.A.
USA Sales (800) 336-6500
For information about other American International automotive
accessories visit our website at:
http://www.aius.net
1. Using a soft tool Unclip dash panel including air vents around the radio and remove.
2 Using a soft tool Unclip panel around the shifter and remove.
3 Remove (2) 7mm screws on the lower dash pocket. Unclip and remove
4 Remove (4) 7mm screws from the climate control/hazard button panel.
Unclip and remove
5 Remove (2) 7mm screws on the radio control panel. Unclip and remove
6 Remove (2) 7mm screws on the OEM display panel. Unclip and remove
7 Remove (4) 7mm Screws from radio chassis brackets. Remove radio,
Unplug harnesses.
8 Unclip (2) air vents from the OEM panel (save to be used on kit assembly).
DASH DISASSEMBLY
1 2
KIT ASSEMBLY INSTRUCTIONS
1. Install the OEM air vents to the GMK367 mainframe.
2. Install the (3) clips provided onto the 3 lower posts of the GMK367 mainframe.
3. Insert pocket into lower section of the GMK367 brackets
4. Insert ISO mountable radio between ISO mount brackets and loosely attach to sides
of radio using screws provided with radio when possible, or screws supplied with kit.
5. Using the main frame of the GMK367 as a guide, slide radio forward or backward
for desired look and then tighten screws to the radio.
NOTE: Attach a rear support bracket to the rear of the new radio and adjust as
necessary to support the weight of the radio. Suggested.
Single ISO Mount Applications
Double DIN Mount Applications
1. Install the OEM air vents to the GMK367 mainframe.
2. Install the (3) clips provided onto the 3 lower posts of the GMK367 mainframe.
3. Insert ISO mountable radio between ISO mount brackets and loosely attach to
sides of radio using screws provided with radio when possible,
or screws supplied with kit.
4. Using the main frame of the GMK367 as a guide, slide radio forward or backward
for desired look and then tighten screws to the radio.
NOTE: Attach a rear support bracket to the rear of the new radio and adjust as
necessary to support the weight of the radio. Suggested.
Fig A
Left Cut Right Cut
Left Pre-Cut Right Pre-Cut
NOTE: In most applications you must remove 2 small sections on the OEM dash panel
to allow enough space for the aftermarket radio. Check available room before the
modification. Use the photos below as a guide.
OEM PANEL MODIFICATION


Produkt Specifikationer

Mærke: PAC
Kategori: Ikke kategoriseret
Model: GMK367B

Har du brug for hjælp?

Hvis du har brug for hjælp til PAC GMK367B stil et spørgsmål nedenfor, og andre brugere vil svare dig


Ikke kategoriseret PAC Manualer
PAC

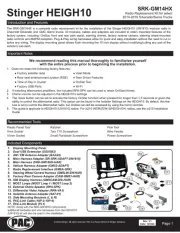
PAC CAM-GM51 Manual

11 Juli 2025
PAC

PAC TY1A-RS Manual

11 Juli 2025
PAC

PAC SR-F15009HX Manual

10 Juli 2025
PAC

PAC SRK-RAM13HX Manual

10 Juli 2025
PAC

PAC AAI-TY3 Manual

30 Juni 2025
PAC

PAC SRK-GM14HX Manual

10 Marts 2025
PAC

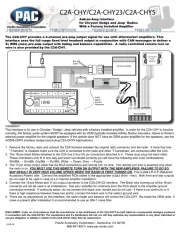
PAC C2A-CHY Manual

19 Februar 2025
PAC

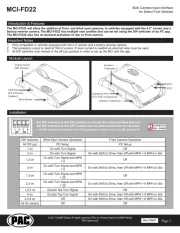
PAC MCI-FD22 Manual

19 Februar 2025
PAC

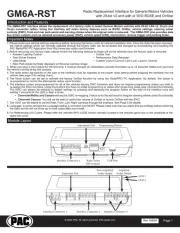
PAC GM6A-RST Manual

19 Februar 2025
PAC

PAC SWI-X Manual

19 Februar 2025

Ikke kategoriseret Manualer

Nyeste Ikke kategoriseret Manualer

IFM

IFM SU9030 Manual

13 September 2025
IFM

IFM O2U554 Manual

13 September 2025
QSC

QSC RMXa Manual

13 September 2025
Osram

Osram VX500-CB Manual

13 September 2025
Zelmer

Zelmer ZTS7990 Manual

13 September 2025
Osram

Osram VX250-SP Manual

13 September 2025