PAC OnStar OS-311b Manual

PAC Ikke kategoriseret OnStar OS-311b

Læs gratis den danske manual til PAC OnStar OS-311b (2 sider) i kategorien Ikke kategoriseret. Denne vejledning er vurderet som hjælpsom af 18 personer og har en gennemsnitlig bedømmelse på 4.7 stjerner ud af 9.5 anmeldelser. Har du et spørgsmål om PAC OnStar OS-311b, eller vil du spørge andre brugere om produktet?

Side 1/2
Pacic Accessory Corporation - 1502 S. Santa Fe Street, Santa Ana, CA 92705
techsupport@pac-audio.com • Voice: 714-835-3022 • Fax: 714-835-3233 • www.pac-audio.com Page 1
08-10-07
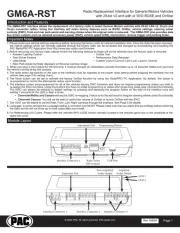
The OS-311b is a plug and play interface that allows replacement of a General Motors GMLAN factory radio. It will main-
tain operation of the OnStar® system. The OS-311b has on board switching and audio ampliers which allow audio from
the OnStar® system to play through the two front factory speakers when OnStar® is active. This interface retains all
warning chimes, the audible turn signal indicators, and provides a 12v R.A.P. (Retained Accessory Power) output circuit.
Step 1- Pre wire the OS-3RAD wire harness to the aftermarket stereo wire harness.
Step 2- After connecting the OS-3RAD and OS-LAN24b wire harness to the OS-311b main interface, connect the OS-LAN24b connector to
the factory harness.
The Following General Motors Vehicles using the GMLAN 11bit Data Bus with or without a Factory Amplier.
Pontiac: G6 (2005-2007)
Chevrolet: Cobalt (2005-2006) Malibu (2004-2007)
1. The OS-311b does not retain the factory XM receiver. You will lose the XM option when the factory radio is replaced with an aftermarket
radio.
2. If you are not retaining the OnStar® system, use the C2R-GM11b instead of this OS-311b interface.
3. Built in Smart Mute Circuitry will play OnStar® audio through the front speakers while muting the radio or turning the radio off if a mute
input circuit is not present
• OnStar® active LED and Ignition on LED.
• Provides +12v switched accessory output. No more searching for switched +12v in fuse box or kick panel.
• Steering wheel radio controls can be retained to control the new radio by using the SWI - X, JACK, ECL or PS.
• New radio will operate with the vehicle RAP (Retained Accessory Power) circuit. The radio stays on after the key is turned off and stays on
for approximately 10 minutes or until the drivers door is opened.
Note: Connect the Purple/White wire (pin 18) from the OS-3RAD to the radios mute input. If a mute input is not available, connect the
Purple/White wire (pin 18) to the Red/White wire (pin 16) of the OS-3RAD connector.
The Lt. Green wire is a SWC output. Connect this wire to a SWI - X, JACK, ECL, or PS green interface wire. The interface will need to be
programmed for version 1. Do not cut the brown loop. Use the Step by Step programming instructions included with the SWI interface.
Wire locations and Description
WIRE COLOR CIRCUIT CIRCUIT WIRE COLOR
9 18
8 17
7 16
6 15
5 14
4 13
3 12
2 11
1 10
PIN NUMBER
N/A
Chime Module
White/Black
Grey/Black
Green/Black
Purple/Black
Black
N/A
Orange
Blue/White
Red
Left Front(-)
Right Front (-)
Left Rear (-)
Right Rear(-)
Ground
Illumination
Amp Turn On
+12v Accessory Output
Left Front (+)
Right Front (+)
Left Rear (+)
Chime Module
Right Rear (+)
+12v Constant
White
Grey
To CM - X
Green
To CM - X
Purple
Yellow
Purple/White
Red/White
Mute Sense
Mute Output
WIRE COLOR CIRCUIT CIRCUIT WIRE COLOR
N/A N/A
8 16
Purple/White GMLAN
7 15
+12v Constant Yellow
Black Ground
6 14
Amplifier Turn On Blue/White
Purple/Black Right Rear (-)
5 13
Right Rear (+) Purple
Green/Black Left Rear (-)
4 12
Left Rear (+) Green
OnStar Mono(-)
3 11
OnStar Mono(+)
Grey/Black Right Front (-)
2 10
Right Front (+) Grey
White/Black Left Front (-)
1 9
Left Front (+) White
PIN NUMBER
White/PurpleWhite/Brown
Amp Control White/Green
OS-3RAD
OS-LAN24b
Notes
Supported Vehicles
Installation
OS-311b
General Motors OnStar®
Interface Installation Instructions
For GMLAN 11bit Vehicles
Pacic Accessory Corporation - 1502 S. Santa Fe Street, Santa Ana, CA 92705
techsupport@pac-audio.com • Voice: 714-835-3022 • Fax: 714-835-3233 • www.pac-audio.com Page 2
08-10-07
Step 3- The CM-X should be plugged into the white 2-pin connector and permanently mounted. This module will retain all warning chimes
and audible turn signal indications. There is no volume adjustment for this feature so keep that in mind when choosing a mounting
location.
Step 4- The OnStar volume is controlled from the adjustment screw on the interface. Make sure this is set to the desired level before ®
mounting the interface and reassembling the dash. The OS-3RAD speaker inputs will not be used
Note - This conguration is used when aftermarket amplier(s) are installed to power new or existing speakers.
Step 3- The CM-X should be plugged into the white 2-pin connector and permanently mounted. This module will retain all warning chimes
and audible turn signal indications. There is no volume adjustment for this feature so keep that in mind when choosing a mounting
location.
Step 4- The OnStar volume is controlled from the adjustment screw on the interface. Make sure this is set to the desired level before ®
mounting the interface and reassembling the dash.
102.7 FM
Aftermarket stereo
30
8586
87
87a
Red wire to accessory
input of radio
OS-LAN24b Harness
OnStar
Active
®
Volume
Adjust
OS - 311b
General Motors GMLan OnStar Interface®
Factory Radio Replacement
Retention the OnStar Option®
Ignition
On LED
Pacific Accessory Corporation Santa Ana, Ca 92705 www.pac-audio.com
OS-3RAD
CM-X
O
Chime Module
SWC output wire
Connect to SWI - X green wire
Program for Version # 1
Red/White - Mute Sense
Purple/White - Mute Output
Connecting to the Vehicle’s Factory Speakers
Connecting to External Speakers
102.7 FM
Aftermarket stereo
30
8586
87
87a
Red wire to accessory
input of radio
OnStar
Active
®
Volume
Adjust
OS - 311b
General Motors GMLan OnStar Interface®
Factory Radio Replacement
Retention the OnStar Option®
Ignition
On LED
OS-3RAD
(-)(+) (-)(+)
White White/Black Grey Grey/Black
High Power
Speaker Outputs
Are Not Used
Pacific Accessory Corporation Santa Ana, Ca 92705 www.pac-audio.com
CM-X
O
Chime Module
SWC output wire
Connect to SWI - X green wire
Program for Version # 1
Audio Signal
to new amp(s)
Red/White - Mute Sense
Purple/White - Mute Output
OS-LAN24b Harness
Testing and Verifying Operation
1. Turn ignition on. The red ignition On LED inside the interface will turn on and the +12v accessory wire will turn on.
2. Turn on the radio and check balancing and fading.
3. Pressing the OnStar® button will turn off the radio (or mute it depending on the connections made) and allow the OnStar® audio to be
heard in the two front speakers. The OnStar® active red LED will also turn on. When OnStar® disconnects, the radio will un-mute or turn
back on and the OnStar® LED will turn off.
4. Turn off vehicle and remove key. RAP will be active and keep the radio on for 10 minutes or until the drivers door is opened.
5. The red LED and the radio will turn off when RAP turns off or the drivers door is opened.
DISCLAIMER: Under no circumstances shall the manufacturer or the distributors of the OS-311b be held liable for consequential damages
sustained in connection with the OS-311b. The manufacture and it’s distributors will not, nor will they authorize any representative or any other
individual to assume obligation or liability in relation to the OS-311b other than its replacement.
OnStar® is a registered trademark of OnStar® Corporation.


Produkt Specifikationer

Mærke: PAC
Kategori: Ikke kategoriseret
Model: OnStar OS-311b

Har du brug for hjælp?

Hvis du har brug for hjælp til PAC OnStar OS-311b stil et spørgsmål nedenfor, og andre brugere vil svare dig


Ikke kategoriseret PAC Manualer
PAC

PAC OnStar OS-311b Manual

17 Februar 2025
PAC

PAC BT-SWC-NI1 Manual

11 Februar 2025
PAC

PAC OnStar OS-311 Manual

11 Februar 2025
PAC

PAC LCCH21 Manual

11 Februar 2025
PAC

PAC APSUB-TY13 Manual

28 December 2024
PAC

PAC RP4-GM31 Manual

6 September 2024
PAC

PAC NU-CTS2 Manual

6 September 2024
PAC

PAC TR7 Manual

6 September 2024
PAC

PAC OS-5 Manual

6 September 2024
PAC

PAC NDK735MG Manual

29 August 2024

Ikke kategoriseret Manualer

Nyeste Ikke kategoriseret Manualer