PAC RP4-GM31 Manual


Læs gratis den danske manual til PAC RP4-GM31 (3 sider) i kategorien Ikke kategoriseret. Denne vejledning er vurderet som hjælpsom af 30 personer og har en gennemsnitlig bedømmelse på 4.4 stjerner ud af 15.5 anmeldelser. Har du et spørgsmål om PAC RP4-GM31, eller vil du spørge andre brugere om produktet?

Side 1/3
Radio Replacement and Steering Wheel Control Interface
for Select General Motors Vehicles
RP4-GM31
© 2018 AAMP Global. All rights reserved. PAC is a Power Brand of AAMP Global.
PAC-audio.com
C
Page 1
Rev: 3
Date: 120618
Introduction and Features
Important Notes
Wiring Connection Chart
Illustration / Schematic
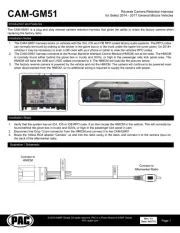
The RP4-GM31 interface allows the replacement of a factory radio in select General Motors vehicles with 29-bit LAN
radios. Using this interface will retain factory features such as steering wheel controls (SWC), Warning Chimes, Rear
Seat Controls (RSC) and the BOSE amplier when the original radio is removed. Use of this interface also allows you
to program two radio functions to each SWC button, by using short press / long press dual command functionality.
The RP4-GM31 also provides data bus driven outputs such as retained accessory power (RAP), vehicle speed sensor
(VSS), illumination, reverse trigger and parking brake.
1. These instructions only apply to R.1.2.3a.8 or later revisions. The revision info can be found on a small white sticker on
the interface and packaging.
2. The radio select rotary switch on the side of the interface, must be adjusted to the proper radio setting before plugging
the interface into the vehicle (see below for setting chart).
3. The interface comes pre-programmed for all of the vehicle’s factory SWC functions and does not require programming,
unless you wish to re-assign the SWC functions or utilize short press / long press dual command functionality. The SWC
can always be restored to default settings by pressing and releasing the program button on the side of the interface
once, and waiting 7 seconds for the LED to ash 4 times.
4. RSC buttons that are identical to the SWC will mimic the SWC one for one.
5. To prevent over driven audio when installing into a vehicle with a Bose system and the aftermarket radio does not have
low level outputs, a 4 channel or two 2 channel LOC’s are recommended to match the input voltage. We recommend the
LP5-4 or two LP5-2 or any other LOC that have the same characteristics as the LP5-4 or LP5-2.
6. To prevent ground loop or engine noise when installing aftermarket radios that use a common ground on the RCA
outputs, a pair of ground loop isolators (part # SNI-1 or LPGL-2) are required.
7. The LED will ash whenever a SWC button is pressed.
Interface Connector
See above chart for
wire color descriptions.
Vehicle Connector
See above chart for
wire color description.
SWC Connection
See above chart for
different radio type
connections
Acc On/
Programming
LED
Programming
Button
Wiring SWC Connection
Light Green Parking Brake Output (-)
Pink Vehicle Speed Output
Blue / White Amp Turn On Input
Red Accessory Output
(10 amp)
Orange / White Illumination Output (+)
Purple / White Reverse Output (+)
Interface Connector
Yellow Battery +12v
Black Ground
Blue Antenna On Input
White Front Left + input
White / Black Front Left - input
Gray Front Right + input
Gray / Black Front Right - input
Green Rear Left + input
Green / Black Rear Left - input
Purple Rear Right + input
Purple / Black Rear Right - input
Vehicle Connector SWC Connector
Blue / Yellow Kenwood,
Newer JVC
3.5mm Jack
Alpine, JVC, Clarion,
Fusion, Pioneer,
Sony, Boyo, Dual,
Lightning Audio,
Visteon or Advent
Radio Replacement and Steering Wheel Control Interface
for Select General Motors Vehicles
RP4-GM31
© 2018 AAMP Global. All rights reserved. PAC is a Power Brand of AAMP Global.
PAC-audio.com
C
Page 2
Rev: 3
Date: 120618
Installation Steps
1. The radio select rotary switch on the side of the interface must be adjusted to the proper radio setting before
plugging the interface into the vehicle.
2. Make all connections as described in the chart on page 1.
If there is a BosAudio system present: Connect the RCA inputs to the aftermarket radios pre-amp output. The audio
level will vary depending on the new radios pre-amp output voltage (2 - 4 volts is recommended).
If there is not a Bose® Audio system present: Cut the RCA inputs off and connect the aftermarket radios speaker outputs
to the remaining wire according to the chart on page 1.
3. Connect the SWC wire according to the chart on page 1 (aftermarket radio MUST support a wired remote input).
4. If you wish to reassign functions to the SWC, follow the programming instructions discussed later on this page.
Alpine Kenwood Clarion Pioneer FusionJVC Sony
Volume + Volume + Volume + Volume + Volume + Volume + Volume + Volume +
Volume - Volume - Volume - Volume - Volume - Volume - Volume - Volume -
Source Source Source Source Source Source Source Source
Track + Track + Track + Track + Track + Track + Track +Search +
Track - Track - Track - Track - Track - Track - Track -Search -
Answer/Voice Receive Receive Receive Receive Receive Answer/End N/P
Mute/End Mute/End Mute/End Mute/End Mute/End Mute/End Mute/End Mute/End
Default SWC Button Assignments
IMPORTANT! The interface comes pre-programmed for the functions listed in the chart below and does not require programming
unless you wish to re-assign the SWC functions to different buttons. The SWC can always be restored to default settings by
pressing the program button on the side of the interface once and waiting for the timeout.
Default Steering Wheel Control Programming
Optional Steering Wheel Control Programming
1
2
3
4
5
6
7
8
9
0
*Other - Dual / Axxera, Jensen, Rockford Fosgate
SET RADIO SELECT SWITCH
If you wish to re-assign the SWC functions or utilize short press long press dual command functionality, the interface must be
programmed in the specic order shown on the chart below. If you come across a function in the chart that your steering wheel
does not have, or you do not want to program, press and release the programming button on the side of the interface to skip that
function. The LED will ash off, and on conrming that you have successfully skipped that function and are ready to proceed to
the next one.
Short Press Long Press Dual Command Functionality
This feature allows you to assign two aftermarket radio functions to each of the vehicles SWC buttons. It can be used with as
many of the buttons as the user likes or none at all. When this functionality is implemented, quickly pressing and releasing a SWC
button will initiate the short press command while pressing and holding a SWC button for longer than two seconds, will initiate the
long press command. Please note that no long press commands are programmed by default. If you wish to assign dual command
functionality to the SWC, please follow the programming steps on the next page.
Alpine JVC Kenwood /
Lightning Audio
Clarion /
Nakamichi
Pioneer /
Other* Sony Fusion
1 2 3 7 8 94


Produkt Specifikationer

Mærke: PAC
Kategori: Ikke kategoriseret
Model: RP4-GM31

Har du brug for hjælp?

Hvis du har brug for hjælp til PAC RP4-GM31 stil et spørgsmål nedenfor, og andre brugere vil svare dig


Ikke kategoriseret PAC Manualer
PAC

PAC OnStar OS-311b Manual

17 Februar 2025
PAC

PAC BT-SWC-NI1 Manual

11 Februar 2025
PAC

PAC OnStar OS-311 Manual

11 Februar 2025
PAC

PAC LCCH21 Manual

11 Februar 2025
PAC

PAC APSUB-TY13 Manual

28 December 2024
PAC

PAC RP4-GM31 Manual

6 September 2024
PAC

PAC NU-CTS2 Manual

6 September 2024
PAC

PAC TR7 Manual

6 September 2024
PAC

PAC OS-5 Manual

6 September 2024
PAC

PAC NDK735MG Manual

29 August 2024

Ikke kategoriseret Manualer

Nyeste Ikke kategoriseret Manualer