SolidDrive SD-1SM Manual


Læs gratis den danske manual til SolidDrive SD-1SM (2 sider) i kategorien Ikke kategoriseret. Denne vejledning er vurderet som hjælpsom af 3 personer og har en gennemsnitlig bedømmelse på 4.9 stjerner ud af 2 anmeldelser. Har du et spørgsmål om SolidDrive SD-1SM, eller vil du spørge andre brugere om produktet?

Side 1/2
SolidDrive
INSTALLATION & USE GUIDE
for SolidDrive SD1sm to wood, laminate,
and composite surfaces
8005 W. 110th St., Suite 208 • Overland Park, KS 66210
TEL: 913-663-5600 • FAX: 913-663-3200 • www.SolidDrive.com
WARRANTY
SolidDriv SolidDr v wooes, i e sub fer and A4 amplifiers are guaranteeds, for 7 years
from date of purchas An misuses or modifications to equipment in an wa e. y this y y will
WARNING
Read instructions prior to operating . To reduce risk of fire or electric shock, do not the
expose product to rain or moistur Unplug prior to cleaning and clean with a this e.
damp cloth There are no user-servicea le par in product, please re . b ts this fer all
servicing to qualified personnel.
So SD Sp f ti sli rivedD 1sm eci ica on
NOTE: this ust be When installed in Canada, product m installed in accordance
with Canadian Electrical Cod Par the e, C22.1, t1.
Type
Impedance
Frequency Response (Hz)
R ecommended Amplifier Power
Dimensions
Weight
UL Listing
Full Range Transducer
8Ohm
70 Hz 15 to kHz
10 100 W atts
2.28'' x 2.08'' HeightDiameter
Mounting Plate Diameter 3.5''
1.2 / lb .54 kg
1480 2043 &
Experience Audio Perfection
Induct on yna teni D mics ex sive iline of aud o
pr c makodu ts es it y u t eeas to create the l imat
aud ega of ta ati soystem r, rdless i sn ll ion
requirement Induction Dynamics uildss. b
these the products with only most select
components and materials and utili ; zes
numerous unique and proven technologie s.
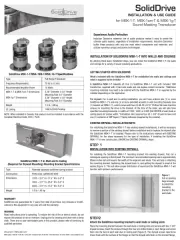
INSTALLATION OF SOLIDDRIVE SD1G TO WOOD
SURFACES
By these s, y theutilizing basic installation step ou can install
SolidDr v SD1sm on wood, laminat composite and otheri e e, s,
porous sur ace SD1sm commonly used on desk f s.The is s,
conference table cabinetr s, y, fu e.and other rnitur
GETTING STARTED WITH SOLIDDRIVE
What’s included with the SolidDrive SD1sm for
installation to wood surfaces
A SolidDrive SD1sm consists of: One SolidDr v SD1sm (1) i e
unit and attached wiring harness with Eurostyle connector .
Installation requires our (4) wood scr ws up to (supplied f e #9
by installer).
For wooden surfaces: The i e is SolidDr v SD1sm designed
with an oversi zed mounting base which pre-drilled or is f
mounting to wood sur ace f s.
REV - 3 / 3 / 11
Figure 3
SolidDr vi e
SD1sm’s
wired in
parallel
for
high output
i s in ta atll ons
STEP 1
Mount the SolidDrive SD1sm to wood, laminate, and composite
surfaces
The i e be f SolidDr v SD1sm can installed directly to wooden sur aces to deliver
h . Eigh-quality sound ven our xisting offices or con erence rooms aren’t if y e f
wired or audio SolidDr v SD1sm provides a convenient solution and f , the i e
installs underneath desk counter tops and con erence room ta les so s, f b the
sound source not visi l is b e.
T he ove zrsi ed ount ng base on So mi the lidDr vi e S 1 D sm a oll ws it to be s ecr w de
directly to underside of rnitur For maximum output each SolidDr v the fu e. i e
channel should av availa le at least square of sur ace area. h e b 20 feet f
T i e S 1 be fhe SolidDr v D sm should sur ace mounted with the ove siz ir ed mount ng
base facing mounting area m the . T he ounting base aud is the io sioutput de
oppos abeite the l l For r. su fac m w laes ade of ood, minates, i s theand compos te
SolidDr v SD1sm should scr wed directly to sur aci e be e the f e.
Once ou av y h e the i e use thedetermined where to mount SolidDr v SD1sm
appropriate length wood scr ws to attach securely to sur ac e it the f e. The best
mounting location typically out of on underside or back of desk is sight the s,
counter top con erence ta les or other office/home rnitur Mak s, f b fu e. e sure to
install SolidDr v SD1sm in a location where will not jostled or the i e it be
b y.umped easil For xampl e e, if the i e theinstalling SolidDr v SD1sm on
underside of a ta l mount in middle awa b e, it the y from where people’s legs
will be. T fhe our pr dr m l dDr v e- illed ounting ho es on the Soli i e S 1 D sm oversized
m ld w r wounting base will ho ood sc e s s .as large a#9
Some i sn ta at onll i s may requ es beire that pilot hol drilled into suthe rface m rate ial
due to its ss ihardne espec ally if larger, e e uscourse thread scr ws ar ed.
STEP 2
Make the electrical connections
Mak electrical connection ween SolidDr v SD1sm ande the bet the i e the
speaker ca le using Eurostyle connector attached to end of b the the the
SolidDriv SD1sm audio cablee . The ity the is polar of wiring clearly indicated
(Figure 2). NOTE: When installed in Canada, this product must be
installed in accordance e Canad n t e, C22.1,with th ia Elec rical Cod
Part1.
NOTE: If inst e SD u e i h t nk, slide it overalling th 1sm sing th opt onal ea si
the SD1sm housing body and tighten with the included mini hex key.
DO NOT OVERTIGHTEN as this could strip the screw.
STEP 3
Equalize the SolidDrive SD1sm sound system
The f sur ace material plays y the a ke role in system’s f e.Tsound per ormanc o
ensure an optimal listening xperience installer equali e the MUST ze the
SolidDr v SD1sm system Equalization accomplished usingi e . is by the
optional SolidDr v Dr wall Passiv i e y e M e ( UL )Equalization odul not approved
or equalization eature availa le on some receiver ius ng the auto f b s.
INSTALLATION NOW COMPLETE
ENJOY THE
SOLIDDRIVE SD1SM SOUND SYSTEM
N yow that ou’v completed installation process and equalization, ou can e the y
enjoy the f the i e audio per ection of Induction Dynamics SolidDr v SD1sm
sound system.
HIGH OUTPUT INSTALLATIONS
For installations requiring output, such as a large con high ference ta le or b
other output type application, wo SolidDr v SD1sm’ high t i e s be should used
for each of output channels or the high (f example left, r and center the ight,
channels of a home theater or left and r channels of a output the ight high
stereo wo SD1sm’ should wired in or each of system) . The t s be parallel f the
high i eoutput channels (Figure 3). For maximum output each SolidDr v
SD1sm should av at least square of sur ace area. h e 20 feet f
HOW THE SOLIDDRIVE SD1G WORKS ON WOOD
With the i e y e y f b e,SolidDr v SD1sm ou can mak an desk, con erence ta l
cabinetry, fu eand other rniture into a speak r.
Figure 1
Mounting
the
S i eolidDr v
SD1sm to
a ta leb
Figure 4
SolidDr vi e
SD1sm
making a
table into
a speaker
Figure 2
Eurostyle
connector


Produkt Specifikationer

Mærke: SolidDrive
Kategori: Ikke kategoriseret
Model: SD-1SM

Har du brug for hjælp?

Hvis du har brug for hjælp til SolidDrive SD-1SM stil et spørgsmål nedenfor, og andre brugere vil svare dig


Ikke kategoriseret SolidDrive Manualer

Ikke kategoriseret Manualer

Nyeste Ikke kategoriseret Manualer