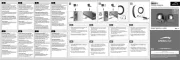
1. Kérjük, először csatlakoztassa a szatellit hangszóró fekete
Cinch/RCA dugóját a mélysugárzó audió kimeneteihez („SOUND
2. Ezután csatlakoztassa a mélysugárzót az audió kábellel
(„AUDIO INPUT“ / fehér dugó bal oldalon, vörös dugó jobb
oldalon) az audió forráshoz, például a számítógéppel.
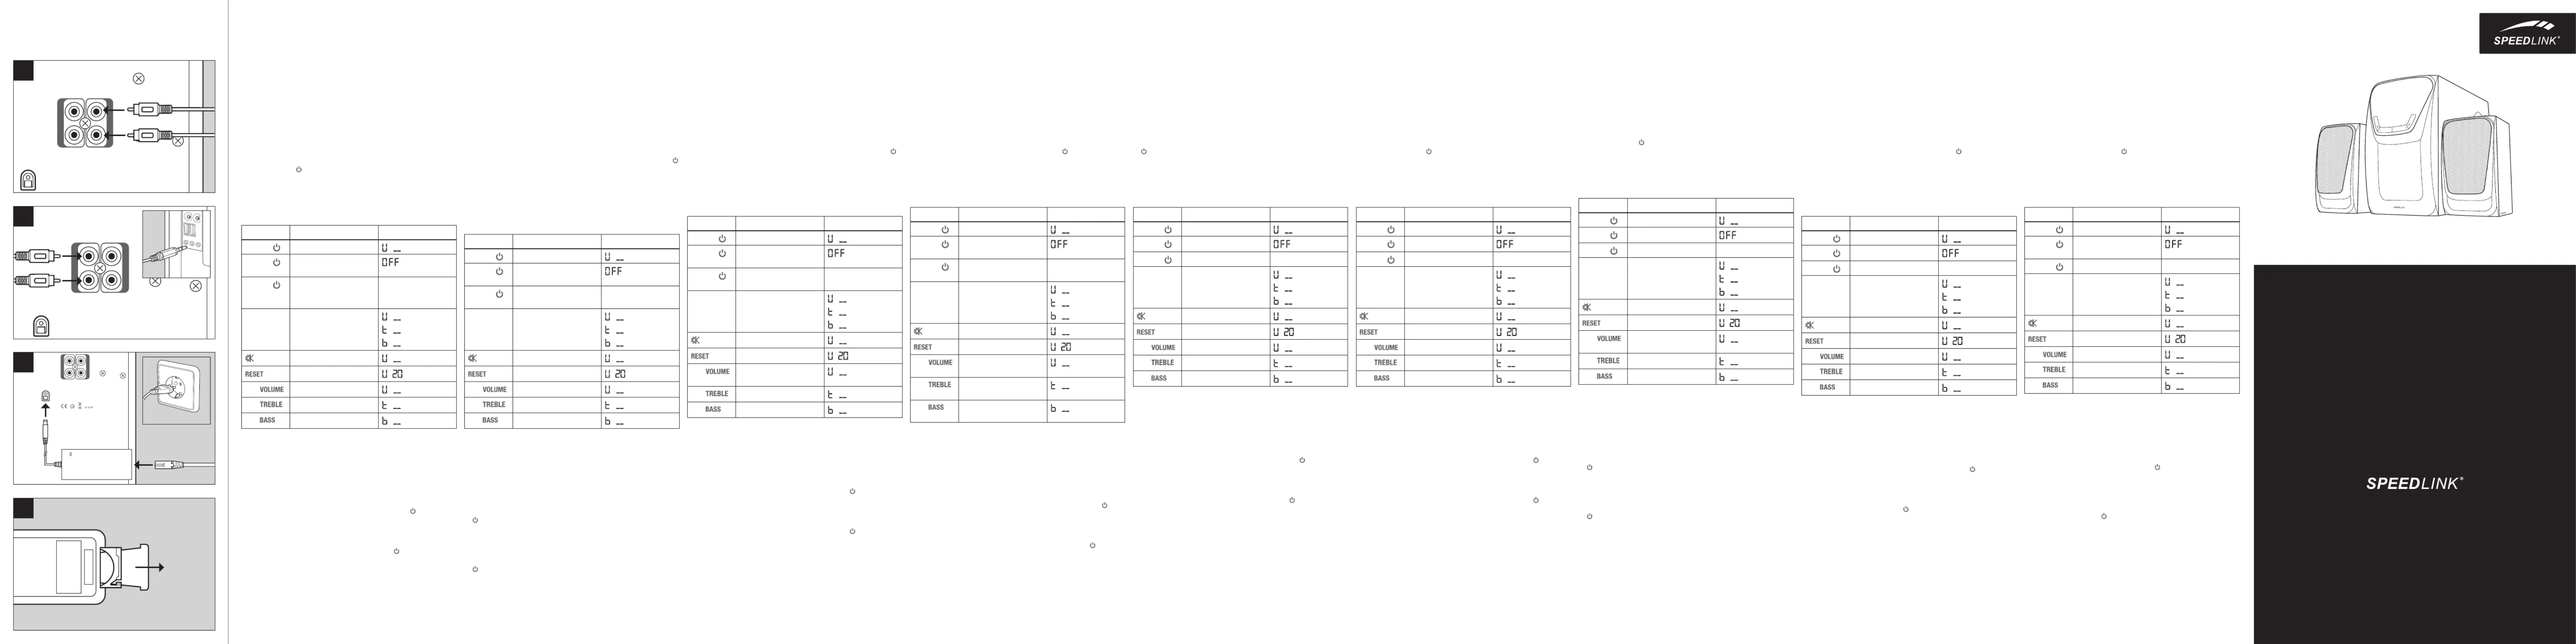
3. Csatlakoztassa a tápkábel a mélysugárzó bemeneti aljzatába
(DC). Csatlakoztassa a mélysugárzó tápegységét egy dugaszoló
aljzatba (100 - 240 V, 50/60 Hz).
4. Kérjük, ügyeljen az akkumulátor infravörös távirányítóba
(CR2025, 3 V) helyezése előtt arra, hogy a kapcsolati csíkokat
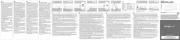
5. Kapcsolja be a mélysugárzó rendszert a mélysugárzón
lévő elülső („POWER“) gombot röviden megnyomva vagy a
6. Az elülső gombokkal és a távirányítóval szabályozhatja a
mélysugárzó rendszer hangzási tulajdonságait. Ezek funkcióit a
táblázat adja meg. Kérjük, vegye fi gyelembe, hogy a távirányító
a használat alatt közvetlenül a mélysugárzóra irányuljon.
BILLENTYŰ FUNKCIÓ MEGJELENÍTÉS
- / + Magas hangok le/fel
* V 20 = Kötet alapértelmezett
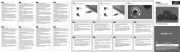
7. Ha 30 másodperc eltelik a bemeneti jelzés nélkül, akkor a
rendszer automatikusan készenléti módba vált. A kijelzőn
megjelenik az „OFF“ megjegyzés. Ha ismét a bekapcsolási
jelzés látható, akkor a rendszer kb. három másodperc után
automatikusan ismét bekapcsol.
8. Ahhoz, hogy kézzel váltson készenléti módba, röviden nyomja
meg a „POWER“-gombot a mélysugárzón vagy a
távirányítón. Kérjük, vegye fi gyelembe, hogy ebben az esetben
a bemeneti jelzés után nem fog automatikusan bekapacsolni.
9. A hangszóró rendszer teljes kikapcsolásához tartsa lenyomva
a mélysugárzón a „POWER“-gombot vagy a
távirányítón két másodpercig hosszan.
1. Πρώτα συνδέστε τα μαύρα βύσματα Cinch/RCA των ηχείων
δορυφόρων στις εξόδους ήχου του υπογούφερ («SOUND
2. Στη συνέχεια συνδέστε το υπογούφερ μέσω του καλωδίου
εισόδου ήχου («AUDIO INPUT»/άσπρο βύσμα αριστερά, κόκκινο
βύσμα δεξιά) με την πηγή ήχου, για παράδειγμα με τον Η/Υ.
3. Συνδέστε του ηλεκτρικό καλώδιο με το στην υποδοχή εισόδου
του υπογούφερ (DC). Συνδέστε το τροφοδοτικό μέσω του
καλωδίου δικτύου σε μια πρίζα (100-240V DC, 50/60Hz).
4. Προσέξτε πριν την τοποθέτηση μιας μπαταρίας (CR2025, 3V)
στο τηλεχειριστήριο υπερύθρων ώστε να έχετε απομακρύνει
ενδεχόμενα υπάρχουσες λωρίδες επαφής.
5. Ενεργοποιήστε το σύστημα υπογούφερ πατώντας σύντομα το
μπροστινό πλήκτρο («POWER») στο υπογούφερ ή το πλήκτρο
6. Μέσω των μπροστινών πλήκτρων και του τηλεχειριστηρίου
ρυθμίζετε τις ιδιότητες ήχου του συστήματος υπογούφερ.
Μπορείτε να βρείτε περισσότερες λεπτομέρειες στον πίνακα.
Προσέξτε ότι το τηλεχειριστήριο πρέπει να βλέπει απευθείας
στο υπογούφερ κατά τη διάρκεια της χρήσης.
ΠΛΗΚΤΡΟ ΛΕΙΤΟΥΡΓΙΑ ΕΝΔΕΙΞΗ
- / + Πρίμα μείωση/αύξηση
- / + Μπάσα μείωση/αύξηση
* V 20 = Αξίας της όγκος προεπιλογή
7. Μετά από 30 λεπτά χωρίς σήμα εισόδου, το σύστημα
γυρίζει αυτόματα στην λειτουργία ετοιμότητας. Στην οθόνη
προβάλλεται η υπόδειξη «OFF». Όταν υπάρξει πάλι σήμα
εισόδου, το σύστημα ενεργοποιείται πάλι μετά από περίπου
8. Για χειροκίνητη αλλαγή στην λειτουργία ετοιμότητας, πιέστε
σύντομα το πλήκτρο «POWER» στο υπογούφερ ή το πλήκτρο
στο τηλεχειριστήριο. Προσέξτε ότι σε αυτή την περίπτωση
δεν διεξάγεται αυτόματα μετέπειτα ενεργοποίηση μέσω ενός
9. Για να απενεργοποιήσετε το σύστημα ηχείων κρατήστε
πατημένο το πλήκτρο «POWER» στο υπογούφερ ή το πλήκτρο
στο τηλεχειριστήριο περίπου για δύο δευτερόλεπτα.
1. Zapojte nejprve černé konektory Cinch/RCA satelitních
reproduktorů do audio výstupů subwooferu („SOUND OUTPUT“).
2. Poté zapojte subwoofer pomocí audio vstupního kabelu
(„AUDIO INPUT“ / bílý konektor vlevo, červený konektor vpravo)
do vašeho audio zdroje, například do PC.
3. Připojte napájecí kabelu ke vstupnímu konektoru subwooferu
(DC). Pomocí síťového zdroje zastrčte napájecí zdroj do zásuvky
4. Před vložením baterie (CR2025, 3V) do infračerveného
dálkového ovládání dbejte na případné odstranění kontaktních
5. Subwoofer systému zapněte krátkým stisknutím předního
tlačítka („POWER“) na subwooferu nebo stisknutím tlačítka
6. Předními tlačítky a dálkovým ovládáním regulujete vlastnosti
zvuku Subwoofer systému. Další podrobnosti naleznete v
tabulce. Vezměte prosím na vědomí, že dálkové ovládání by
mělo být zaměřeno při použití přímo na subwoofer.
- / + Snížení/zvýšení výšek
- / + Snížení/zvýšení basů
* V 20 = Výchozí úroveň hlasitosti
7. Po 30 minutách bez vstupního signálu se systém automaticky
přepne do pohotovostního (Stand-by) režimu. Na displeji se
objeví informace „OFF“. Jakmile je signál opět aktivovaný, se
systém po cca třech sekundách opět automaticky zapne.
8. Pro manuální přepnutí do režimu Stand-by, stiskněte krátce
tlačítko „POWER“ na subwooferu nebo tlačítko
ovládání. Vezměte prosím na vědomí, že v tomto případě se
neprovede automatické přepínání pomocí vstupního signálu.
9. Pro úplné vypnutí systému reproduktorů podržte stisknuté
tlačítko „POWER“ na subwooferu nebo tlačítko
ovládání po dobu cca dvou sekund.
1. Primeiro, ligue a fi cha Cinch/RCA do altifalante de satélites nas
saídas de áudio do subwoofer („SOUND OUTPUT“).
2. De seguida, ligue o subwoofer com o cabo de entrada („AUDIO
INPUT“ / fi cha branca à esquerda, fi cha vermelha à direita)
com a sua fonte de áudio, por exemplo com o computador.
3. Conecte o cabo de alimentação à tomada DC do subwoofer.
Ligue a fonte de alimentação com o cabo de rede numa
tomada (100-240 V DC, 50/60 Hz).
4. Antes de colocar uma bateria (CR2025, 3 V) no telecomando de
infravermelho, lembre-se de remover as fi tas do contacto se
5. Ligue o sistema do subwoofer premindo brevemente o botão
frontal („POWER“) no subwoofer ou o botão
6. Regule as características do sistema do subwoofer nos botões
frontais e no telecomando. Mais informações na tabela.
Tenha em conta que o telecomando tem de estar orientado
diretamente para o subwoofer enquanto estiver a utilizá-lo.
* V 20 = Valor de volume padrão
7. Após 30 minutos sem sinal de entrada, o sistema muda
automaticamente para o modo standby. No visor aparece o
aviso „DESL“. Quando houver outra vez o sinal de entrada,
o sistema liga-se novamente após três segundos de forma
8. Para mudar manualmente para o modo standby, prima
brevemente o botão „POWER“ no subwoofer ou o botão
telecomando. Tenha em conta que, neste caso, não haverá
uma ligação automática por um sinal de entrada.
9. Para desligar por completo o sistema de altifalantes, mantenha
premido o botão „POWER“ no subwoofer ou o botão
telecomando por dois segundos.
1. Slut først det sorte cinch-/RCA-stik på satellit-højttaleren til
lydudgangene på subwooferen (»-SOUND OUTPUT«).
2. Forbind derefter subwooferen med lydkilden, for eksempel
en pc, via lyd-indgangskablet (»AUDIO INPUT« / hvidt stik til
venstre, rødt stik til højre).
3. Slut Strømkabel til indgangsstik på subwooferen (DC). Slut
strømkabel i højttaleren stikket (DC). Slut netaggregatet til en
stikkontakt (100-240V DC, 50/60Hz).
4. Bemærk, at kontaktstrimlerne skal fjernes, før der sættes et
batteri (CF2025, 3V) ind i den trådløse fjernbetjening.
5. Tænd for subwoofer-systemet ved at trykke kort på
frontknappen («-POWER«) på subwooferen, eller aktivér
-knappen på fjernbetjeningen.
6. Med frontknapperne og fjernbetjeningen kan du regulere
subwoofersystemets klang. Se tabellen for yderligere
informationer. Bemærk, at fjernbetjeningen skal rettes direkte
mod subwooferen ved brug.
* V 20 = Standard-volumen
7. Efter 30 minutter uden indgangssignal skifter systemet
automatisk til stand-by-modus. Infoen »-OFF« vises på
displayet. Når indgangssignalet aktiveres, tændes systemet
efter cirka tre sekunder automatisk igen.
8. For at skifte manuelt til stand-by-modus skal du trykke kort
på »-POWER«-knappen på subwooferen eller på
på fjernbetjeningen. Bemærk, at der herefter ikke tændes
automatisk via et indgangssignal.
9. For at slukke helt for højttalersystemet, skal du trykke på
»-POWER«-knappen på subwooferen eller på
fjernbetjeningen i cirka to sekunder.
1. Koppla först satellithögtalarnas svarta cinch/RCA-kontakter till
subwooferns audioutgångar (“SOUND OUTPUT“).
2. Anslut sedan subwoofern till en audiokälla, t ex en PC, med
audioingångskabeln (“AUDIO INPUT“/vit kontakt till vänster, röd
3. Anslut strömkabeln till ingången på subwoofern. Sätt nätdelens
strömkabel i ett eluttag (100-240V DC, 50/60Hz).
4. Tänk på att du kanske måste ta bort skyddsremsan över
kontakten innan du stoppar in ett batteri (CR2025, 3V) i den
infraröda fjärrkontrollen.
5. Sätt på subwoofersystemet genom att snabbt trycka på
knappen på framsidan (“POWER“) av subwoofern eller trycka
6. Med knapparna på framsidan och på fjärrkontrollen regleras
subwoofersystemet ljudegenskaper. Fler detaljer fi nns i
tabellen. Tänk på att fjärrkontrollen måste riktas rakt mot
subwoofern för att det ska fungera.
TANGENT FUNKTION INDIKATION
Håll inne i 2s: stäng av -
* V 20 = Standardvolymvärde
7. Efter 30 minuter utan ingångssignal växlar systemet till
standby automatiskt. “OFF“ kommer upp på displayen. När
ingångssignalen kommit tillbaka kopplas systemet på igen
automatiskt efter cirka tre sekunder.
8. För att växla till standbyläget manuellt trycker du snabbt på
subwooferns “POWER“-knapp eller fjärrkontrollens
Observera att systemet i så fall inte kopplas på automatiskt
igen av en ingångssignal.
9. För att stänga av högtalarsystemet helt och hållet håller du
subwooferns “POWER“-knapp eller fjärrkontrollens
inne i cirka två sekunder.
1. Liitä ensin satelliittikaiuttimen musta RCA-liitin subwooferin
audiolähtöihin (”SOUND OUTPUT”).
2. Yhdistä subwoofer sen jälkeen äänen tulokaapelilla (”AUDIO
INPUT” / valkoinen liitin vasemmalla, punainen liitin oikealla)
audiolähteeseen, esimerkiksi tietokoneeseen.
3. Liitä virtajohto tuloliittimeen subwooferin (DC). Liitä verkkolaite
virtajohdolla pistorasiaan (100-240V DC, 50/60Hz).
4. Ennen kuin asetat pariston (CR2025, 3V)
infrapunakaukosäätimeen, poista tarvittaessa kontaktinauha.
5. Käynnistä subwoofer-järjestelmä painamalla lyhyesti
subwooferin etuosassa olevaa (”POWER”)-painiketta tai
6. Subwooferin etuosan ja kaukosäätimen painikkeiden avulla voit
säätää subwoofer-järjestelmän ääniominaisuuksia. Lisätietoja
löytyy taulukosta. Huomaa, että kaukosäädin on käytön aikana
suunnattava suoraan subwooferia kohti.
- / + Korkeat äänet alas/ylös
- / + Bassoäänet alas/ylös
* V 20 = Standard oletusarvo
7. Jos tulosignaalia ei 30 minuutin kuluessa ole saatu, järjestelmä
vaihtaa automaattisesti valmiustilaan. Näytöllä näkyy ohje
”OFF”. Kun tulosignaali on jälleen saatavilla, järjestelmä
kytkeytyy noin kolmen sekunnin kuluttua uudelleen päälle.
8. Jos haluat siirtyä valmiustilaan manuaalisesti, paina lyhyesti
subwooferin ”POWER”-painiketta tai kaukosäätimen
-painiketta. Huomaa, että tällöin järjestelmä ei
automaattisesti kytkeydy päälle, kun tulosignaali on
9. Jos haluat kytkeä kaiutinjärjestelmän täysin pois päältä, pidä
subwooferin ”POWER”-painiketta tai kaukosäätimen
-painiketta painettuna noin kahden sekunnin ajan.
1. Start med å sette de svarte Cinch/RCA-pluggene på
satellitthøyttaleren inn i lydutgangene på subwooferen
2. Koble deretter subwooferen til lydkilden (f.eks. en datamaskin)
ved hjelp av lydinngangskabelen («AUDIO INPUT» / hvit plugg til
venstre, rød plugg til høyre).
3. Koble strømkabelen inn i inngangsboksen på subwooferen
(DC). Bruk deretter nettkabelen for å koble strømadapteren til
en stikkontakt (100–240V DC, 50/60Hz).
4. Fjern en eventuell kontaktstrimmel før du setter inn batteriet
(CR2025, 3V) i IR-fjernkontrollen.
5. Slå på subwoofersystemet ved å trykke kort på tasten
foran på subwooferen («POWER»), eller bruk
6. Du kan justere klangegenskapene for subwoofersystemet
ved hjelp av fjernkontrollen og tasten foran. Se tabellen for
mer informasjon. Pass på å peke fjernkontrollen direkte mot
MODE Innstillingsmodus for
7. Etter 30 minutter uten inngangssignal går systemet automatisk
i ventemodus. Displayet viser da «OFF». Når det igjen mottas
inngangssignal, kobler systemet seg inn automatisk etter ca.
8. Du kan bytte til ventemodus manuelt ved å trykke kort på
«POWER»-tasten på subwooferen eller trykke på
fjernkontrollen. Vær oppmerksom på at systemet da ikke kobler
seg inn automatisk ved mottak av inngangssignal.
9. For å slå av høyttalersystemet helt holder du inne «POWER»-
tasten på subwooferen eller
-tasten på fjernkontrollen i ca.
1. Introduceți mai întâi conectorul negru Cinch/RCA al difuzorului
receptorului de satelit la ieșirile audio ale subwoofer-ului
2. În continuare conectați subwoofer-ul, prin intermediul cablului
de intrare audio („AUDIO INPUT“ / conector alb stânga,
conector roșu dreapta) la sursa audio, de exemplu la PC.
3. Conectați cablul de alimentare la priza de curent continuu a
subwoofer-ului. Conectați sursa de alimentare, prin intermediul
cablului de alimentare, la o priză (100-240V DC, 50/60Hz).
4. Înainte de a introduce bateria (CR2025, 3V) în telecomanda cu
infraroșu, vă rugăm să îndepărtați benzile de contact.
5. Aprindeți subwoofer-ul apăsând scurt tasta frontală („POWER“)
de pe subwoofer sau tasta
6. Caracteristicile sunetului emis de sistemul subwoofer se pot
regla cu ajutorul tastelor frontale și a telecomenzii. Mai multe
informații sunt specifi cate în tabel. Aveți grijă ca telecomanda
să fi e îndreptată direct spre sobwoofer în timpul utilizării.
Apăsare 2sec.: stingere -
MODE Mod reglaj volum/înalte/
- / + Creștere/scădere înalte
- / + Creștere/scădere bas
* V 20 = Valoarea standard de volum
7. Dacă în 30 de minute nu primește niciun semnal de intrare,
sistemul trece automat în modul Stand-by. Pe display
apare indicația „OFF“. Sistemul se activează automat după
aproximativ trei secunde de la primirea unui semnal de intrare.
8. Pentru a comuta manual în modul Stand-by, apăsați scurt tasta
„POWER“ de pe subwoofer sau tasta
rugăm să rețineți că în acest caz nu are loc activarea automată
la primirea unui semnal de intrare.
9. Pentru a stinge complet sistemul de difuzoare mențineți
apăsată timp de aprox. două secunde tasta „POWER“ de pe
EUFONIA – 2.1 SUBWOOFER SYSTEM