Wimberley, Inc. ©2018, All Rights Reserved
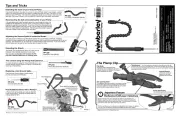
Grip delicate objects without damage.
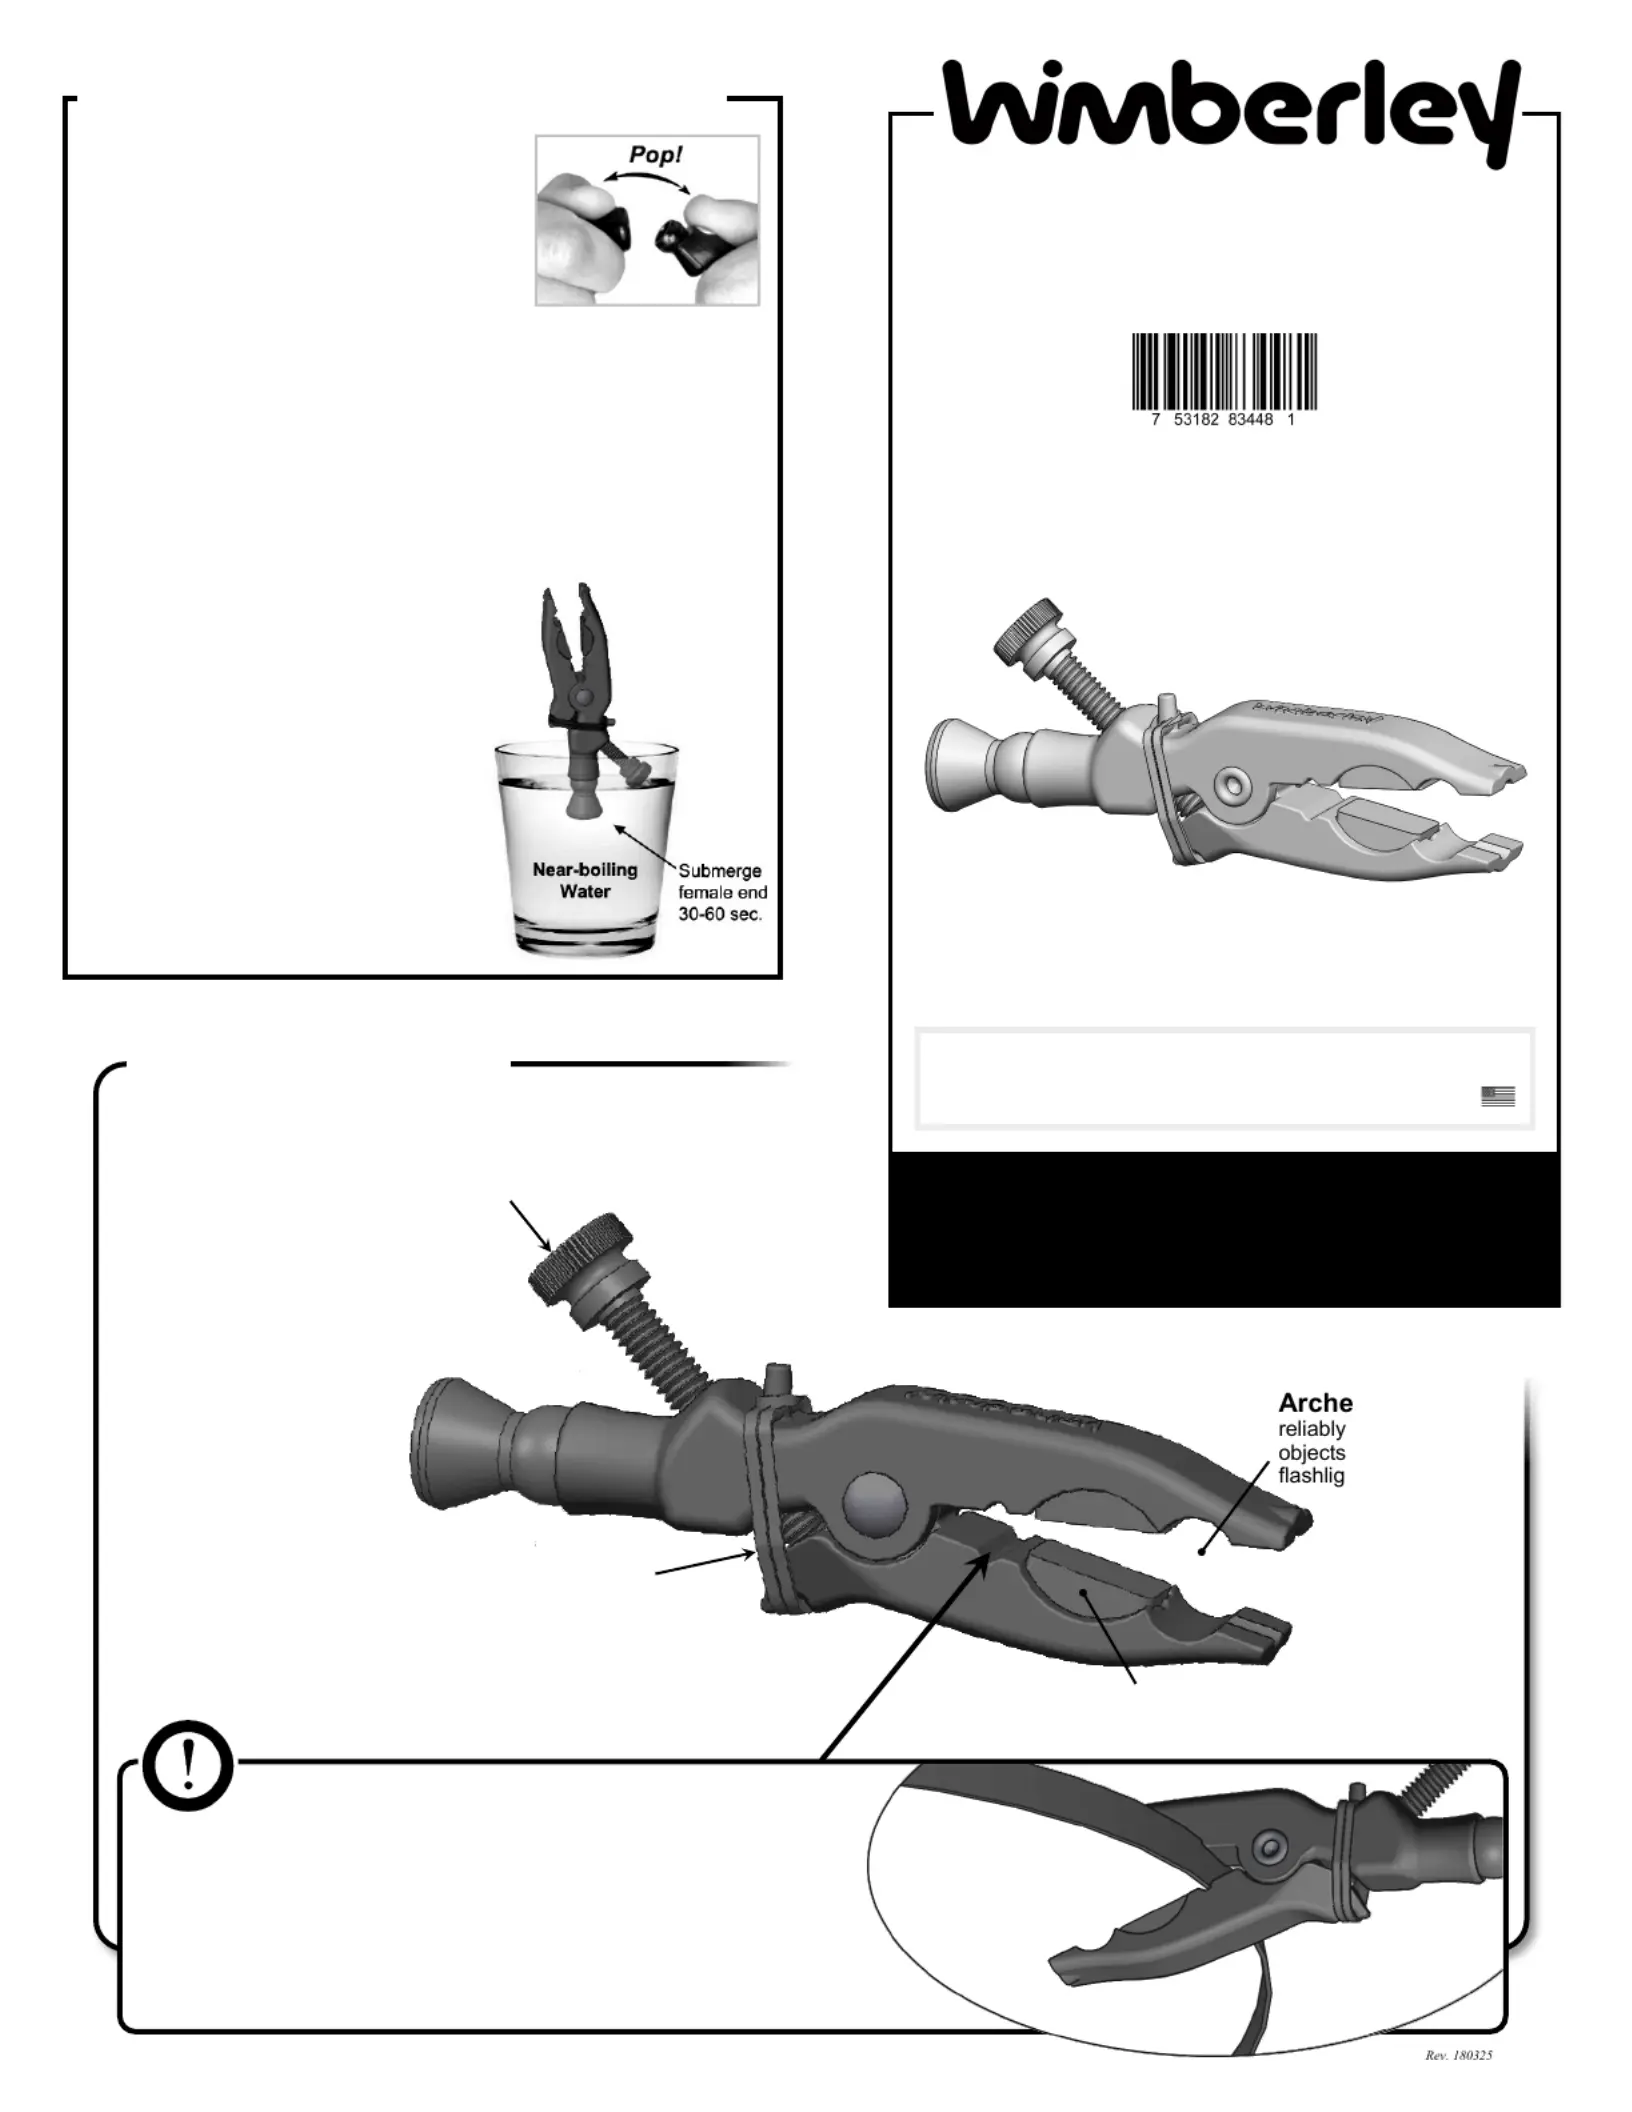
Thumbscrew Turn the thumbscrew to open or close the jaws of the
clip. Compared to typical spring-activated clips, thumbscrew activated
clip jaws allow for more finesse when holding delicate objects, as well
as much higher maximum clamping force when desired.
The clip is custom designed to hold
anything from the most delicate plant stems
to heavy reflectors and diffusers. It is made of
nearly unbreakable ST Nylon
This elastomer band puts tension on the clamp s moving ’
jaw so that it opens when you loosen the thumbscrew. It
is made of weather/UV resistant EPDM
Special notches in the clip s jaws grab the steel rim on reflectors and ’
diffusers, providing a secure, slip free attachment (applies to typical cloth-
reflectors/diffusers with steel perimeter hoop). This new feature is a drastic
improvement over other clips currently on the market.
The firm grip allows you to make precise adjustments to the angle of a reflector.
You can even hold diffusers cantilevered straight out above your subject
Reflector/Diffuser Notches
Connecting the Plamp Clip to your Plamp
1. Remove the old clip end from the
Plamp by firmly grabbing the Loc Line® -
segment the end segment that is next to
attached to the clip Bend it sharply until .
the segments pop apart (do not worry,
you will not hurt the Plamp).
2. To attach the new clip, forcefully press it onto the segment
that was previously attached to the old clip. It should snap into
place with an audible It takes a substantial amount of “pop”.
pressure to make this happen. It helps to place your fists be-
tween your knees, holding the mating pieces as close to the
connecting joint as possible. Squeeze your knees together
forcefully as you force the joints together with your hands. If
you are still having difficulty you can heat up the female socket
to facilitate the process (details be-
Heating the female socket:
Heat some water to boiling or near-
boiling temperature. Warm the female
end of the segment for 30 60 seconds in -
the hot water. Connect the segments by
pushing them together. Use the knee-
squeezing technique mentioned above if
needed. The segments should pop into
Wimberley, Inc. - - - Phone: 1 434 529 8385
1750 Broadway St Toll Free: 1 2746 -888-665-(USA & Canada)
22902 USA www.tripodhead.com info@tripodhead.com
5 Year Warranty – See www.tripodhead.com/warranty.cfm for complete details