CDN IN482 Manual

CDN Termometer IN482

Læs gratis den danske manual til CDN IN482 (4 sider) i kategorien Termometer. Denne vejledning er vurderet som hjælpsom af 4 personer og har en gennemsnitlig bedømmelse på 4.9 stjerner ud af 2.5 anmeldelser. Har du et spørgsmål om CDN IN482, eller vil du spørge andre brugere om produktet?

Side 1/4
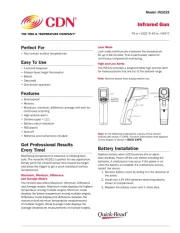
Model: IN482
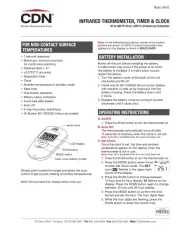
INFRARED THERMOMETER, TIMER & CLOCK
-67 to 482°F/-55 to +250°C; 24 hours by hr/min/sec
FOR NON-CONTACT SURFACE
TEMPERATURES
1-second response
Maximum, minimum and lock
for continuous scanning
±3.6°F/2°C accuracy
Stopwatch timer
Clock
Ambient temperature in standby mode
Data-hold
One-button operation
Battery status indication
Food-safe ABS plastic
Auto-off
2-way mounting: stand/loop
3V Button IEC CR2032 Lithium (included)
Simply point toward the target and press the scan
button to get a quick reading of surface temperatures.
Note: Remove label from display before initial use.
Note: In the following instructions, names of the control
buttons are shown in CAPS. Function information that
appears on the display is shown in .BOLD CAPS
BATTERY INSTALLATION
Power off the unit before installing the battery.
A malfunction may occur if the power is on when
the battery is installed. If a malfunction occurs,
restart the device.
1. Turn the battery cover at the back of the unit
clockwise and lift off.
2. Install one 3V IEC CR2032 lithium button battery
with positive (+) side up by hooking it into the
battery housing. Press the battery down until
it clicks.
3. Replace the battery cover by turning it counter
clockwise until it clicks shut.
OPERATING INSTRUCTIONS
A. On/Off
1.
Press the SCAN button to turn the thermometer on.
B. Auto Off
The thermometer automatically turns off after
15 seconds of inactivity when the clock is not set.
Note: Auto-off is disabled when the clock has been set.
C. Set Clock
Once the clock is set, the time and ambient
temperature appear on the display when the
thermometer is not in use.
Note: Auto-off is disabled when the clock has been set.
1.
Press the SCAN button to turn the thermometer on.
2. Press the MODE button seven times
to enter Set Clock mode. The SET
icon ( ) ashes in the upper right
corner of the display.
3. Press the SCAN button to choose between
12-hour and 24-hour display. ashes on the 24
display. Press the SCAN button again to change
between 12-hour and 24-hour display.
4. Press the MODE button to conrm the time
format and set the hour. The hour digits ash.
5. While the hour digits are ashing, press the
SCAN button to enter the correct time.
PO Box 10947 Portland, OR 97296-0947 800 338-5594 800 879-2364 Tel Fax Web CDNkitchen.com
6. Press the MODE button to conrm time and set
the minutes. The minute digits ash.
7. While the minute digits are ashing, press the
SCAN button to enter the correct time.
8. Press the MODE button to conrm time and exit
Set Clock mode.
D. Count Up Timer
1.
Press the SCAN button to turn the thermometer on.
2. Press the MODE button four times to enter the
Timer mode. The icon ( ) ashes in the Timer
upper right corner of the display.
3. Press SCAN button to begin the count up to
24 hours.
a. For times less than 30 minutes,
minutes:seconds are displayed above
the milliseconds. (ex. 01:28 &
0.75 seconds).
b. For times greater than 30 minutes,
hours:minutes are displayed above
the seconds. (ex. 01:28:47.5 seconds).
4. Press SCAN button to interrupt the count.
Press SCAN button again to resume the count.
5. Press MODE button to clear count up time.
The timer will reset to and exit the 00:00
Timer mode.
6. Press MODE button to exit the Timer mode.
E. Temperature Scale
To select temperature reading in Fahrenheit
or Celsius:
1. Press the SCAN button to turn the
thermometer on.
2. Press the MODE button times. The or ve °F °C
symbol ashes on the display.
3. Press the SCAN button to change the scale.
F. Infrared Thermometer
1. Infrared Scanning
a. Press the SCAN button to turn the
thermometer on.
b. Distance:Spot = 5:1
For example, if the
surface area being
measured is 2" in
diameter, then the
thermometer must be
within 10" of the target
for an accurate reading.
c. Aim the thermometer at the target and press
the SCAN button to display the surface
temperature. Hold the SCAN button to
continuously update the measurement
reading.
2. Minimum Mode
a. Press the SCAN button to turn the
thermometer on.
b. Press the MODE button once.
The icon ashes on the display.MIN
c. Press and hold the SCAN button to conrm
the Minimum Mode and display the lowest
temperature among multiple targets.
3. Maximum Mode
a. Press the SCAN button to turn the
thermometer on.
b. Press the MODE button twice.
The icon ashes on the display.MAX
c. Press and hold the SCAN button to conrm
the Maximum Mode and display the highest
temperature among multiple targets.
4. Lock Mode
This is particularly useful for continuous
temperature monitoring.
a. Press the SCAN button to turn the
thermometer on.
b. Press the MODE button three times.
The icon ashes on the display.LOCK
c. Press the SCAN button to conrm the Lock
Mode. The IN482 will continuously display
the temperature for up to 60 minutes or until
the SCAN button is pressed again.
5. Emissivity
Everything gives off a certain amount of
radiation. Emissivity is the measure of this
thermal radiation. The infrared thermometer is
supplied with a default emissivity of 0.95, which
standard for most uses. The emissivity of the
thermometer can be changed from 0.05 (5E) to
1 (100E). Only experienced personnel should
attempt to make changes. For information
relating to the emissivity of specic materials,
please contact CDN.
a. Press the SCAN button to turn the
thermometer on.
b. Press the MODE button times to enter six
Emissivity Mode. 95E ashes on the display.
c. Press the SCAN button to adjust the
emissivity value in 0.01 (1E) increments.
d. Press the MODE button again to exit
Emissivity Mode.
Note: Infrared thermometers are not recommended for
use in measuring the temperature of shiny or polished
metals.
6. Error Messages
The IN482 incorporates visual diagnostic
messages as follows:
a. or is displayed when the temperature Hi Lo
being measured is outside of the range of
the thermometer.
1.) Hi indicates that the temperature is
higher than 482°F/250°C.
2.) Lo indicates that the temperature is
lower than -67°F/–55°C.
b. Allow a minimum 30 minutes for the
thermometer to stabilize to the working/room
temperature.


Produkt Specifikationer

Mærke: CDN
Kategori: Termometer
Model: IN482

Har du brug for hjælp?

Hvis du har brug for hjælp til CDN IN482 stil et spørgsmål nedenfor, og andre brugere vil svare dig