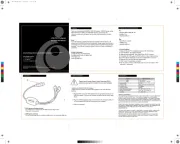
PAC RP4.2-TY13 Manual

PAC Ikke kategoriseret RP4.2-TY13

Læs gratis den danske manual til PAC RP4.2-TY13 (8 sider) i kategorien Ikke kategoriseret. Denne vejledning er vurderet som hjælpsom af 12 personer og har en gennemsnitlig bedømmelse på 4.8 stjerner ud af 6.5 anmeldelser. Har du et spørgsmål om PAC RP4.2-TY13, eller vil du spørge andre brugere om produktet?

Side 1/8
Radio Replacement and
Steering Wheel Control Interface
for Select Toyota Vehicles
RP4.2-TY13
© 2022 AAMP Global. All rights reserved. PAC is a Power Brand of AAMP Global.
PAC-audio.com
C
Page 1
Rev: V3
Date:032222
Introduction and Features
Important Notes
The RP4.2-TY13 interface allows the replacement of a factory radio in select Toyota vehicles and will retain factory
features such as steering wheel controls (SWC), rear camera and the factory audio amplier. This interface also allows
you to program two radio functions to each SWC button by using short press long press dual command functionality,
and also provides outputs such as: vehicle speed signal (VSS), illumination, reverse trigger and parking brake.
1. Adjustment of the vehicle settings through the original radio’s vehicle settings menu will be disabled after installation of the new
radio. It is advised to make sure all settings are as desired prior to removal of the original radio.
2. The RP4.2-TY13 does not retain Rear Seat Entertainment.
3. Speaker fading on factory amplied systems is only supported with the “amplied output” connection of the RP4.2-TY13.
4. When using real time fade, if the fader setting is biased more to the front or rear, as the radio turns on the sound may begin at the
default setting and then quickly transition to your custom setting.
5. Aftermarket radio features such as High Pass Filters (crossovers), DSP or “Network Mode” will interfere with proper fader function.
In order for the RP4.2-TY13’s fader function to work, the audio from the aftermarket radio’s output must match so it can compare the
front and rear audio levels and determine the proper fader setting for the factory amplier.
6. A USB adapter must be purchased in order to retain the factory USB port. Please refer to www.pac-audio.com to see which harness
you will need.
7. To retain AM/FM Radio and SiriusXM Radio, additional parts and adapters are required and sold separately.
Module Layout
Module Status LED
USB Status LED
Interface Connector 1
Expansion Port
Interface Connector 2
Amplied Audio Output
Non-Amplied Audio Output
Programming Button
USB Port
Radio Select DIP switches
Interface Connector 4
Amplied Audio Output Level Adjustment
Radio Replacement and
Steering Wheel Control Interface
for Select Toyota Vehicles
RP4.2-TY13
© 2022 AAMP Global. All rights reserved. PAC is a Power Brand of AAMP Global.
PAC-audio.com
C
Page 2
Rev: V3
Date:032222
Interface & Harness Connections
Plug Interface Connectors 1, 2 and 4 into the appropriate ports on the RP4.2-TY13 interface (using the diagram on page 1 or the
label on the bottom of the RP4.2-TY13 module). The Connector 3 connection will be dependent upon whether or not the vehicle
has a factory amplied system. Plug Connector 3 into the appropriate port on the RP4.2-TY13; Amplied if the vehicle has a factory
amplier, Non-Amplied for base audio.
Connect the RPA-VA1 Video Adapter to the 6-pin plug on the RP4.2-TY13 harness.
Interface Connector 1 Interface Connector 2 Interface Connector 4
RPA-VA1
Interface Connector 3
Installation Steps
Purple Rear R + input
Purple / Black Rear R - input
Green Rear L + input
Green / Black Rear L - input
Gray Front R + input
Gray / Black Front R - input
White Front L + input
White / Black Front L - input
Blue / Yellow SWC Output / Key 1
Brown SWC Output / Key 2
3.5 mm Jack SWC Output
Pink Vehicle Speed
Sense Output
Light Green Parking Brake
Output
Violet / White Reverse Signal
Output
Orange / White Illumination Output
Blue / White Amp Turn On Input
Blue Not Used
1. Set the Radio Select DIP switches according to the radio you are installing.
2. Wire the aftermarket radio to the RP4.2-TY13 Interface 4 harness according to the
wiring connections chart on this page.
3. Connect the appropriate SWC Output to the aftermarket radio (if applicable).
4. Connect the OEM Camera RCA to the aftermarket radio (if applicable).
5. Once all connections have been made, connect the white, gray and black Vehicle
Connectors to the matching connectors in the vehicle.
6. Turn the ignition on. The LED on the interface will turn on and the +12v accessory
wire will turn on. For factory amplied systems, see “Testing and Verication” section
on page 5 for details on how to set the gain.
7. If the radio does not turn on and the LED on the interface is solid orange, check
the DIP switches on the side of the interface to make sure they are not all in the on
position.
8. If you wish to reassign functions to the SWC, or utilize short press, long press dual
command functionality, follow the programming instructions starting on the following
page.
Aftermarket Radio Wiring Table
Wires from Interface Connector 4
Alpine JVC Kenwood /
Lightning Audio
Clarion /
Stinger
2-Wire
Resistive
Pioneer /
Other* Sony Fusion
1 2 1 & 2 3 2 & 3 1, 2, & 3 4 1 & 4
Set DIP switches that correspond with your radio to the ON position.
Set all other DIP switches to the OFF position.
*Other - Dual / Axxera (these brands could also have 2-wire resistive), Jensen, Rockford Fosgate


Produkt Specifikationer

Mærke: PAC
Kategori: Ikke kategoriseret
Model: RP4.2-TY13

Har du brug for hjælp?

Hvis du har brug for hjælp til PAC RP4.2-TY13 stil et spørgsmål nedenfor, og andre brugere vil svare dig


Ikke kategoriseret PAC Manualer
PAC

PAC CAM-GM51 Manual

11 Juli 2025
PAC

PAC TY1A-RS Manual

11 Juli 2025
PAC

PAC SR-F15009HX Manual

10 Juli 2025
PAC

PAC SRK-RAM13HX Manual

10 Juli 2025
PAC

PAC AAI-TY3 Manual

30 Juni 2025
PAC

PAC SRK-GM14HX Manual

10 Marts 2025
PAC

PAC C2A-CHY Manual

19 Februar 2025
PAC

PAC MCI-FD22 Manual

19 Februar 2025
PAC

PAC GM6A-RST Manual

19 Februar 2025
PAC

PAC SWI-X Manual

19 Februar 2025

Ikke kategoriseret Manualer

Nyeste Ikke kategoriseret Manualer