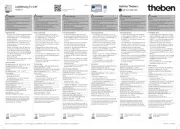
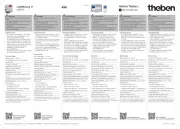
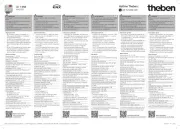
Theben LUNA 121 top2 RC AL Manual

Theben Ikke kategoriseret LUNA 121 top2 RC AL

Læs gratis den danske manual til Theben LUNA 121 top2 RC AL (6 sider) i kategorien Ikke kategoriseret. Denne vejledning er vurderet som hjælpsom af 12 personer og har en gennemsnitlig bedømmelse på 4.2 stjerner ud af 6.5 anmeldelser. Har du et spørgsmål om Theben LUNA 121 top2 RC AL, eller vil du spørge andre brugere om produktet?

Side 1/6
1
LUNA 121 top2 RC
1210100/ 1210200
LUNA 122 top2 RC
1220100/ 1220200
307031
Digital twilight
switch
EN
1. Basic safety information
Danger of death through electric shock or fire!
Installation should only be carried out by a
qualied electrician!
WARNING
The device is designed for installation on DIN top hat
rails (in accordance with EN 60715)
!OBELISK top2 memory card: Avoid mechanical overload
and contamination during storage/transportation
2. Proper use
The digital twilight switch is used for lighting equipment
(streets), external stairways, display windows, entrances etc.
Only for use in closed, dry rooms
!Do not use on safety devices, e.g. escape route doors, re
safety equipment etc.
Disposal
Dispose of device in environmentally sound manner
3. Installation and connection
Mounting the time switch
Danger of death through electric shock or fire!
Installation should only be carried out by a
qualied electrician!
WARNING
click
45° cable
Plug-in
screwless termi-
nal NC contact
OBELISK top2
memory card
(9070404)
Test tap
Load line connection
Mount on DIN top hat rails (as dened in EN 60715)
Switched voltage-free
Ensure device cannot be switched on
Check absence of voltage
Earth and bypass
Cover or shield any adjacent live components
Connecting the cable
Wiring diagrams LUNA 121 top2 RC / LUNA 122 top2 RC
C1
123
N
L
L
L N
Ext1
max. 100 m
Data
RC DCF
– +
Lux
max. 100 m
C2
C1
123
456
N
L
L
L N
Ext1
max. 100 m
max. 100 m
Ext2
Data
RC DCF
– +
Lux
max. 100 m
Strip cable to 8 mm (max. 9)
Insert cable in the open DuoFix® plug-in terminal at 45°
L2 cables per terminal position possible
To open the DuoFix® plug-in terminal, press screwdriver
downwards
Disconnecting the cable
Use the screwdriver to push the load line connection
opener downwards
2
Connection/installation of light sensor
!Take length of connection cable into account: max. 100 m
(2 x 1.5 mm2), max. 50 m (2 x 0.75 mm2)
!Avoid running sensor wiring parallel to mains power
cables
Ensure correct polarity. Disconnect power source
Mounting light sensor 907 0 415
Mounting light sensor: 0.5-2.5 mm2, strip cable by 10 mm
(max. 11 mm)
max . o 4 m m
Installing light sensor 907 0 456
Installing light sensor: 0.25-1.5 mm 2, strip cable by 8 mm
(max. 9 mm)
8-9 mm
max. 10 mm
Ø 5-10 mm
<9 mm Ø 20 mm
ca. 63 mm
IP 66
IP 40
4. Device description
Display & buttons
MENU OK
OKMENU
0 6 12 18 24
Programmed
switching times
Date display
Channel status
C1, C2
ON = On
OFF = Off
Time display
Days of the week
from 1 to 7
Display of the active buttons
with the relevant function
Activate display
Open menu
Cancel menu
ESC
(leave menu)
Save
selection
Confirm
selection
 
Options
are displayed
Sunrise/sunset
display
DCF antenna display
Operating instructions
YES
Confirmation
Press
OK
NO
Modify/
Change
Press
t u
1. Read text line
text/symbol represents
query
2. Make a decision


Produkt Specifikationer

Mærke: Theben
Kategori: Ikke kategoriseret
Model: LUNA 121 top2 RC AL

Har du brug for hjælp?

Hvis du har brug for hjælp til Theben LUNA 121 top2 RC AL stil et spørgsmål nedenfor, og andre brugere vil svare dig