Technische Daten (Auszug)
Busspannung KNX 21–32 V DC
Verlustleistung P max. 0,4 W
Betriebstemperatur –5 °C ... +45 °C
Schutzart IP 20 nach EN 60529
Anschlussklemme Steckklemme für IR-Kabel
Maximale Luftfeuchte 95 %, keine Betauung
Bestimmungsgemäße Verwendung
• Das Split Unit Gateway bildet die Schnittstelle
zwischen dem KNX-System und Klimageräten
vieler Hersteller, so genannten Split Units.
• Die verwendete Fernbedienung der Split Unit
wird ersetzt durch das Split Unit Gateway. Dann
wird das Gateway über ein IR-Kabel mit der Split
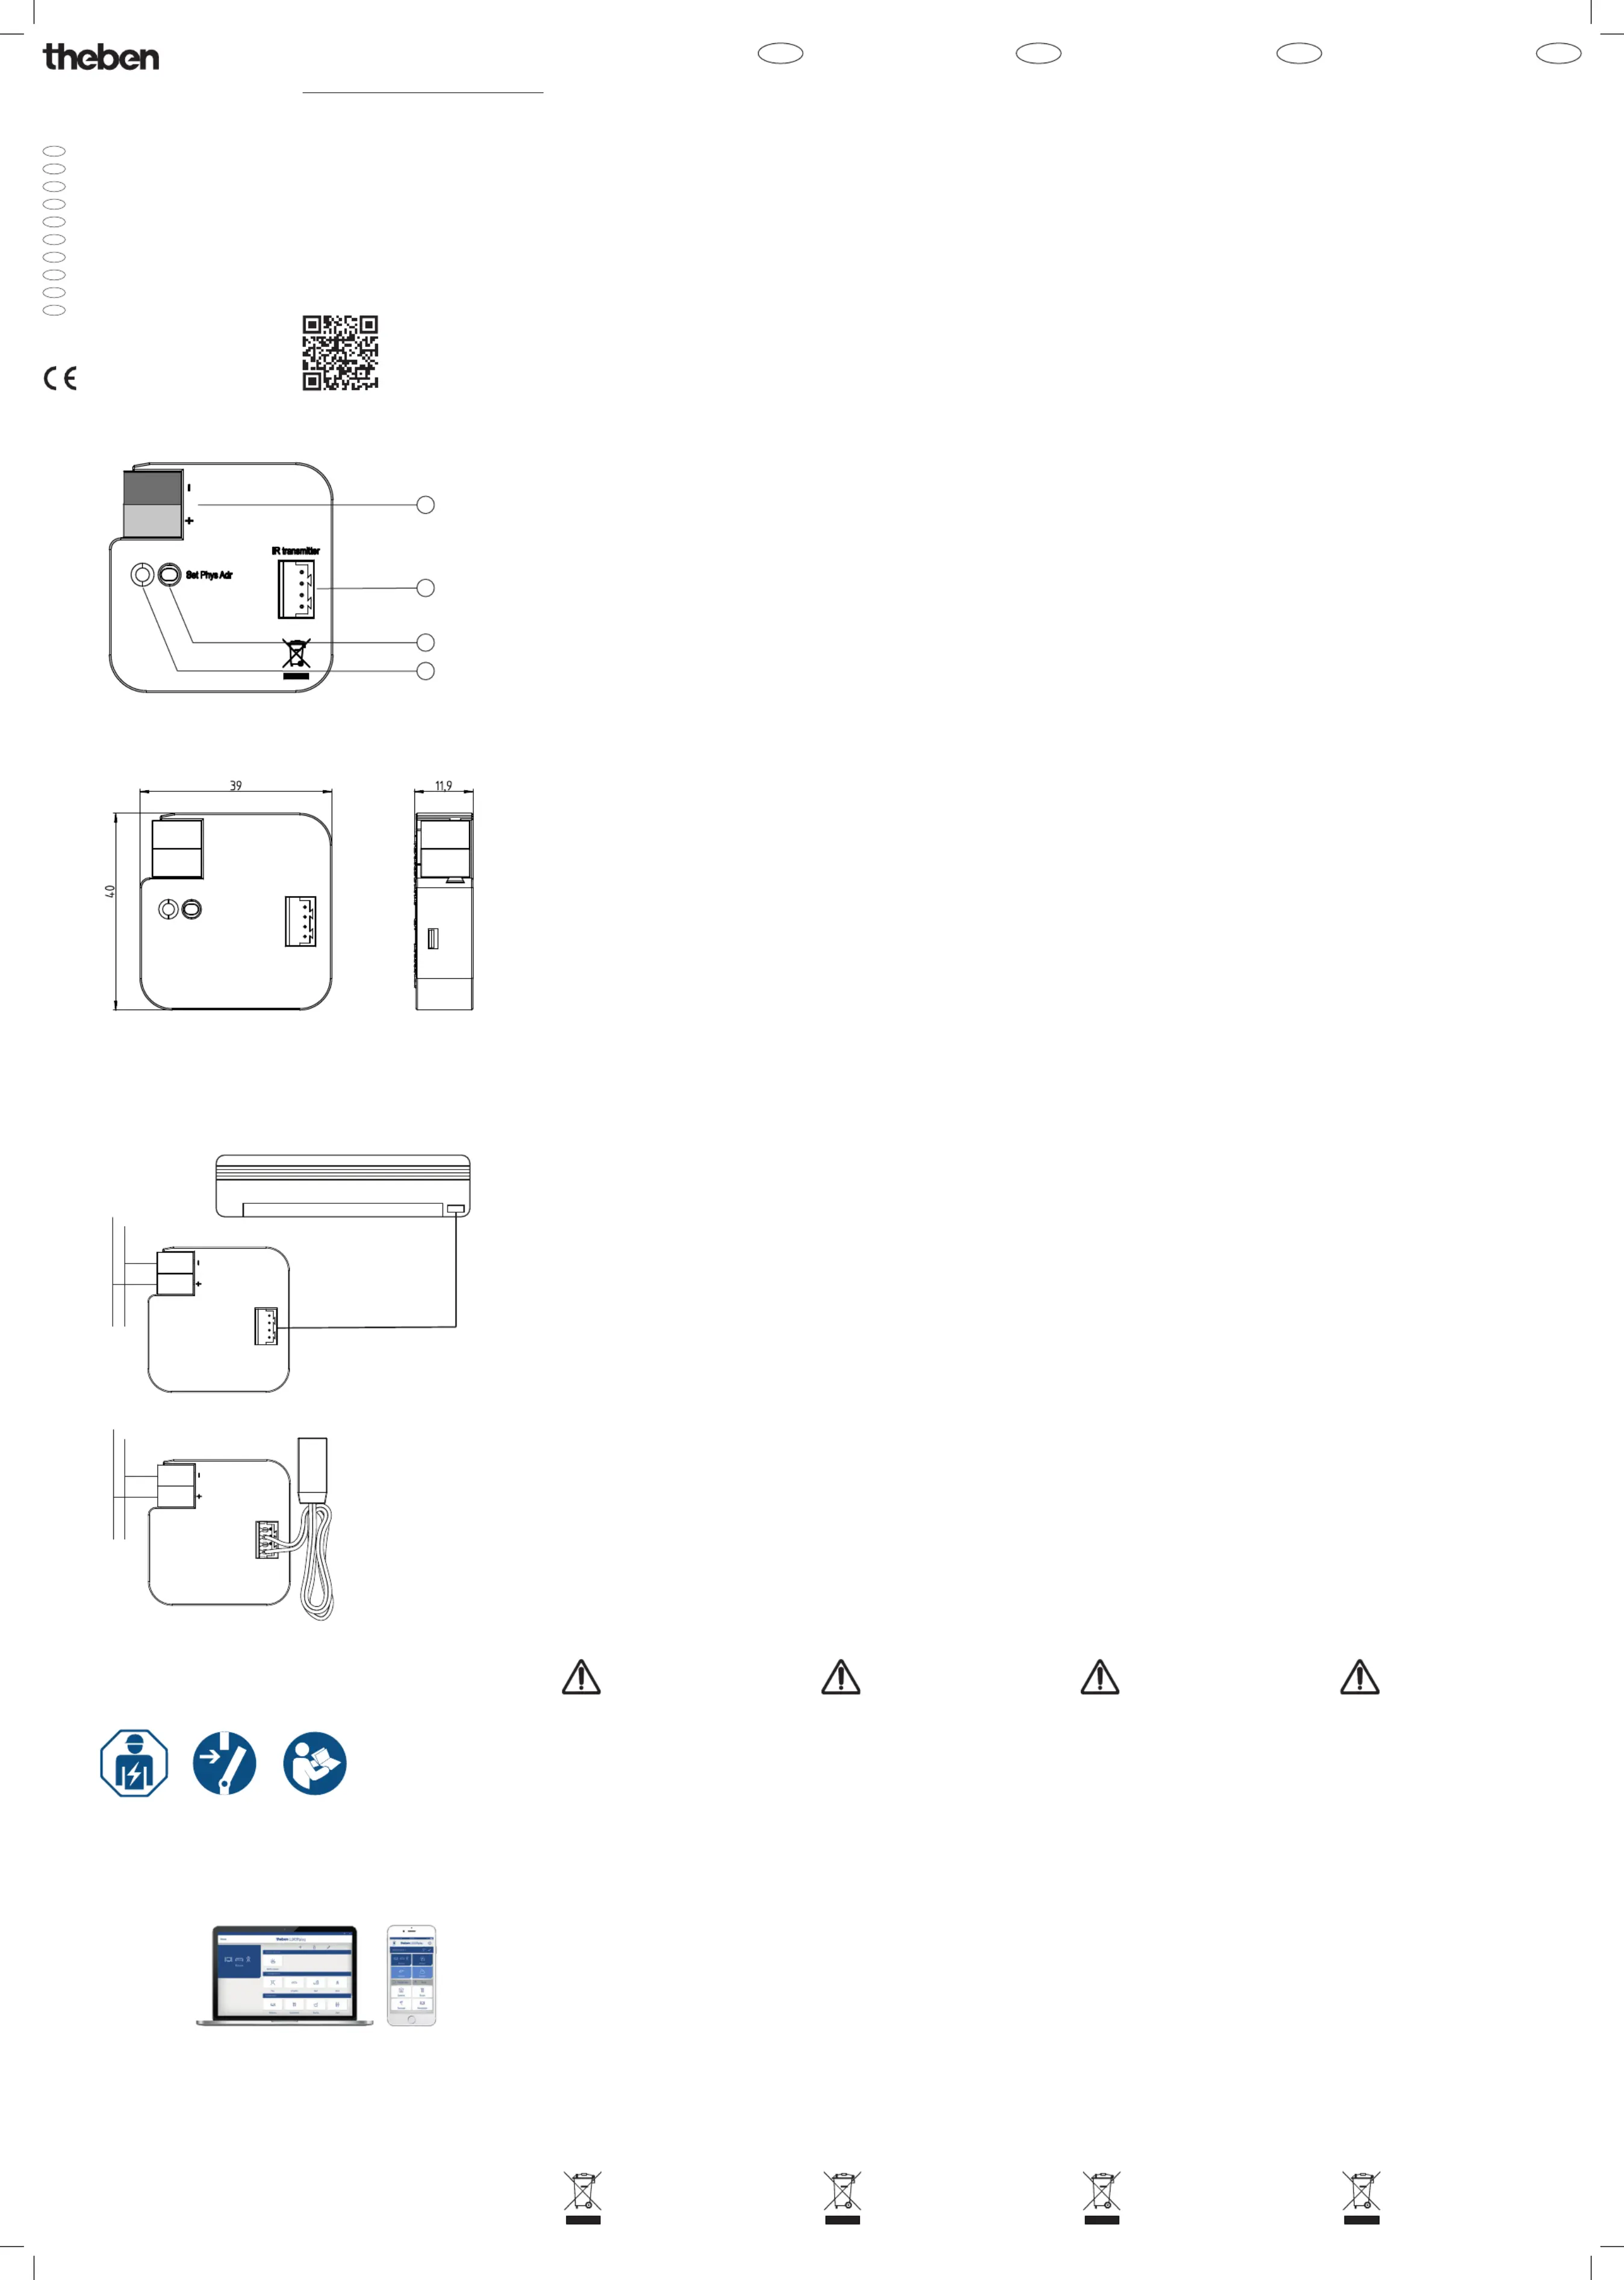
• Inbetriebnahme mit der Software LUXORplug und
einfache Bedienung mit der App LUXORplay (für
Android und iOS): www.luxorliving.de
• Bei Verwendung in einem KNX-System erfolgt die
Programmierung mit der ETS.
Warnung! Installation nur durch elektrotechni-
sche Fachkraft. Bei der Planung und Errichtung
von elektrischen Anlagen sind die einschlägigen
Normen, Richtlinien, Vorschriften und Bestimmun-
– Gerät bei Transport, Lagerung und im Betrieb
vor Feuchtigkeit, Schmutz und Beschädigung
– Gerätnurinnerhalbderspeziziertentechni-
– Das Gerät nicht öffnen.
Das Gerät ist vor dem Reinigen spannungsfrei
zu schalten. Verschmutzte Geräte können mit
einem trockenen oder leicht mit Seifenlösung
angefeuchteten Tuch gereinigt werden. Auf keinen
Fall dürfen ätzende Mittel oder Lösungsmittel
Das Gerät ist wartungsfrei. Bei Schäden (z.B. durch
Transport, Lagerung) dürfen keine Reparaturen
Beim Öffnen des Gerätes erlischt der Gewährlei-
Passerelle KNX pour climatiseurs
Pasarela KNX para unidad split
Interfaccia IR-KNX per unità split
Split Unit -yhdyskäytävä KNX
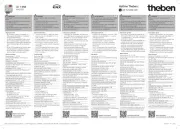
¾Das Split Unit Gateway in der Nähe (max. 2 m
vom Infrarot-Empfänger) der Split Unit in eine
Unterputz- oder Aufputzdose montieren.
¾Das IR-Kabel in die Buchse des Gateways ste-
cken, die Sendeeinheit mit dem doppelseitigen
Klebeband auf den Empfangsteil der Split Unit
kleben und kräftig anpressen.
LDie Fläche, auf die die Sendeeinheit geklebt
wird, muss trocken, sauber und fettfrei sein.
LDie Verarbeitung muss bei Raumtemperatur
(mind. 10 °C) erfolgen. Ggf. muss das Material
LDer elektrische Anschluss erfolgt über schrau-
benlose Klemmen. Die Klemmenbezeichnungen
bendensichaufdemGehäuse.DieVerbindung
zum KNX erfolgt über die mitgelieferte Busan-
LEs ist keine Hilfsspannung notwendig.
Auf eine räumliche Trennung (> 10 mm) der
SELV-Stromkreise zu anderen Stromkreisen
¾Stromversorgung anschließen.
LDie Inbetriebnahme erfolgt mit der kostenlosen
Software LUXORplug oder der Engineering Tool
Software (ETS) und der kostenlosen ETS-App
„ACIRGatewayCongurationApp“ausdem
DieETS-ApplikationndenSieunter
www.theben.de oder im ETS-Online-Katalog.
Für detaillierte Funktionsbeschreibungen verwen-
Bus voltage KNX 21–32 V DC
KNX bus power input max. 12 mA
Operating temperature –5 °C ... +45 °C
Protection degree IP 20 in accordance with
Overvoltage category III according to DIN
Connection terminal plug-in terminal for IR
Maximum air humidity 95 %, no condensation
Connection socket IR cable
• The Split Unit Gateway is the interface between
the KNX system and air conditioning units from
many manufacturers, so-called split units.
• The remote control used for the split unit is
replaced by the Split Unit Gateway. The gateway
is then connected to the split unit via an IR cable.
• Start-up using the LUXORplug software and easy
operation using the LUXORplay app (for Android
and iOS): www.LUXORliving.co.uk
• When used in a KNX system, programming is
Warning! Installation by person with electrotech-
nical expertise only. The appropriate standards,
directives,regulationsandspecicationsmustbe
observed when planning and setting up electrical
– The device must be protected from damp, dirt
and damage during transport, storage and
– The device must not be operated outside the
– The device must not be opened.
The voltage supply to the device must be
switched off before cleaning. If devices become
dirty, they can be cleaned with a dry cloth or
one slightly dampened by soapy water. Corrosive
agents or solutions must never be used.
The device is maintenance-free. In the event of
damage (e.g. during transport or storage), repairs
must be carried out only by an authorized person.
The warranty expires if the device is opened.
¾Mount the Split Unit Gateway near the split
unit (max. 2 m from the infrared receiver) in a
ush-mountedorsurface-mountedbox.
¾Plug the IR cable into the socket of the gate-
way, stick the transmitter unit onto the receiver
part of the split unit using the double-sided
adhesivetapeandpressonrmly.
LThe surface to which the transmitter unit is
stuck must be dry, clean and free of grease.
LApplication must be carried out at room tem-
perature (min. 10 °C). If necessary, the material
¾Disconnect power source.
LElectrical connection is implemented using
screwless terminals. The terminal designations
are located on the housing. The connection to
the KNX is implemented using the supplied bus
LAn auxiliary voltage is not necessary.
Ensure spatial separation (> 10 mm) of the
SELV circuits from other circuits (230 V)!
LStart-up is carried out with the free LUXORplug
software or the Engineering Tool Software
(ETS) and the free ETS app „AC IR Gateway
CongurationApp“fromtheKNXStore.
YoucanndtheETSapplicationat
www.theben.de or in the ETS online catalogue.
Use the manual for detailed descriptions of
Caractéristiques techniques (extrait)
Tension de bus KNX 21-32 V CC
Puissance dissipée P max. 0,4 W
Température de service –5 °C ... +45 °C
Indice de protection IP 20 selon EN 60529
Catégorie de surtensionIII selon DIN EN 60664-1
Borne de raccordementborneenchablepour
Humidité rel. maximale 95 %, aucune condensa-
Raccordement de l'appareil
Borne de raccordement de bus
Douille de raccordement câble IR
Utilisation conforme à l‘usage prévu
• La passerelle KNX pour climatiseurs constitue
l’interface entre le système KNX et les appareils
de climatisation de nombreux fabricants, des
• La télécommande du Split Unit utilisée est
remplacée par la passerelle Split Unit. Ensuite, la
passerelle est reliée au Split Unit par un câble IR.
• Mise en service avec LUXORplug et commande
aisée par le biais de l‘appli LUXORplay (pour
Android et iOS) : www.LUXORliving.fr
• En cas d‘intégration dans un système KNX, la
programmation s‘opère via l‘ETS.
Avertissement ! Installation uniquement par des
personnesqualiéesenélectrotechnique.Lorsde
laplanicationetdelaconstructiond'installations
électriques, les normes, directives, réglemen-
tations et dispositions applicables doivent être
– Protégerl'appareilcontrelapoussière,l'humidité
et les risques de dommages lors du transport,
dustockageetdel'utilisation.
– N'utiliserl'appareilquedanslerespectdes
donnéestechniquesspéciées.
– L'appareilnedoitpasêtreouvert.
L'appareildoitêtremishorstensionavantle
nettoyage. Les appareils encrassés peuvent
être nettoyés avec un chiffon sec ou un chiffon
humidiédansunesolutionsavonneuse.
L'usaged'agentscaustiquesoudesolvantsest
L'appareilnenécessiteaucunentretien.Encasde
dommages (provoqués p. ex. pendant le transport
ou le stockage), aucune réparation ne doit être
L'ouverturedel’appareilentraînel'annulationde
¾Monter la passerelle KNX pour climatiseurs à
proximité (à max. 2 m du récepteur infrarouge)
duSplitUnitsuruneboîteencastréeouen
¾EncherlecâbleIRdansladouilledelapasse-
relle, coller l’unité d’émission au récepteur du
Split Unit avec du ruban adhésif double-face,
LLa surface sur laquelle l’unité d’émission est
collée doit être sèche, propre et exempte de
LCes travaux doivent être effectués à tempéra-
ture ambiante (au moins 10 °C). Le cas
échéant, le matériau doit être tempéré.
LLe raccordement électrique se fait par des
bornes sans vis. La désignation des bornes
setrouvesurleboîtier.LaliaisonaubusKNX
se fait par la borne de raccordement du bus
LAucune tension auxiliaire n’est requise.
Veiller à une séparation spatiale (> 10 mm)
des circuits électriques TBTS avec les autres
circuits électriques (230 V) !
LLa mise en service s‘effectue à l‘aide du logiciel
gratuit LUXORplug ou avec l’ETS (Engineering
Tool Software) et l’appli ETS gratuite « AC IR
GatewayCongurationApp»disponibledans
Vous trouverez l’application ETS sur
www.theben.de ou dans le catalogue ETS en ligne.
Pour la description détaillée des fonctions, repor-
Datos técnicos (fragmento)
Tensión del bus KNX 21–32 V CC
Potencia disipada P máx. 0,4 W
Tipo de protección IP 20 según EN 60529
Borne de conexión borne enchufable para
Toma de conexión para cable IR
• La pasarela KNX para unidad split constituye la
interfaz entre el sistema KNX y los aparatos de
aire acondicionado de muchos fabricantes, las
• El mando a distancia utilizado para la Split Unit
se sustituye por la pasarela KNX. A continuación,
la pasarela se conecta con la Split Unit mediante
• Puesta en servicio con el software LUXORplug
y manejo sencillo con la App LUXORplay (para
Android e iOS): www.LUXORliving.es
• Al utilizar un sistema KNX, la programación se
Advertencia: Solo electricistas especializados de-
beránrealizarlainstalación.Alahoradeplanicar
y montar instalaciones eléctricas deben tenerse
en cuenta las normas, directivas, reglamentos y
disposiciones correspondientes.
- El aparato debe protegerse contra la humedad,
la suciedad y los daños durante el servicio, el
transporte y el almacenamiento.
– El aparato debe funcionar solo respetando los
datostécnicosespecicados.
– El aparato no debe abrirse.
Antes de la limpieza debe desconectarse la
tensión del aparato. Los aparatos sucios pue-
den limpiarse con un paño seco o con un paño
ligeramente humedecido en una solución
jabonosa. Está prohibido utilizar productos
El aparato no requiere mantenimiento. En caso de
daños, (p. ej., durante el transporte o almacena-
miento) no está permitida su reparación.
Al abrir el aparato se rescinde el derecho a
¾Monte la pasarela KNX para unidad split en
unacajaempotradaoensuperciecercadela
Split Unit (a 2 m de distancia del receptor de
infrarrojos como máximo).
¾Enchufe el cable IR en la toma de la pasarela,
jelaunidademisoraalapiezareceptorade
la Split Unit con cinta adhesiva de doble cara y
LLasuperciesobrelaqueseadhieralaunidad
emisora debe estar limpia, seca y sin grasa.
LLa aplicación debe realizarse a temperatura
ambiente (10 °C mín.). En caso necesario, se
LLa conexión eléctrica se efectúa con bornes
sin tornillo. La denominación de los bornes se
encuentra en la carcasa. La conexión KNX se
realiza mediante los bornes de conexión de bus
LNo se necesita tensión auxiliar.
¡Asegúrese de que haya una separación espa-
cial (> 10 mm) entre los circuitos eléctricos
SELV y otros circuitos eléctricos (230 V)!
¾Conecte el suministro de corriente.
LLa puesta en marcha se realiza con el software
gratuito LUXORplug o el Engineering Tool
Software (ETS) y la aplicación de ETS gratuita
“ACIRGatewayCongurationApp”,disponible
La aplicación de ETS se encuentra en
www.theben.de o en el catálogo en línea de ETS.
Consulte el manual si desea una descripción de la
Entsorgen Sie das Gerät getrennt
vomHausmüllaneinerofziellen
Dispose of the appliance separately
fromdomesticwasteatanofcial
Éliminer l’appareil séparément des
ordures ménagères dans un point de
No deseche el aparato con la basura
doméstica, llévelo a un punto limpio